Blog

  • Best Smart Door Lock India Options for Every Budget in 2026

    Best Smart Door Lock India Options for Every Budget in 2026

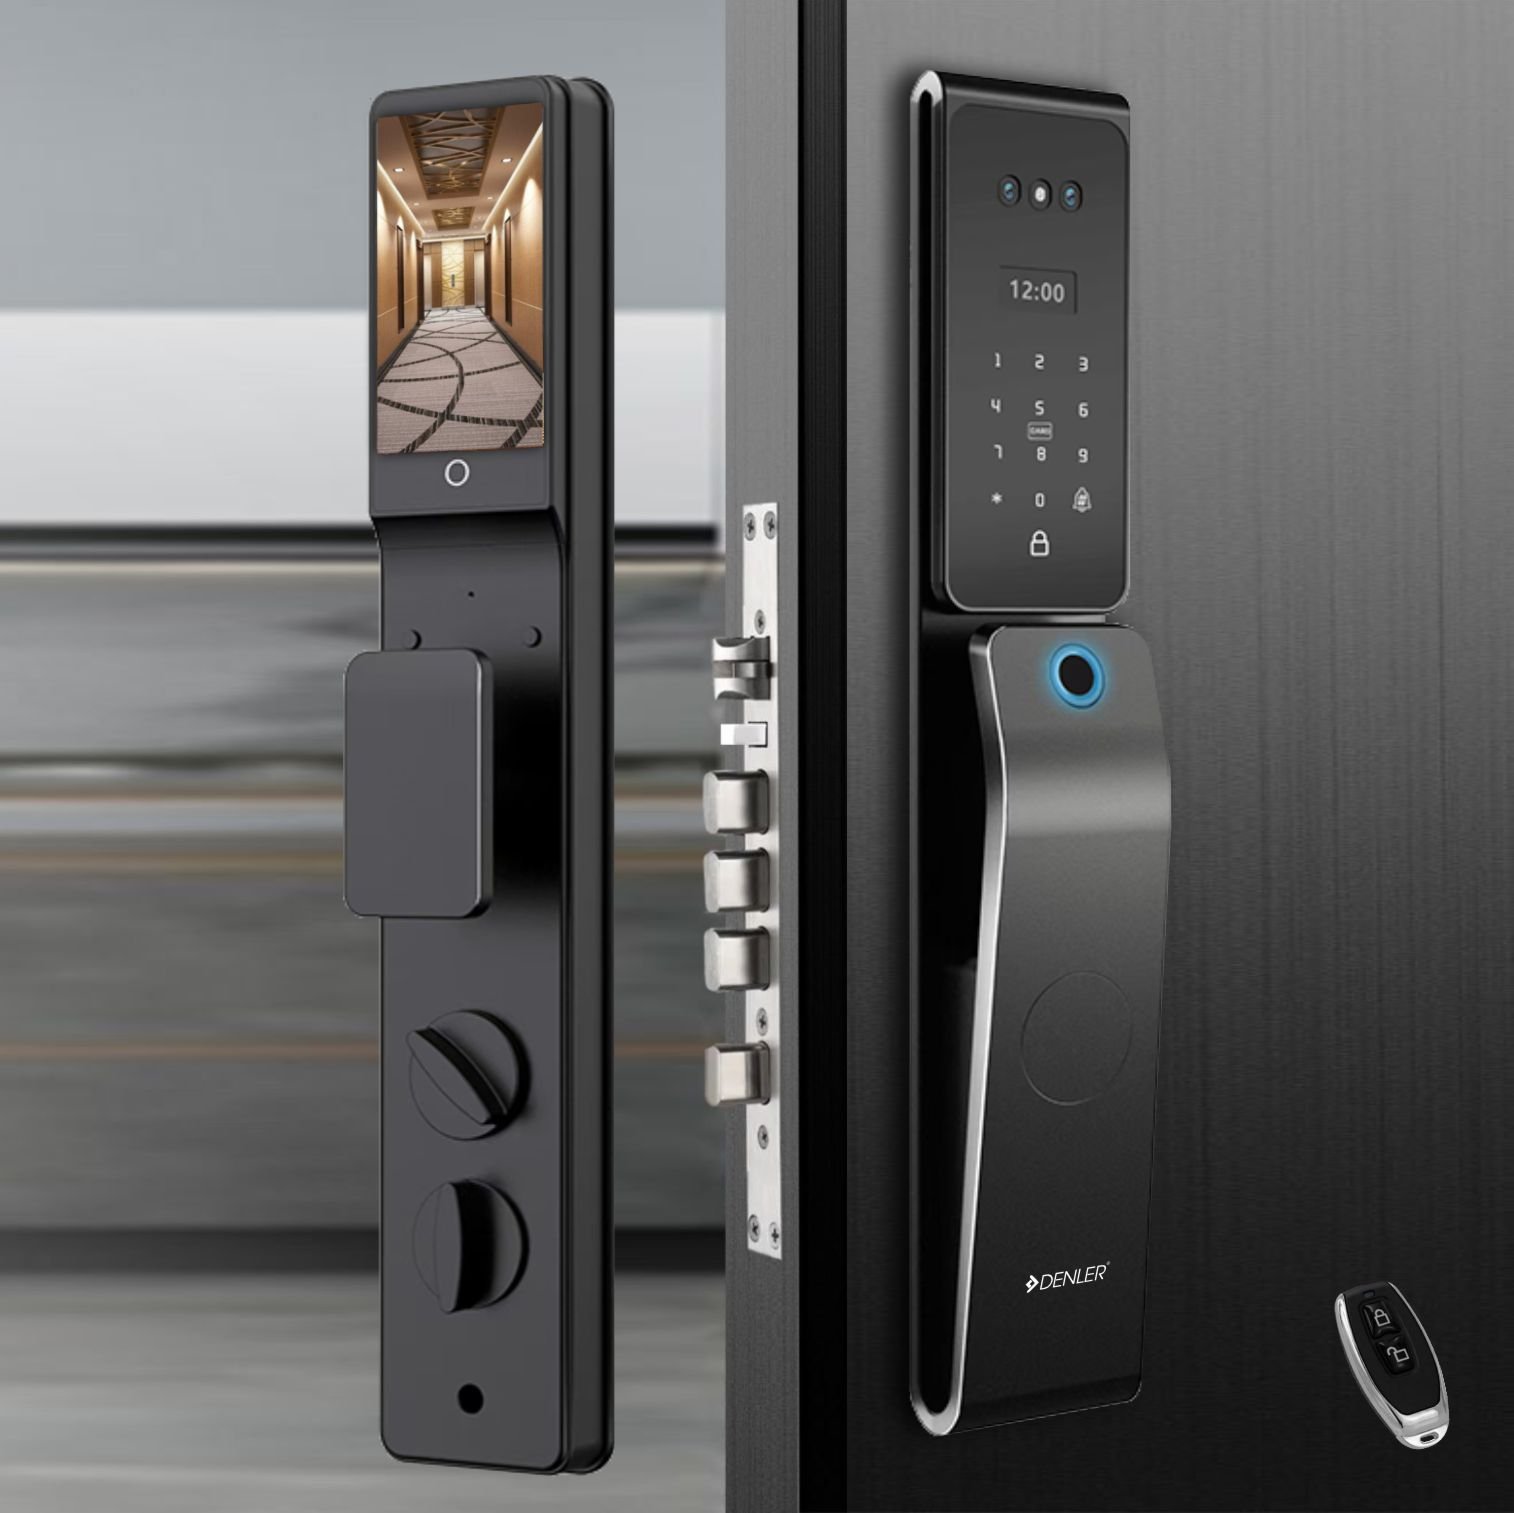
    Fumbling for keys outside your own door at 11 PM, arms full of grocery bags, is one of life’s small but genuinely irritating moments. A decent smart door lock India buyers can actually rely on fixes exactly that, and does a lot more besides.

    I switched my own main door to a fingerprint lock about two years ago, mostly on a whim, and I’ll admit I was skeptical it’d hold up through a Delhi summer and a proper monsoon. It has, mostly. This guide walks through what actually matters when picking a smart door lock for an Indian home in 2026 — not spec-sheet numbers that sound impressive but don’t mean much day to day.

    What Makes a Smart Door Lock Actually Work in Indian Conditions

    Direct answer: A smart door lock suited for India needs a fingerprint sensor that performs reliably in humidity, a mechanical key backup for power failures, weatherproofing for exposed main doors, and a battery backup — since standard door dimensions and monsoon moisture affect performance more than most global brands account for.

    Global lock brands are often designed and tested for drier, more temperate climates. That’s not a knock against them, it’s just a fact worth knowing. Humidity affects optical fingerprint sensors more than capacitive ones, for instance — something I learned the hard way after my first lock started misreading my fingerprint every monsoon without fail.

    Indian doors also aren’t standardized the way they are in some other markets. Before ordering anything, measure your door’s thickness, the bore hole diameter if you’re replacing an existing lock, and the backset distance. Skipping this step is the single most common reason people end up needing a return or exchange.

    Budget Range: Under ₹8,000

    Direct answer: Budget smart locks under ₹8,000 typically offer fingerprint and PIN access with basic app connectivity, making them a reasonable entry point for renters or first-time buyers who want keyless convenience without a big investment.

    This range won’t get you WiFi remote unlock in most cases, and that’s fine for a lot of households. Bluetooth-only connectivity means you can’t unlock the door from outside network range, but for a straightforward main-door replacement, most people never actually need that.

    Brands like LAVNA and Golens have a genuine presence in this bracket, generally offering fingerprint plus PIN access, and sometimes RFID card support too. Build quality varies more here than in higher tiers, so check for at least a 1-year warranty before buying anything at the very bottom of this range.

    Mid-Range: ₹8,000 to ₹15,000 — The Sweet Spot for Most Homes

    This is genuinely where most Indian apartment owners should be looking, and honestly where I’d point a friend asking for a straightforward recommendation. You start getting real brand trust here — Godrej, Qubo, and Mygate all have models sitting comfortably in this range.

    Picture a small business owner in Jaipur wanting to secure a rented office space without a big security budget — a mid-range lock with fingerprint plus OTP access covers that need well, letting them share temporary access codes with staff or a cleaning service without ever handing out a physical key.

    What to look for specifically at this price:

    • Multiple unlock methods (fingerprint, PIN, and at least one backup like RFID or a mechanical key)
    • A stated warranty of 2-3 years, not just 1
    • Tamper alert or alarm functionality — surprisingly common even at this price now

    Premium Tier: ₹15,000 and Above

    Direct answer: Premium smart locks (₹15,000-₹35,000+) from brands like Yale, Samsung, and Hafele add WiFi connectivity for true remote access, stronger build materials, and more advanced fingerprint sensors — worth the extra spend mainly for independent houses or main entrance doors facing higher security needs.

    Yale’s Indian lineup brings a long lock-making history into this segment, and the app integration tends to be noticeably more polished than budget alternatives. Samsung’s digital lock range carries similar premium positioning, with a design focus that suits modern apartment aesthetics particularly well.

    Is the jump from ₹12,000 to ₹25,000 actually worth it for most homes? Honestly, not always. Unless you specifically need WiFi-based remote access — say, for letting in a delivery or house help while you’re away at work — the mid-range tier covers most practical needs just fine.

    Fingerprint vs PIN vs App: Which Access Method Matters Most

    Every smart lock now offers multiple access methods, but they’re not all equally useful day to day. Here’s how I’d rank them for a typical Indian household:

    1. Fingerprint — fastest for daily use by household members, but performance varies by sensor quality and can lag in extreme humidity
    2. PIN code — reliable backup, good for guests or family members who don’t want to register a fingerprint
    3. OTP/temporary codes — genuinely useful for delivery staff, house help, or short-term guests since codes expire automatically
    4. App/remote unlock — convenient but depends entirely on WiFi connectivity and isn’t essential for most households
    5. Mechanical key backup — non-negotiable; never buy a lock without one, no matter how advanced the electronics are

    Installation: DIY or Professional?

    Direct answer: Most smart door locks marketed in India include free professional installation from the brand, which is worth taking advantage of even if the process looks simple in demo videos — incorrect installation is the leading cause of early lock failures and warranty disputes.

    I attempted a DIY install on my first lock to save the installation fee, which in hindsight was a mistake. Got the bore alignment slightly off, and the deadbolt never quite sat right afterward. Free installation exists for a reason — take it.

    If your door doesn’t match standard sizing (common in older buildings or custom-built homes), mention this to the installer beforehand. Retrofitting an oddly-sized door sometimes needs additional carpentry work that isn’t included in the standard installation charge.

    Battery Life and Power Backup: Don’t Get Caught Locked Out

    Nothing defeats the purpose of a smart lock quite like being stuck outside because the batteries died. Most quality locks warn you well in advance — low battery alerts through the app or an audible beep — but it’s worth understanding backup options regardless.

    • Standard AA battery backs typically last 6-12 months depending on usage frequency
    • A 9V emergency battery port (common in most mid-range and premium locks) lets you power the lock temporarily from outside if the main batteries die completely
    • Always keep the physical mechanical key somewhere accessible but not obviously near the door itself

    [link to related guide on budget smart home upgrades here] if you’re building out a broader smart home setup around your new lock.

    Data Privacy: A Question Worth Asking Before You Buy

    Not something people think to ask, but genuinely worth raising with any smart lock brand — where is your access data actually stored? Some brands store fingerprint and access logs on Indian servers with encryption, while others route data through international cloud services.

    This matters more for households wanting extra peace of mind, though for most buyers, any established brand with a proper privacy policy should be reasonably safe. Ask the retailer or check the brand’s website specifically, rather than assuming.

    [link to related guide on smart plug and hub setups for Indian homes here]

    FAQ: Common Questions About Smart Door Lock India Options

    Is a smart door lock actually safer than a traditional key-and-deadbolt setup? Generally yes, provided you choose a lock with a proper deadbolt mechanism and multiple stainless steel bolts, not just a decorative-looking unit. Encryption and tamper alarms add a layer traditional locks simply don’t have.

    Do smart locks work during a power cut? Yes — nearly all run on battery power independent of your home’s electricity supply. WiFi-connected features won’t work if your router loses power, but the lock itself still functions on fingerprint, PIN, or mechanical key.

    What happens if the fingerprint sensor stops working? Every reliable smart lock includes backup access — PIN code and a mechanical key at minimum. You should never be fully dependent on the fingerprint sensor alone.

    Can I install a smart lock on a rented apartment door? Yes, as long as you keep the original lock hardware safely stored to reinstall before moving out. Most smart locks fit into standard door preparations without permanent modification, though it’s worth confirming with your landlord first.

    How long do smart door locks typically last before needing replacement? A good quality lock, properly maintained, should last 5-7 years minimum. Battery contacts and sensor components tend to be the parts that eventually need servicing or replacement.

    Is WiFi connectivity necessary, or is Bluetooth enough? Bluetooth is enough for most households who just want keyless entry for people already at home. WiFi only becomes genuinely useful if you need to unlock remotely for guests or deliveries while you’re away.

    Final Thoughts

    Choosing the right smart door lock for an Indian home really comes down to matching the tier to your actual needs, not chasing every feature on the spec sheet. Most apartment owners are genuinely well served by the mid-range bracket, while independent houses with higher security needs might justify the premium jump.

    Measure your door properly before ordering anything, always confirm a mechanical key backup is included, and take the free installation offer rather than risking a DIY attempt. Get those three things right, and you’ll likely be locking (and unlocking) that door without a second thought for years to come.

  • AC Maintenance Schedule: How Often You Really Need Servicing

    AC Maintenance Schedule: How Often You Really Need Servicing

    Every technician who’s ever serviced your AC has probably said the same thing on the way out: “Sir/Madam, service it every 3 months, otherwise gas will finish.” Sound familiar?

    Here’s the thing — that’s not entirely accurate, and I say that after getting genuinely annoyed enough to research it properly. A sensible AC maintenance schedule depends heavily on how many hours a day you actually run the unit, not a fixed calendar number some technicians repeat because it means more service calls for them.

    I’ve owned split ACs for close to eight years now, tracked servicing costs across three different units, and watched more than one technician try to upsell an unnecessary gas refill. This article breaks down what a genuinely useful maintenance schedule looks like in 2026, based on real usage patterns rather than a one-size-fits-all number.

    Why the “Service Every 3 Months” Advice Is Mostly Marketing

    Direct answer: ACs don’t need servicing every 3 months unless run 10+ hours daily during peak summer — a realistic AC maintenance schedule for moderate use (4-6 hours/day, seasonal) is once every 4-6 months, with a deeper service before and after peak summer.

    Technicians repeat the 3-month rule partly out of habit and partly because more visits mean more revenue, plain and simple. That’s not a conspiracy theory — it’s just how service-based businesses work everywhere.

    What actually determines service frequency is usage hours, not the calendar. A unit running 12 hours a day in a Delhi summer needs far more frequent attention than one used for 3 hours a night in Bengaluru’s milder climate. Has anyone in your building ever compared notes on this? I did, once, at a residents’ meeting, and the range of “recommended” service intervals people had been quoted was honestly comical.

    Building Your AC Maintenance Schedule Based on Actual Usage

    Rather than following a blanket rule, match your servicing frequency to how hard your AC actually works:

    • Light use (2-4 hours/day, only in peak summer months): Service once a year, ideally just before summer starts
    • Moderate use (4-8 hours/day, most of the year in warmer cities): Service every 4-6 months
    • Heavy use (8+ hours/day, or running through most seasons): Service every 3 months, closer to what technicians generally recommend

    Picture a small business owner in Jaipur running a shop AC for 10-12 hours daily through summer — that setup genuinely does need the frequent servicing schedule, because dust accumulation and filter clogging happen fast under that kind of continuous load.

    What Actually Needs to Happen During a Proper AC Service

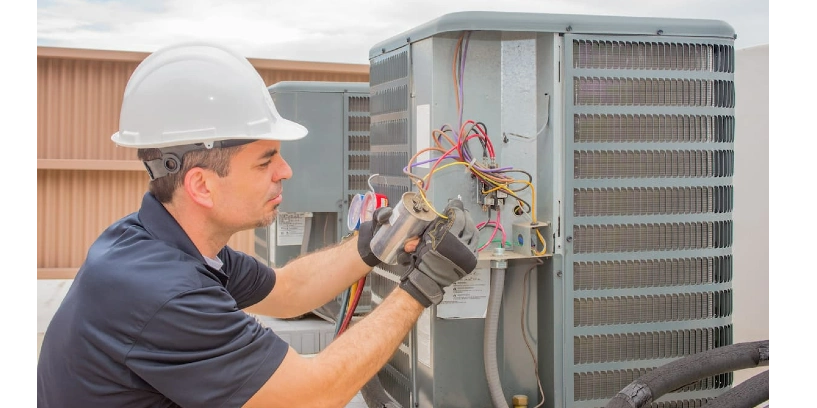
    Direct answer: A proper AC service includes cleaning the indoor unit filter and coil, checking the outdoor condenser for dust buildup, verifying gas pressure (not automatically refilling it), and inspecting drainage — a full gas refill should only happen if there’s a confirmed leak, not as routine practice.

    This is where a lot of unnecessary spending happens. Gas doesn’t “run out” through normal use in a properly sealed system — it only drops if there’s a leak somewhere. A technician who refills gas every single visit without checking for a leak first is either not doing their job properly or padding the bill.

    What a genuinely thorough service should cover:

    1. Indoor unit filter cleaning (should happen more often than a full service, honestly)
    2. Coil cleaning, both indoor and outdoor units
    3. Drainage pipe check for blockages
    4. Gas pressure check using a gauge, not just a guess
    5. Electrical connection and capacitor check

    Filter Cleaning: More Frequent Than Full Servicing

    Here’s something most people don’t realize — filter cleaning and full servicing are two different things, and filters need attention way more often. A clogged filter reduces cooling efficiency and pushes your electricity bill up noticeably.

    I clean my own filters every 2-3 weeks during peak summer use, and it takes maybe ten minutes total. Just slide it out, rinse with water, let it dry fully before putting it back (this last part matters — a damp filter breeds mould).

    You don’t need a technician for this part at all. It’s genuinely one of the easiest DIY maintenance tasks in the whole house.

    Signs Your AC Needs Servicing Before the Scheduled Date

    Sometimes your unit tells you it needs attention regardless of what the calendar says. Watch for:

    • Reduced cooling despite the temperature setting staying the same
    • Unusual noise from the indoor or outdoor unit — rattling, grinding, anything new
    • Water dripping or leaking from the indoor unit (usually a blocked drain pipe)
    • A musty or mouldy smell when the AC first switches on
    • Ice formation on the outdoor unit’s pipes, which usually points to low gas or airflow issues

    If you notice any of these, don’t wait for your “scheduled” service date. Small issues caught early cost far less to fix than the same problem left running for another two months.

    Cost of AC Servicing in India: What’s Reasonable to Pay

    Rates vary by city and technician, but here’s a rough sense of fair pricing in 2026:

    Service TypeApprox Cost
    Basic filter and coil cleaning₹400-700 per unit
    Full service (coil, drainage, electrical check)₹600-1,200 per unit
    Gas refill (only if leak confirmed)₹1,500-3,000 depending on gas type
    Annual maintenance contract (AMC)₹2,500-5,000/year for 2-3 services

    An AMC can genuinely be worth it if you own 2-3 units and want predictable costs rather than negotiating each time. For a single unit, I’ve noticed pay-per-service usually works out cheaper unless you’re in the heavy-use category.

    Split AC vs Window AC: Does Maintenance Frequency Differ?

    Window ACs, being a single sealed unit, tend to accumulate dust faster in the filter and coil area since everything’s packed closer together. They generally benefit from slightly more frequent filter cleaning — every 2 weeks during heavy use versus 3-4 weeks for split units.

    Split ACs have separated indoor and outdoor components, which means better airflow around the coil generally, but the outdoor unit is more exposed to dust, pollen, and in coastal areas, salt air — which can affect the condenser coil over time.

    [link to related guide on budget smart home upgrades here] if you’re considering a smart AC controller alongside your regular maintenance routine.

    FAQ: Common Questions About AC Maintenance Schedule

    Is it true that AC gas needs refilling every year? No, this is one of the most common misconceptions. Gas only depletes if there’s a leak in the system — a properly sealed AC shouldn’t need gas refills at all unless something’s actually wrong.

    Can I service my own AC to save money? Filter cleaning, yes, easily. Coil cleaning and gas pressure checks need proper tools and some know-how, so it’s worth paying a technician for those parts specifically.

    How much does it cost to service an AC in India in 2026? A basic service typically runs ₹400-1,200 depending on the depth of cleaning and your city. Gas refills, if genuinely needed, add another ₹1,500-3,000 on top.

    Does not servicing my AC regularly actually increase my electricity bill? Yes, noticeably. A dirty filter and coil force the compressor to work harder for the same cooling output, which can increase power consumption by 10-15% or more.

    Should I get an AMC (annual maintenance contract) for my AC? Worth it if you own multiple units or want predictable, scheduled service without negotiating each time. For a single lightly-used unit, per-visit servicing is often cheaper overall.

    How do I know if my technician is trying to oversell me on gas refills? Ask them to show you the actual gas pressure reading using a gauge before agreeing to a refill. A pressure genuinely low enough to need a refill also usually comes with a visible or audible leak somewhere in the system.

    Final Thoughts

    A sensible AC maintenance schedule isn’t about following whatever number the last technician quoted you — it’s about matching servicing frequency to actual usage hours and paying attention to what your unit is telling you in between.

    Clean your own filters every few weeks during peak season, book a proper service based on your usage category from this guide, and always ask for the gas pressure reading before agreeing to any refill. Your electricity bill — and your wallet, come service time — will both notice the difference.

  • Monsoon Home Maintenance Tips: A Checklist That Actually Works

    Monsoon Home Maintenance Tips: A Checklist That Actually Works

    That first heavy shower always seems to arrive faster than expected, doesn’t it? One minute it’s a dry April afternoon, the next you’re mopping up water near the balcony door wondering when that gap appeared.

    Good monsoon home maintenance tips aren’t about reacting once the damage is already done — they’re about catching problems in the weeks before the rain actually arrives. I’ve lived through enough Indian monsoons, in both Mumbai and Pune, to know that a couple of weekends of prep in May or early June saves you weeks of headache come July.

    This checklist covers what actually matters, based on what tends to go wrong every single year, not the generic “clean your gutters” advice that ignores how Indian homes are actually built. Let’s get into it before 2026’s monsoon catches you off guard.

    Why Monsoon Prep Matters More in Indian Homes Specifically

    Direct answer: Indian homes face monsoon-specific risks — flat roof terraces prone to water pooling, older buildings with degraded waterproofing, and balconies that weren’t designed with proper slope for drainage — making proactive monsoon home maintenance more critical than in homes built for drier or more temperate climates.

    Most international home maintenance content assumes sloped roofs and gutters, which honestly doesn’t apply to most Indian apartments. We’ve got flat terraces, exposed balconies, and buildings that are often 15-20 years old with waterproofing that’s long past its useful life.

    I’ve noticed the buildings that suffer the worst monsoon damage every year are almost always the ones where terrace waterproofing hasn’t been redone in over a decade. It’s not glamorous work, but it’s the single highest-impact thing on this whole list.

    1. Check and Redo Terrace Waterproofing Before It’s Too Late

    If you own a top-floor flat or an independent house, this is non-negotiable. Waterproofing typically lasts 5-8 years depending on quality and exposure, and once it starts failing, water finds its way in through cracks you’d never spot with a casual glance.

    A basic waterproofing check-and-touch-up costs ₹15-40 per square foot depending on the method (APP membrane, cementitious coating, or liquid waterproofing). For a 500 sq ft terrace, that’s roughly ₹7,500-20,000 — considerably cheaper than repairing water-damaged ceilings later.

    Picture a family in Jaipur who skipped terrace waterproofing for three monsoons straight, assuming “it’s fine, no visible leak yet.” By year three, damp patches appeared on the bedroom ceiling below, and the repair bill — replastering, repainting, plus the actual waterproofing job — came to nearly four times what a timely fix would’ve cost.

    2. Clear Drainage Points and Balcony Outlets

    Direct answer: Blocked drainage outlets on terraces and balconies cause water pooling that leads directly to seepage — clearing debris, leaves, and silt from these points takes under an hour but prevents most of the water damage Indian homes experience during monsoon.

    This one’s genuinely quick to do yourself. Terrace drains and balcony outlets collect dust, leaves, and general debris over the dry months, and a blocked outlet turns a normal rain shower into standing water within minutes.

    A few spots people consistently forget:

    • The small drainage gap under AC outdoor units
    • Balcony floor drains hidden behind planters
    • Rooftop water tank overflow pipes

    Has this ever happened to you — water pooling on the balcony despite “no visible blockage”? Check the outlet pipe itself, not just the surface opening; silt builds up a few inches down where you can’t see it.

    3. Inspect Window and Door Seals for Gaps

    Older windows, especially the metal-frame kind common in many Indian flats, develop small gaps over years as the frame expands and contracts with weather. During heavy rain, wind-driven water pushes through these gaps surprisingly forcefully.

    Silicone sealant (₹150-300 per tube) handles most gaps yourself, no professional needed. For bigger gaps or warped frames, weatherstripping tape (₹100-200 per roll) is a decent temporary fix, though it won’t last more than a season or two.

    I’ll be honest, I used to think this was a minor issue until water pooled inside my window frame during one particularly bad storm in Mumbai and started dripping onto the sill. Fifteen minutes with a sealant gun the next dry day fixed it completely.

    4. Service Your Exhaust Fans and Check for Reverse Airflow

    Bathroom and kitchen exhaust fans without proper backflow flaps let rainwater and wind blow directly back into the room during heavy monsoon storms — something almost nobody thinks about until it happens.

    A backflow damper or flap (₹200-500) fixes this permanently. If your exhaust fan already has one but it’s stuck or broken, a quick clean and oil usually solves it.

    5. Treat Wooden Furniture and Doors Against Moisture

    Monsoon humidity is brutal on wood. Doors swell and stop closing properly, furniture develops that musty smell, and untreated wood is genuinely at risk of fungal growth if humidity stays high for weeks.

    • Apply wood polish or a moisture-resistant coating before the season starts, not during
    • Keep a small gap behind wardrobes against exterior walls for airflow
    • Use silica gel packets or charcoal moisture absorbers inside cupboards — cheap, at ₹100-200 for a pack, and genuinely effective

    [link to related guide on home improvement ideas for rented apartments here] covers similar low-cost fixes if you’re renting and don’t want to touch the actual wood finish.

    6. Check Electrical Points Near Windows and Balconies

    Direct answer: Electrical sockets and switchboards located near windows, balconies, or exterior walls should be checked for moisture ingress before monsoon — a qualified electrician visit (₹300-600) is worth it if you notice any dampness, discolouration, or a musty smell near these points.

    This is one people genuinely underestimate, and it’s not something to DIY if you spot actual dampness. Water and electricity together are a serious hazard, not just an inconvenience.

    If you’ve had any seepage near a switchboard in previous monsoons, get it checked properly before this season starts, not after the first big storm.

    7. Stock Up on Monsoon Essentials Before the Rush

    Every single year, the same items go out of stock or get marked up right when the first heavy rains hit. Buying ahead in May or early June avoids both the price bump and the scramble.

    1. Waterproof tarpaulin sheets for covering outdoor furniture or exposed areas
    2. A decent wet-and-dry vacuum if your area floods even mildly
    3. Extra silicone sealant and weatherstripping tape
    4. Dehumidifier or moisture absorber packs for wardrobes and storage rooms
    5. A basic tool kit for quick fixes (nobody wants to be searching for a screwdriver mid-leak)

    Monsoon Home Maintenance Checklist: Quick Reference

    Here’s the whole thing condensed, roughly in order of priority:

    TaskApprox CostPriority
    Terrace waterproofing check₹7,500-20,000Highest (if applicable)
    Clear drainage outletsFree (DIY)Highest
    Window/door seal check₹150-500High
    Exhaust fan backflow check₹200-500Medium
    Wood moisture treatment₹500-1,500Medium
    Electrical point inspection₹300-600High (if damp seen)
    Monsoon supply stock-up₹1,000-2,500Medium

    [link to related guide on budget smart home upgrades here] if you want to add moisture sensors to catch leaks even earlier next season.

    FAQ: Common Questions About Monsoon Home Maintenance

    How early before monsoon should I start home maintenance? Ideally 4-6 weeks before the season starts in your region — so around late April or May for most of India. This gives enough time for waterproofing work to cure properly before the first rains.

    Do I need to redo terrace waterproofing every single year? No, quality waterproofing lasts 5-8 years typically. What you need every year is an inspection, not necessarily a full redo — small cracks can often be patched without a complete reapplication.

    What’s the most common monsoon damage in Indian homes? Ceiling seepage from terrace or upper-floor leaks, hands down. It’s also usually the most expensive to fix once the damage has already spread through the plaster.

    Can renters do monsoon maintenance, or is it the landlord’s responsibility? Terrace and structural waterproofing is typically the landlord’s or society’s responsibility. But seals around your own windows, exhaust fan checks, and wood treatment are things any renter can handle themselves.

    Is it worth buying a dehumidifier just for monsoon season? For a single humid room or a wardrobe issue, silica packets or charcoal absorbers usually suffice. A full dehumidifier makes more sense if you’re dealing with a persistently damp room, like a ground-floor flat.

    What should I do immediately if I notice a new leak during monsoon? Contain it first — bucket, towels, whatever stops the spread — then document it with photos before calling anyone. This helps enormously if you need to claim against your building’s maintenance fund or negotiate repair costs with your landlord.

    Final Thoughts

    Monsoon damage in Indian homes is almost always preventable, not inevitable. A weekend spent checking drainage, seals, and waterproofing before the season starts costs a fraction of what water damage repair runs afterward.

    Pick the three highest-priority items from the checklist above and tackle them this weekend, even if you can’t get to everything on the list. Your future self, mopping up (or not) during the first big storm of the season, will genuinely thank you for it.

  • Low Budget Bathroom Renovation: A Realistic Step-by-Step Guide

    Low Budget Bathroom Renovation: A Realistic Step-by-Step Guide

    Your bathroom’s looking tired, the tiles have that permanent yellowish tinge no amount of scrubbing fixes, and you’ve already priced out a full renovation once — then closed the quote email and never opened it again. Sound familiar?

    A proper low budget bathroom renovation doesn’t need to mean a full gut job or a lakh-plus spend. I’ve helped redo two bathrooms now, one for myself and one for my sister’s flat in Indore, both under ₹50,000, and both look nothing like “budget” once finished. The trick isn’t cutting corners everywhere. It’s knowing exactly which corners are safe to cut and which ones you really shouldn’t.

    This guide walks through the whole process, step by step, the way I’d actually plan it if starting fresh in 2026.

    Why Most Bathroom Renovation Quotes Feel So Expensive

    Direct answer: Full bathroom renovations in India typically start at ₹1.5-3 lakh because contractors default to complete demolition, new plumbing lines, and full re-tiling — even when the existing structure doesn’t need any of that. A low budget bathroom renovation skips full demolition and reuses what’s structurally sound.

    Contractors quote for the full job because that’s what they’re used to doing, and honestly, it’s more profitable for them too. Nobody’s being sneaky here necessarily, it’s just the default script.

    The real budget-saving move is figuring out what’s actually broken versus what just looks old. A cracked tile needs replacing. A slightly dated tile that’s structurally fine? That can often stay, especially if you’re regrouting and repainting around it.

    Step 1: Get Honest About What Actually Needs Fixing

    Before spending a rupee, walk through your bathroom and separate problems into two lists — “broken” and “just ugly.” This single step probably saves more money than any other tip in this article.

    • Broken: leaking taps, cracked tiles, a toilet that runs constantly, water seepage stains
    • Just ugly: dated tile colour, old mirror, worn-out cabinet finish, yellowed grout

    Has this ever happened to you — you assume the whole bathroom needs redoing, then realize half of it just needs a clean and a coat of paint? It’s more common than people think.

    Step 2: Regrouting and Retiling Only Where Necessary

    Direct answer: Regrouting existing tiles (₹15-25 per square foot) instantly refreshes a bathroom’s appearance for a fraction of the cost of full retiling (₹80-150 per square foot including labour), and works well when tiles themselves aren’t cracked or hollow-sounding.

    This step alone transformed my sister’s bathroom more than anything else on her list. Grout goes grey and grimy over years, no matter how much you scrub, and swapping it out for fresh white or light grey grout makes the whole tile job look almost new.

    Tap a few tiles gently — if any sound hollow, they’ve likely detached from the wall underneath and need actual replacement, not just regrouting. Don’t skip this check; painting over a loose tile just delays a bigger repair.

    Step 3: Fixture Swaps Give the Biggest Visual Return

    If your budget only stretches to one category, put it here. Swapping the tap, showerhead, and toilet seat cover gives a bathroom an almost disproportionate visual lift compared to the cost.

    1. Basin mixer tap: ₹800-2,500 (Jaquar or Cera budget ranges)
    2. Health faucet/shower set: ₹500-1,500
    3. Toilet seat cover: ₹600-1,800
    4. Towel rod and accessories set: ₹800-2,000

    Picture a small flat in Jaipur where the owner replaced just the tap and toilet seat — total spend under ₹3,000 — and the bathroom suddenly photographed like a fresh renovation for the rental listing. Small swaps, disproportionate payoff.

    Step 4: Paint the Ceiling and Non-Tiled Walls

    Bathroom ceilings get ignored constantly, and they show water stains and mould more than any other surface. A waterproof bathroom-grade paint (₹250-400 per litre) fixes this for genuinely little money.

    I’ll admit I underestimated this step the first time. Painted my bathroom ceiling almost as an afterthought, and it ended up making the biggest visible difference of the whole project — more than the tap, more than the grout.

    Stick to specifically waterproof, anti-fungal formulas (Asian Paints Royale Aquashield or similar) — regular wall paint peels within months in a bathroom environment.

    Step 5: Storage and Organisation Without Construction

    New cabinetry is expensive and usually unnecessary for a low budget bathroom renovation. Wall-mounted organizers, over-toilet shelving units, and adhesive-hook storage solve most storage problems for ₹1,500-4,000 total.

    • Over-toilet shelf unit: ₹1,200-3,000
    • Corner shower caddy: ₹300-800
    • Wall-mounted mirror cabinet: ₹1,500-3,500

    These don’t require any tiling changes or plumbing work, which keeps both cost and mess down considerably. [link to related guide on home improvement ideas for rented apartments here] covers similar no-drill options if you’re renting.

    Step 6: Lighting Fixes That Punch Above Their Cost

    Most Indian bathrooms run on one harsh overhead tube light, which flatters absolutely nobody and nothing. Adding a warm LED mirror light (₹500-1,200) or a simple wall sconce changes the whole mood of the space for very little money.

    This is one of those upgrades nobody thinks about until they see it done somewhere else and go “oh, that’s why it looks nicer.” Warm white lighting near the mirror specifically makes a real difference — worth prioritizing over ceiling lights if you’re picking just one.

    Step 7: When to Actually Call a Plumber (Don’t Skip This)

    Some things genuinely aren’t DIY-friendly, no matter how tight the budget. Skipping proper plumbing work to save money almost always costs more later, sometimes a lot more.

    Call a professional for:

    • Any active leak behind walls or under the floor
    • Water pressure issues that suggest pipe blockage or damage
    • Toilet flange replacement or repositioning
    • Waterproofing redo if there’s any sign of seepage into the room below

    A plumber visit for diagnosis alone typically costs ₹300-600 in most Indian cities — cheap insurance against a much bigger repair bill down the line.

    Sample Low Budget Bathroom Renovation: ₹35,000 Breakdown

    Here’s roughly how a full budget renovation could look for a standard Indian bathroom:

    ItemApprox Cost
    Regrouting existing tiles₹6,000
    Fixture swaps (tap, shower, toilet seat)₹5,500
    Waterproof ceiling + wall paint₹4,500
    Storage units and organizers₹3,000
    Mirror LED light₹1,000
    Plumber visit + minor fixes₹2,500
    Labour (grouting, painting)₹8,000
    Contingency buffer₹4,500
    Total~₹35,000

    [link to related guide on kitchen renovation cost breakdown here] if you’re planning a full home refresh rather than just the bathroom.

    FAQ: Common Questions About Low Budget Bathroom Renovation

    Can I really renovate a bathroom for under ₹50,000 in India? Yes, as long as you’re not moving plumbing lines or fully retiling. Regrouting, fixture swaps, and paint get most bathrooms 80% of the way to a “renovated” look for a fraction of the full-gut cost.

    Is regrouting actually as effective as full retiling? For tiles that are structurally sound and not cracked, yes — regrouting alone can make a bathroom look years newer. It won’t fix a hollow-sounding or cracked tile, though; that genuinely needs replacement.

    What’s the single best value upgrade for a tight budget bathroom renovation? Fixture swaps, hands down. A new tap and toilet seat cost under ₹3,000 combined but change how the whole bathroom feels within an afternoon.

    How long does a low budget bathroom renovation take? Most projects following this approach — no full retiling — wrap up in 3-5 days, including paint drying time. A full gut renovation takes 3-4 weeks by comparison.

    Should I DIY the painting myself to save more money? If you’re reasonably careful, yes — waterproof bathroom paint isn’t much harder than regular wall paint, just needs good ventilation and two coats minimum. Just don’t DIY anything involving plumbing or electrical work.

    Do I need a permit or society approval for a low budget bathroom renovation in an apartment? Cosmetic changes (paint, fixtures, regrouting) usually don’t need approval. Anything involving plumbing changes or wall-breaking often does, depending on your building’s society rules — worth checking before starting.

    Final Thoughts

    A tired, dated bathroom doesn’t automatically need a full renovation budget to fix. Regrouting, smart fixture swaps, and a proper coat of waterproof paint solve most of the visible problems for a fraction of what a contractor’s full quote usually suggests.

    Start with the “broken versus ugly” list from Step 1 — it’ll tell you honestly where your money actually needs to go. Then work through this guide one step at a time, and you’ll likely land somewhere between ₹30,000-50,000 for a bathroom that looks like it cost triple that.

  • Kitchen Renovation Cost: What Contractors Don’t Tell You

    Kitchen Renovation Cost: What Contractors Don’t Tell You

    Ever gotten a quote for your kitchen that seemed reasonable, only to watch the final bill come in 30-40% higher? You’re not imagining it. This happens to almost everyone.

    The truth about kitchen renovation cost in India is that the quote you get on day one is rarely the number you actually pay. Not because contractors are all dishonest — some genuinely are, but most are just leaving out costs that come up “later,” almost like clockwork. I’ve been through two kitchen renovations myself and watched a close friend go through a third, so this isn’t theory. This is what actually happens once the demolition starts.

    By the end of this, you’ll know exactly where the hidden costs hide, and how to budget for a kitchen renovation in 2026 without the nasty surprise at the end.

    Why Your Kitchen Renovation Cost Quote Never Matches the Final Bill

    Direct answer: Initial kitchen renovation cost quotes in India typically miss electrical rewiring, plumbing changes, waste disposal, and material wastage — these can add 20-35% to the original estimate, which is why final bills routinely run higher than the first number given.

    Most contractors quote based on what’s visible and easy to measure — cabinet length, countertop area, basic appliances. What they often skip is what’s behind the walls. Old wiring that needs replacing. Pipes that don’t match new fixture positions. A floor that isn’t level enough for new tiles without extra prep work.

    I’ve noticed contractors rarely lie outright about these things. They just don’t bring them up unless you specifically ask. It’s less deception, more omission — which, from a budgeting perspective, amounts to the same headache.

    Modular Kitchen Cost: The Big Range Nobody Explains Properly

    Ask five contractors for a modular kitchen quote and you’ll get five wildly different numbers, sometimes ₹1.5 lakh apart for what looks like the same job on paper. Here’s roughly what drives that gap for a standard 10×10 foot kitchen:

    • Basic modular setup (laminate finish, standard hardware): ₹1.8-2.5 lakh
    • Mid-range (acrylic or PU finish, soft-close hinges): ₹3-4.5 lakh
    • Premium (German hardware, quartz counters, imported appliances): ₹6 lakh and up

    Picture a couple in Jaipur getting a “budget” quote of ₹2 lakh, then discovering mid-project that soft-close drawers alone add another ₹25,000. That’s not unusual at all — it’s basically the norm unless every single spec is locked down in writing before work starts.

    Civil Work and Demolition: The Cost Nobody Budgets For

    Direct answer: Civil work — breaking old tiles, shifting plumbing points, patching walls, and disposing of debris — typically adds ₹40,000-₹1.2 lakh to a kitchen renovation cost in a standard Indian apartment, depending on how much needs to move.

    This is the section where budgets go sideways most often. If you’re just replacing cabinets and keeping the same layout, civil work stays cheap. But move the sink two feet to the left, or shift the stove position, and suddenly you’re paying for new plumbing lines, possibly floor tile removal, and wall patching.

    A few things that quietly add up here:

    • Debris removal and disposal charges (often ₹3,000-8,000, and yes, contractors do charge for this separately)
    • Waterproofing redo if old waterproofing gets disturbed during plumbing changes
    • Electrical conduit rerouting if you’re adding new appliance points

    Appliance Costs: Where People Massively Underbudget

    Appliances get treated like an afterthought in most renovation conversations, and that’s a mistake. A chimney, hob, oven, dishwasher, and RO system together can easily run ₹1.5-3 lakh depending on brand — and this cost almost never appears in the contractor’s original renovation quote.

    I made this exact mistake during my first renovation. Budgeted ₹2.5 lakh for the whole kitchen, forgot appliances entirely, ended up scrambling for another lakh I hadn’t planned for. Lesson learned the expensive way.

    Rough numbers for mid-range Indian brands (Faber, Elica, Kaff):

    1. Chimney: ₹12,000-25,000
    2. Hob (4-burner): ₹8,000-18,000
    3. Built-in oven/microwave combo: ₹20,000-45,000
    4. RO water purifier: ₹10,000-20,000

    Labour Charges: More Variable Than People Expect

    Labour cost isn’t a fixed percentage the way some articles suggest. It shifts a lot based on city, contractor reputation, and honestly, how good you are at negotiating. In Tier-1 cities like Mumbai or Bengaluru, skilled labour for kitchen work runs noticeably higher than Tier-2 cities.

    Rough daily rates in 2026:

    • Carpenter: ₹700-1,200/day
    • Plumber: ₹600-900/day
    • Electrician: ₹600-1,000/day
    • Tile mason: ₹800-1,300/day

    A full kitchen renovation typically needs 15-25 combined labour days across these trades. Do the math, and labour alone can hit ₹40,000-60,000 for a mid-size kitchen — a number that’s almost never itemized clearly in the original quote.

    Countertop Material: The Silent Budget Killer

    Granite, quartz, or Corian — the choice here swings your kitchen renovation cost more than almost any other single decision. Granite runs ₹150-400 per square foot, quartz sits at ₹250-600, and imported quartz or marble can go past ₹1,000 per square foot without much effort.

    For a standard 25-30 sq ft countertop, that’s the difference between ₹5,000 and ₹30,000 just on material, before installation charges. Has anyone ever explained this range to you before signing a contract? Usually not — most quotes just say “countertop as per selection,” which tells you nothing.

    I’d honestly recommend visiting a stone yard in person rather than trusting sample chips shown at a contractor’s office. The lighting there is deliberately flattering, and it shows.

    Contractor Margin and “Miscellaneous” Charges

    Direct answer: Most contractors add a 10-15% margin on materials plus a flat “miscellaneous” charge of ₹15,000-40,000 covering transport, minor hardware, and site supervision — a line item worth questioning directly, since it’s rarely broken down unless you push for it.

    This is the part contractors are least likely to explain unless you push. It’s not necessarily dishonest — running a renovation does involve real overhead — but “miscellaneous” as a line item on a ₹3 lakh quote deserves a proper breakdown, not a shrug.

    Ask for an itemized version of any miscellaneous charge before signing. Most reasonable contractors will provide one. If they get cagey about it, that tells you something too.

    How to Actually Budget for a Kitchen Renovation Without Getting Blindsided

    Based on what’s above, here’s a more realistic way to structure your budget rather than trusting a single upfront number:

    • Get the base modular quote in writing, itemized by cabinet, hardware, and finish
    • Add a separate line for civil work — ask specifically about plumbing and electrical changes
    • Budget appliances as their own category, roughly 25-30% of the total project cost
    • Set aside a 15% contingency buffer for the “we didn’t expect this” moments (there’s always at least one)
    • Get countertop pricing in writing per square foot, not as a lump sum

    [link to related guide on modular kitchen design ideas for small apartments here]

    FAQ: Common Questions About Kitchen Renovation Cost in India

    What’s a realistic total kitchen renovation cost for a standard Indian apartment? For a 10×10 foot kitchen with mid-range finishes, most homeowners end up spending ₹4-6 lakh once appliances and civil work are included, even if the original quote suggested ₹3 lakh.

    Is it cheaper to hire an interior designer or go directly to a contractor? Direct contractors are usually 10-15% cheaper upfront, but designers often catch layout and wiring issues that save money later. It depends on how confident you are managing the project yourself.

    How long does a typical kitchen renovation take in India? Most modular kitchen projects take 4-6 weeks from demolition to final installation, assuming no major delays with material delivery or unexpected civil work.

    Can I renovate my kitchen in phases to spread out the cost? Yes, though it’s not ideal. Cabinets and countertops first, appliances later, is a common approach — just know that living without a full kitchen for weeks gets old fast.

    Why did my contractor’s final bill come in higher than the quote? Almost always civil work, appliance additions, or material upgrades made mid-project. Always ask for a revised written quote the moment anything changes from the original plan.

    Is granite or quartz better value for a kitchen renovation? Granite is cheaper and holds up well to heat, but needs periodic sealing. Quartz costs more upfront but needs almost no maintenance — worth it if you don’t want yearly upkeep.

    Final Thoughts

    Kitchen renovations rarely cost what the first quote says, and now you know why. Civil work, appliances, and countertop choices are where the real money hides, not the cabinets everyone focuses on first.

    Before you sign anything, ask your contractor to itemize every single category from this article — plumbing, electrical, appliances, miscellaneous — separately, in writing. If they hesitate, that’s worth paying attention to. A little pushback at the quote stage saves a lot of frustration halfway through demolition.

  • Home Improvement Ideas for Rented Apartments (No Drilling Needed)

    Home Improvement Ideas for Rented Apartments (No Drilling Needed)

    You know that moment when you walk into your rented flat and think, “this could look so much better, but I can’t exactly repaint the walls”? Yeah, most tenants in India know that feeling well.

    The good news: home improvement ideas for rented apartments don’t have to mean permanent changes or an angry call from your landlord. There’s a genuine middle ground between “do nothing because it’s not my house” and “renovate like you own the place.” I’ve moved four times in the last six years, and I’ve picked up a decent number of tricks along the way — some worked brilliantly, a couple were a waste of money, honestly.

    This list sticks to what’s reversible, affordable, and actually makes a rented space feel like home in 2026, without touching your security deposit.

    Why Rented Homes Need a Different Approach to Improvement

    Direct answer: Rented apartments need reversible, non-permanent solutions because most rental agreements in India restrict drilling, painting, or structural changes — and security deposits (often 2-3 months’ rent) are at stake if damage is found during the move-out inspection.

    Most home improvement content online just assumes you own the walls. Drill here, paint there, knock down that wall. None of that applies when you’re renting, and honestly, a lot of bloggers seem to forget renters exist at all.

    The trick with a rented space is thinking in layers you can peel off later — vinyl instead of paint, adhesive hooks instead of nails, furniture instead of fixtures. Nothing here needs a broker’s permission or a call to your landlord asking “can I just—”

    1. Peel-and-Stick Wallpaper for an Instant Wall Refresh

    This is probably the single highest-impact change on this whole list. Peel-and-stick wallpaper (₹40-₹90 per square foot in India) goes up without a drop of paint and comes off clean when you move out, assuming the wall underneath was in decent shape to begin with.

    I did this for one accent wall in a Pune flat and it completely changed how the living room felt. Total cost, including some wastage from a shaky first attempt, came to around ₹3,200 for a 10×8 foot wall.

    A few honest tips:

    • Test a small patch first — some cheaper walls (especially older plaster) don’t hold adhesive well
    • Textured or patterned designs hide small application mistakes better than solid colours
    • Budget extra material for corners; you’ll waste more than you think

    2. Command Strips and Adhesive Hooks Instead of Nails

    Nail holes are the number one reason people lose part of their deposit. Command strips solve this completely, and they’ve genuinely gotten stronger over the last few years — some now hold up to 7-8 kg.

    Use them for wall art, small shelves, curtain tie-backs, even lightweight mirrors. Has your landlord ever done a surprise inspection? Mine has, twice, and never once noticed the strips.

    One thing worth knowing — humidity affects adhesive strength. In coastal cities like Mumbai or Chennai, check and replace strips every few months, especially through monsoon.

    3. Furniture Placement Can Fix More Than You’d Expect

    This one costs nothing, which is exactly why people skip it. But rearranging furniture is honestly underrated as a form of home improvement for rented apartments — it changes the whole feel of a room without spending a rupee.

    Picture a 1BHK in Bengaluru where the bed’s shoved against the darkest wall because “that’s where it fits.” Move it under the window instead, and suddenly the whole room feels twice the size. I’ve seen this exact fix change how someone feels about their apartment, no joke.

    A few placement rules that consistently work:

    • Keep walking paths clear rather than cutting through the middle of a room
    • Anchor a room with the largest piece first, then build around it
    • Mirrors opposite windows genuinely do make small rooms feel bigger — not just a design cliché

    4. Removable Contact Paper for Kitchens and Cabinets

    Rented kitchens are almost always the tiredest-looking part of the flat — chipped cabinet doors, ancient countertop laminate, that one shelf nobody trusts. Removable contact paper (₹150-₹300 per roll) covers all of that without a single tool.

    I wasn’t fully convinced this would look good until I tried it on a cabinet front in a Hyderabad rental. It genuinely looked like a proper renovation from a few feet away. Up close? You could tell. But from a few feet away, which is honestly how most of us actually experience our own kitchen, it worked.

    Marble-effect and matte solid colours tend to look the most convincing — busy patterns can look cheap under bright kitchen lighting.

    5. Tension Rods and Curtains Can Divide a Space Without Construction

    Direct answer: Tension rod curtains (₹500-₹1,500 for rod and fabric) let renters create a private study nook, a separate sleeping area, or hide storage clutter without any drilling — and they come down in under two minutes when it’s time to move.

    Studio apartments and 1RKs benefit the most from this trick. A curtain across half a room can turn one open space into something that feels like two rooms, at least psychologically.

    I’ll be honest, though — this works better for visual separation than for actual sound or light blocking. Don’t expect a curtain to replace a wall for noise. If your flatmate snores, a curtain isn’t solving that.

    6. Battery-Powered LED Strip Lighting Under Cabinets and Shelves

    Rental flats in India often come with exactly one harsh tube light per room, and nothing else. Battery or USB-powered LED strips (₹300-₹800) fix that instantly, no electrician, no wiring changes.

    Stick them under kitchen cabinets, along a bookshelf, or behind a TV unit for that soft glow effect. [link to related guide on budget smart home upgrades here] covers a few smart versions of this too, if you want scheduling built in.

    Warm white (around 2700-3000K) tends to feel cosier than the cooler white most Indian homes default to — worth trying if your flat feels a bit clinical.

    7. A Good Rug Changes a Room More Than People Expect

    Rented flats almost always have the same flooring everywhere — usually a plain tile or vitrified finish that feels a bit cold, literally and visually. A rug (₹1,500-₹4,000 depending on size) is one of the fastest ways to add warmth and define a space.

    I underestimated rugs for years, honestly thought they were a bit unnecessary. Then I put one under a coffee table in my current place and the whole living room suddenly felt “finished” in a way it hadn’t before.

    Go for something at least 5×7 feet for a living room — smaller rugs tend to look like an afterthought rather than a design choice.

    8. Door and Cabinet Handle Swaps (Keep the Originals!)

    This is a small one, but it adds up. Swapping out cheap plastic cabinet handles or door knobs for something nicer (₹50-₹150 each) is one of the cheapest facelifts around — as long as you keep the original hardware in a labelled bag to reinstall before you leave.

    I learned this the hard way after losing the original screws for one handle. Ended up buying a matching one just to avoid an awkward conversation with the landlord at move-out.

    [link to related guide on move-in checklist for rented flats in India here]

    Putting Together a Rented Home Makeover Under ₹10,000

    Here’s roughly how a full-apartment refresh could break down for a typical 1BHK:

    ImprovementApprox Cost
    Peel-and-stick wallpaper (1 wall)₹3,000
    Command strips (pack of 3-4 sets)₹800
    Contact paper for kitchen₹1,200
    LED strip lighting₹600
    Rug for living room₹2,500
    Handle/knob swaps (6-8 pieces)₹700
    Total~₹8,800

    That’s a genuinely noticeable transformation, and every single item above comes off cleanly when your lease ends.

    What NOT to Do in a Rented Apartment

    Some improvement ideas seem harmless but cause real trouble at move-out. Skip these:

    • Painting walls without written permission, even “just one accent wall”
    • Drilling into tiles for shelves — tile cracks are expensive to repair and almost always noticed
    • Removing existing fixtures (light fittings, geysers) even temporarily, unless you’re storing the originals carefully
    • Using strong adhesive on wooden furniture provided by the landlord — it can strip the polish off on removal

    FAQ: Common Questions About Home Improvement for Rented Apartments

    Will peel-and-stick wallpaper damage the paint underneath? Usually not, if the wall paint is in decent condition and you remove the wallpaper slowly and evenly. Freshly painted walls (under 30 days) are more risky — the paint hasn’t fully cured.

    Can my landlord deduct my deposit for command strip marks? Generally no, since they’re designed to come off without residue. That said, always test-remove one strip in an inconspicuous spot before your final inspection, just to be safe.

    Is it worth investing in home improvement for a place I’m only renting for a year? It depends on the cost. Anything under ₹500 that you can take with you when you move (rugs, lights, plants) is almost always worth it. Skip bigger, wall-specific investments if you know you’re moving soon.

    What’s the cheapest way to make a rented apartment feel less bare? Honestly, a rug and a couple of plants get you 70% of the way there for under ₹2,000 combined. Lighting is the next cheapest big win.

    Do landlords in India generally allow tenants to make these changes? Most rental agreements are silent on reversible changes like this, since nothing damages the property. It’s still smart to mention bigger changes (like wallpaper) to your landlord upfront, just to avoid any confusion later.

    How do I remove contact paper cleanly if it’s been up for a long time? A hairdryer on low heat softens the adhesive before peeling, which makes a huge difference versus trying to pull it off cold. Go slow at the corners first.

    Final Thoughts

    Renting doesn’t mean living in a space that never quite feels like yours. Every idea here is fully reversible, budget-friendly, and won’t cost you a single rupee of your deposit — which, let’s be honest, is the real fear behind most rental decisions.

    Start small. Pick one or two changes from this list — maybe the rug and the LED strips — and see how much of a difference it makes before committing to the rest. Your landlord will never know, and your flat will finally feel like it’s actually yours, even if it’s only for another year on the lease.

  • 8 Budget Smart Home Upgrades Under ₹20,000 That Actually Save Money

    8 Budget Smart Home Upgrades Under ₹20,000 That Actually Save Money

    Most “smart home” articles show you gadgets that look great on Instagram but do nothing for your electricity bill. That’s not what this is.

    This is a list of budget smart home upgrades I’ve either used myself or watched friends install, and every single one earned its keep within a year — sometimes within a few months. If you’re the kind of person who checks the meter reading before the bill even arrives (guilty), you’ll like this list.

    We’re keeping the total spend under ₹20,000, and in 2026, that stretches surprisingly far. You don’t need a fully automated house with voice-controlled curtains. You need a handful of smart pieces that quietly cut waste. Let’s get into it.

    Why Budget Smart Home Upgrades Beat Full Home Automation

    Direct answer: Full home automation setups often cost ₹1 lakh or more and take months to show real savings. Budget smart home upgrades focused on power monitoring, lighting, and cooling efficiency typically pay for themselves in 3-8 months and need zero rewiring.

    I’ve seen people get talked into ₹80,000 “smart home packages” by electricians moonlighting as consultants. Half the features never get used. Nobody needs their bathroom light to change colour on command. What people actually want is a lower TATA Power or BESCOM bill and a way to catch a fridge that’s secretly guzzling electricity.

    Small, targeted upgrades win here. They’re cheaper, easier to install yourself, and honestly less likely to break in six months.

    1. Smart Plugs With Energy Monitoring (₹800 – ₹2,500)

    This is where everyone should start. Smart plugs plug into your existing socket — no wiring, no electrician — and let you track exactly how much power a device eats.

    Here’s a real example. A friend in Jaipur put a smart plug on her old refrigerator, purely out of curiosity. Turned out it was drawing almost 40% more power than a comparable new model. She didn’t replace the fridge (that’s a bigger expense), but she did stop keeping it half-open while chatting on the phone, which is apparently a family habit. Small fix, noticeable drop in the bill.

    Buy 3-4 for around ₹3,000-4,000 total and put them on:

    • Your water purifier (many run 24/7 for no reason)
    • The TV and set-top box combo (standby power adds up more than you’d think)
    • Any old inverter or UPS charging point
    • The washing machine, if you tend to forget it’s plugged in

    2. Smart LED Bulbs Aren’t Just for Mood Lighting

    Direct answer: Smart LED bulbs (₹300-₹700 each) reduce lighting costs mainly through scheduling and dimming, not colour features — a home switching 8-10 bulbs to smart, scheduled LEDs can cut lighting electricity use by roughly 20-30%.

    I’ll admit, when I first bought smart bulbs I was in it for the colour-changing party mode. Turns out the real value is boring: schedules and auto-off. Bulbs that switch off automatically after the room’s been empty for 10 minutes save more money than any amount of manual discipline ever will, because let’s be honest, nobody actually remembers to switch off the balcony light.

    For a 2BHK, budget around ₹4,000-5,000 for 8 smart bulbs. Focus on high-traffic areas — hallway, balcony, kitchen — where lights get left on constantly.

    3. A Smart Thermostat-Style AC Controller Changes the Game

    Central thermostats are a Western thing mostly, but India has its own version: universal AC controllers that sit between your remote and your split AC unit. These little boxes (₹1,500-₹3,000) learn your usage pattern and adjust temperature automatically, usually settling around 24-26°C instead of the 18°C most people set out of habit.

    This one genuinely surprised me. My cousin in Ahmedabad installed one last summer and his AC bill dropped by close to ₹900 in a single month — during peak summer, no less. That’s not a small number for a device that costs less than a nice dinner out.

    A few things worth knowing:

    • Works with most split AC brands (Voltas, LG, Daikin, Blue Star)
    • Setup takes about 15 minutes, no professional needed
    • Some models integrate with Alexa or Google Home if you already have one

    4. Motion Sensor Switches for Passageways

    Staircases, corridors, storerooms — these are the classic “light left on for six hours” zones. A motion sensor switch (around ₹600-₹1,200 per unit) fixes this without you having to think about it ever again.

    I put one in my stairwell after realizing the light there stayed on basically all day, every day, for no reason at all. Nobody was ever consciously turning it off. Within two months I’d basically recovered the cost.

    For a typical house, 2-3 motion sensors covering staircase, entrance, and storeroom will run you roughly ₹2,000-3,000.

    5. Smart Power Strips to Kill Vampire Load

    Direct answer: Vampire load — the electricity devices draw even when switched off but still plugged in — can account for 5-10% of a typical Indian household’s monthly bill. Smart power strips (₹1,000-₹2,000) cut this by fully disconnecting power to idle devices.

    Chargers, set-top boxes, microwave clocks, router adapters — all of them sip power around the clock even when you think they’re “off.” A smart strip with individual switches, placed near your TV unit or study table, lets you kill all of that in one tap or on a schedule.

    Not the flashiest upgrade on this list, I know. But it’s one of the few that requires literally zero behaviour change from anyone in the house.

    6. Smart Water Heater Timers (Especially Worth It in Winter)

    Geysers are quiet electricity monsters, particularly in North India where they run for hours through winter mornings. A smart timer plug or a geyser-specific smart switch (₹1,200-₹2,500) lets you schedule exactly when hot water is available, instead of the heater running continuously “just in case.”

    Picture a household in Jaipur during December — the geyser gets switched on at 6 AM and often just… stays on till someone remembers around 10 AM. That’s four extra hours of heating water nobody’s using. A timer set for a tight 45-minute window before the usual bath time handles this automatically.

    This single change tends to be one of the highest-impact ones on this whole list, especially November through February.

    7. Smart Irrigation Timers for Balcony or Terrace Gardens

    Not everyone has a garden, so skip this one if it doesn’t apply. But if you do have plants on a balcony or terrace, a small drip irrigation timer (₹1,500-₹3,000) prevents overwatering, which — surprisingly — does cost money through wasted water and pump electricity if you’re on a borewell or overhead tank system.

    It’s a smaller saving than the others here, honestly, but it adds up over a year, and your plants tend to do better too. Win-win, if a modest one.

    8. A Basic Smart Home Hub (Only If You’ve Already Got 3+ Devices)

    Direct answer: A smart hub isn’t necessary for one or two devices, but once you own three or more smart plugs, bulbs, or switches, a basic hub (₹1,500-₹3,000) lets you automate them together — for example, turning off all lights and plugs at once when you leave the house.

    I’d actually recommend skipping this until you’ve bought a few of the other items on this list first. Buying a hub before you have devices to connect is like buying a remote before you own the TV.

    Google Home Mini or an Alexa Echo Dot (often available for ₹1,500-₹2,500 during sale season) works fine as a basic hub for most Indian smart home setups.

    [link to related guide on choosing between Alexa and Google Home for Indian homes here]

    Putting It All Together: A Sample ₹20,000 Budget Smart Home Setup

    Here’s roughly how I’d split the budget if starting from zero:

    UpgradeApprox Cost
    4 smart plugs₹3,500
    8 smart bulbs₹4,500
    AC controller₹2,500
    2 motion sensors₹2,000
    Smart power strip₹1,500
    Geyser timer₹1,800
    Smart hub (Echo Dot)₹2,000
    Total~₹17,800

    That leaves a little buffer for shipping or installation tools. [link to related guide on reducing AC electricity bills in summer here]

    How Much Can You Actually Expect to Save?

    I don’t want to oversell this. Numbers vary a lot depending on your home size, family habits, and how bad your current waste actually is. But based on what I’ve seen across a few households that tried this exact combination, monthly electricity bill reductions of ₹500-₹1,500 aren’t unusual, with AC-heavy summer months on the higher end.

    Is that going to make you rich? No. Will it quietly pay for the whole setup within 6-10 months and then keep saving after that? Pretty much every time.

    [link to related guide on smart plug buying guide for India here]

    FAQ: Common Questions About Budget Smart Home Upgrades

    Do smart plugs work with Indian sockets? Yes, most smart plugs sold in India are made for the standard 3-pin Indian socket type. Just double check the amp rating (6A or 16A) matches what you’re plugging in — a heavy appliance needs the 16A version.

    Will these upgrades work without a fast Wi-Fi connection? Most function fine on basic broadband or even a decent mobile hotspot. They don’t need much bandwidth, just a stable connection so the app can send commands.

    Can I install all of this myself, or do I need an electrician? Almost everything here is plug-and-play. The only exception might be the AC controller or geyser switch if your wiring is older or unusual — in that case, a quick electrician visit is worth the ₹200-300 it’ll cost.

    Are cheaper, no-name smart plugs safe to use? Stick to known brands with proper certification (BIS marking, for one). A ₹200 unbranded plug controlling a high-wattage geyser is exactly the kind of shortcut that causes problems later.

    How long before I actually see savings on my electricity bill? Most people notice a difference within one full billing cycle, so around 30-45 days. AC controllers and geyser timers tend to show results the fastest.

    Is it worth doing this in a rented flat? Yes, actually — this is one of the better things about this whole approach. Nearly everything here is removable. Pack it up and take it with you when you move.

    Final Thoughts

    You don’t need to spend a lakh to make your home smarter or your electricity bill smaller. The upgrades that matter most here are the boring ones — plugs, timers, sensors — not the ones that look good in a demo video.

    Start with two or three items from this list, the ones that match your actual habits (geyser timer if you’re in North India, AC controller if summers hit you hard). See the difference on your next bill. Then decide if you want to add more.

    Got an old appliance you suspect is secretly draining your wallet? A ₹1,000 smart plug will tell you the truth in about a week.