Blog

  • How to Choose a Home Renovation Contractor With Confidence

    Planning a kitchen update, a bathroom repair, or a full home renovation? Finding a contractor online is easy; working out who will actually do careful, dependable work takes more effort. A polished website or a long list of glowing reviews can be useful, but neither tells the whole story. Before you hand over a deposit or let a crew start pulling out tiles, take time to check the details that matter on site: relevant experience, clear estimates, proper permissions, and how the contractor handles problems.

    Start With the Work Your Home Actually Needs

    Quick answer: Choose a contractor whose recent projects match the type and scale of your job, rather than hiring solely on price or a broad claim that they do “everything.” Repairing a leaking roof, reconfiguring a kitchen, and adding a room require different skills and planning.

    Write down the work you want done, including what is uncertain. If you have damp patches, for instance, ask whether the contractor will investigate the source of moisture before repainting. If you are considering removing a wall, make clear that you need to know whether it is structural and what approvals may be required. A useful contractor will ask questions about the home and explain what needs checking before promising a final cost.

    Ask for examples of similar completed jobs, ideally with photos and details about the materials and challenges involved. References from past clients can help too. When possible, speak to someone whose project is finished, not just underway, and ask whether the work was completed on schedule, how changes were priced, and how the contractor handled snags.

    Check References, Reviews, and Online Claims

    Online search can help you build a shortlist, but treat reviews as one source of information rather than a guarantee. Look for specific comments about communication, cleanliness, workmanship, and how issues were resolved. A pattern across several detailed reviews is more informative than a string of brief, identical-sounding compliments.

    It is also worth checking whether the business has a consistent name, phone number, and service area across its website and listings. If a contractor’s site contains useful project information, that can make it easier to understand their work. Some businesses work on their online visibility through editorial links; for a plain-language explanation of niche edits and link insertions, remember that a link can help a page get discovered, but it is not proof that a contractor is qualified or reliable. Verify the work and credentials independently.

    Ask for permission to contact previous clients, and follow up with a few direct questions:

    • Did the final invoice match the agreed scope, or were extra charges explained first?
    • Was the work area protected and left reasonably tidy?
    • Did the contractor return to address any defects?
    • Would you hire the same team again for a similar project?

    Get a Written, Comparable Estimate

    A low quote can be tempting, especially when renovation costs are already stretching the household budget. But estimates are only comparable if they describe similar work. Ask each contractor to break down labour, materials, removal and disposal, expected timelines, and anything excluded. The estimate should identify who supplies fixtures and what happens if hidden damage is discovered after work begins.

    For example, “renovate bathroom” leaves plenty of room for misunderstandings. A more useful scope might specify tile removal, waterproofing, replacement fixtures, plumbing adjustments, waste disposal, and the finish expected around fittings. You do not need to dictate every construction method, but you should be able to tell what you are paying for.

    Get any changes in writing before the additional work starts. A brief message confirming the revised scope, cost, and timing is better than relying on a conversation remembered differently by each person a week later.

    Discuss Payments, Timing, and Household Disruption

    Agree on a payment schedule tied to clear stages of work. Be cautious about paying the full amount upfront, and make sure the contract explains deposits, milestone payments, and the process for approving the completed work. Keep receipts and copies of estimates, messages, and any warranties.

    Ask how the crew will access the home, where tools and materials will be stored, and how dust, noise, water shutoffs, or power interruptions will be managed. If children, older relatives, pets, or anyone working from home will be affected, bring that up before the start date. A realistic schedule should allow for deliveries and the possibility of delays, rather than promising an implausibly quick finish.

    Small renovation businesses sometimes need outside help with photos, writing, or marketing while they focus on jobs. A contractor might find freelancers through a marketplace such as Osdire, which covers categories including writing, design, and marketing. That may explain who produced a website or project brochure, but it should not replace your own checks of workmanship, insurance, references, and the agreement for your project.

    Put the Important Terms in Writing

    Before work begins, make sure you have a written agreement that identifies the parties, describes the scope, gives an estimated schedule, sets out payments, and explains how changes and disputes will be handled. Ask who is responsible for obtaining permits or inspections where they are required. For structural work, electrical changes, plumbing, or other regulated tasks, check local requirements and confirm the people doing the work have the appropriate qualifications.

    Do not feel pressured to sign immediately because a price is supposedly available “today only.” A dependable professional should give you time to review the estimate and ask questions. If answers stay vague or important details keep changing, it is reasonable to pause and get another quote.

    FAQs About Hiring a Renovation Contractor

    How many estimates should I get?

    Two or three detailed estimates are often enough to compare scope, cost, and communication. Make sure each contractor is pricing substantially the same work.

    Should I choose the cheapest contractor?

    Not automatically. Compare what is included, the proposed materials, relevant experience, references, and payment terms. A very low quote may leave out essential work or depend on costly add-ons later.

    What should I do if hidden damage is found?

    Ask the contractor to document the issue, explain the options, and provide the added cost and time in writing before proceeding, except where urgent action is needed to prevent further damage.

    Final Thoughts

    Hiring well is less about finding the most impressive website and more about checking how a contractor works in practice. Match their experience to your project, speak with past clients, compare written scopes, and agree on payments and changes before work starts. Take your time with those basics and you are far more likely to end up with a repair or renovation that is safe, well finished, and easier to live through.
  • Color Psychology in Home Design: Choosing the Right Palette

    Color Psychology in Home Design: Choosing the Right Palette

    Ever walked into a room and felt instantly relaxed, without quite knowing why? Or the opposite — a space that just felt off, even though the furniture was perfectly nice? There’s a decent chance colour had a lot to do with it. Color psychology interior design isn’t some abstract art-school theory — it’s genuinely practical stuff that affects how you feel in a room every single day. I’ve repainted rooms purely based on how they made me feel, not just how they looked in photos, and the difference is real. Let’s break down which colours actually do what, and how to pick a palette that fits your life, not just a Pinterest board, in 2026.

    Why Color Psychology Actually Matters at Home

    This isn’t just decorating theory dressed up to sound scientific — there’s genuine psychological research behind how colour affects mood.

    Quick answer: Color psychology in interior design refers to how different hues influence mood, energy levels, and behaviour within a space. Warm colours like red and orange tend to energise, while cool colours like blue and green promote calm — understanding this helps you choose paint and decor that support how you actually want to feel in each room.

    Colour affects us on a level most people don’t consciously register. Warm tones can genuinely raise your heart rate slightly and make a room feel more social and energetic. Cool tones tend to slow things down, which is exactly why so many bedrooms lean toward blues and soft greens rather than bright red or orange.

    There’s also a cultural layer worth mentioning, especially in an Indian context. Colours carry meaning here that goes beyond pure psychology — red signifies auspiciousness and celebration, yellow is tied to knowledge and positivity, and white often carries more formal or even mourning associations in certain regional traditions. I’ve noticed a lot of generic Western colour psychology guides completely skip this, which honestly makes them less useful for Indian homes.

    None of this means you need a psychology degree to decorate well. It just means the colour choice deserves a bit more thought than “I like this shade” — though liking it genuinely matters too, don’t discount that.

    Warm Colors and the Energy They Bring

    Reds, oranges, and yellows fall into the warm category, and they do exactly what the name suggests — they warm up a space, both visually and emotionally.

    Red is intense. It raises energy, appetite, and social interaction, which is why it works so well in dining rooms but can feel overwhelming in a bedroom where you actually want to wind down. A full red bedroom sounds bold in theory, but I’ve seen people regret it within a few months once the novelty wears off.

    Orange carries similar energy but feels friendlier, less aggressive than red. It’s a strong choice for kitchens or casual dining spaces, especially in smaller doses like an accent wall or décor pieces rather than covering an entire room.

    Yellow brings warmth and optimism without red’s intensity. A soft, muted yellow works beautifully in kitchens or hallways, though bright, saturated yellow can get genuinely tiring in large doses — it’s a colour that works best used thoughtfully, not everywhere.

    A few practical ways to use warm colours without overwhelming a space:

    • Reserve intense warm shades for accent walls, not entire rooms
    • Pair warm colours with neutral furniture to balance the visual energy
    • Use warm tones in social spaces (dining rooms, kitchens, living rooms) rather than rest spaces
    • Consider muted, earthy versions of warm colours — terracotta instead of pure red, mustard instead of bright yellow — for a softer effect that suits Indian light conditions well

    Cool Colors and Their Calming Effect

    Blues, greens, and purples sit on the cool end, and they’re the go-to choice when calm matters more than energy.

    Blue is probably the most universally calming colour in interior design, and there’s decent research backing that up. Soft, muted blues in bedrooms genuinely seem to support better rest — I’ve noticed this myself after repainting a bedroom from a warm beige to a soft dusty blue a few years back. Sleep quality is hard to measure precisely, but the room definitely felt calmer to be in.

    Green connects to nature and tends to feel grounding and restorative, which makes it a strong choice for living rooms or home offices where you want calm focus rather than pure relaxation.

    Purple, especially in its softer lavender or mauve forms, carries a slightly more luxurious, contemplative feel. Deep, saturated purple can feel heavy in a small room, though, so it’s worth using carefully.

    A quick breakdown of where cool colours work best:

    1. Bedrooms — soft blues and muted greens support rest and lower visual stimulation before sleep
    2. Home offices or study corners — green in particular seems to support sustained focus better than warmer, more stimulating shades
    3. Bathrooms — cool tones pair naturally with the calm, clean feeling most people want in this space
    4. Meditation or puja corners — soft blues, whites, or pale greens suit the quieter mood these spaces usually call for

    Neutral Colors: The Underrated Foundation

    Neutrals don’t get nearly enough credit in colour psychology conversations, probably because “beige” doesn’t sound as exciting as “energising red.”

    Quick answer: Neutral colors like white, beige, and grey provide a calm, flexible foundation that lets other design elements — furniture, art, accent colours — stand out without visual competition. They also reflect light well, making rooms feel larger and brighter, which matters a lot in smaller Indian homes.

    White creates a genuine sense of openness and cleanliness, though pure white can feel a bit cold or clinical without warmer accents layered in through furniture, textiles, or wood tones.

    Beige and warm greys strike a nice middle ground — neutral enough to be flexible, but with enough warmth to avoid feeling sterile. Honestly, this is probably my personal favourite base for most rooms, precisely because it doesn’t force a strong mood either way; it just lets the room adapt to whatever you’re using it for that day.

    Grey has become genuinely popular in newer Indian homes over the past several years, particularly in urban apartments. It reads as modern and sophisticated, though I’d argue it needs warmer accents — wood, brass, warm lighting — or it can tip into feeling a bit flat and impersonal.

    Choosing Colors Room by Room

    Different rooms serve different psychological purposes, so the palette should genuinely shift room to room rather than staying uniform throughout the house.

    Bedrooms benefit most from cool, muted tones — soft blues, sage greens, gentle lavenders — that support rest rather than stimulation. Avoid bright, saturated colours here even if you love them elsewhere in the house.

    Living rooms can handle more variety since they serve multiple purposes — socialising, relaxing, sometimes working. A neutral base with one warmer accent colour (terracotta, mustard, deep green) often works best here.

    Kitchens do well with warm, appetite-stimulating colours — soft yellows, warm whites, even the occasional red accent — since these genuinely seem to make food feel more inviting, which is well-documented in colour psychology circles.

    Bathrooms lean toward cool, clean tones — soft blues, whites, pale greens — that reinforce that fresh, calm feeling most people want from this space.

    Children’s rooms are a bit of a special case. Overly stimulating bright colours everywhere can actually make it harder for kids to wind down at bedtime, so I’d suggest one accent wall in a fun, energetic colour paired with calmer tones elsewhere in the room. [link to related guide on how long interior paint lasts here — worth knowing before committing to a bold kids’ room colour]

    Common Color Psychology Mistakes People Make

    A few patterns show up again and again when people try to apply colour psychology at home, and most are easily avoidable.

    The biggest one, honestly? Choosing a colour purely because it’s trending, without considering how the room is actually used. A gorgeous deep navy might look stunning on Instagram, but if it makes your small bedroom feel cave-like and closed in, the trend isn’t worth the daily experience of living with it.

    Other mistakes worth watching for:

    • Using too many strong colours across one open-plan space, which creates visual chaos rather than distinct, intentional zones
    • Ignoring natural light levels — a cool grey that looks sophisticated in a bright, south-facing room can feel genuinely gloomy in a north-facing room with less light
    • Forgetting that paint colour looks different at different times of day — always test samples in both morning and evening light before committing
    • Matching colour purely to furniture trends rather than personal comfort — a colour scheme should serve how you actually want to feel, not just what’s currently fashionable

    Has this ever happened to you — painted a room a colour you loved on the swatch, only to feel strangely unsettled once it covered every wall? That’s usually colour psychology working against you rather than for you, and it’s a genuinely common experience, more common than people admit.

    Building a Cohesive Palette Across Your Whole Home

    Individual rooms matter, but there’s real value in thinking about how colours flow between spaces too, especially in open-plan Indian flats where rooms often connect visually.

    Quick answer: A cohesive whole-home palette typically uses one consistent neutral base throughout, with each room introducing its own accent color that still feels connected to the overall scheme — this creates flow between spaces without every room looking identical.

    Pick a neutral base — warm white, soft beige, light grey — and carry it through hallways and connecting spaces. Then let each room introduce its own accent colour on top of that shared foundation.

    This approach solves a common problem in smaller flats where rooms are visible from each other — an overly disjointed colour scheme between adjoining spaces can make the whole home feel choppy and smaller than it actually is, even if each individual room looks fine on its own. [link to related guide on best exterior paint colors that increase home value here — the same cohesion principle applies moving from exterior to interior]

    FAQs About Color Psychology in Interior Design

    What color psychology interior design tips work best for small Indian homes? Light, warm neutrals as a base with a single accent colour per room tend to work best, since they keep small spaces feeling open while still allowing some personality and mood variation.

    Which colors are best for a calming bedroom? Soft, muted blues, sage greens, and gentle lavenders are consistently the top choices for bedrooms, since cool tones support rest better than warm, stimulating shades.

    Does color psychology in home design vary by culture in India? Yes, genuinely. Colours like red and yellow carry auspicious, celebratory meaning in Indian tradition beyond their pure psychological effects, which is worth factoring in alongside general colour theory.

    Can the wrong wall color actually affect my mood daily? It can, especially in rooms you spend a lot of time in. A colour that’s too stimulating in a bedroom, or too cold in a social space, genuinely affects how comfortable you feel there long-term.

    Should every room in my house use the same color scheme? Not necessarily identical, but a shared neutral base with room-specific accents creates a cohesive flow, especially important in open-plan or smaller flats where rooms are visually connected.

    What’s the best color for a small home office to improve focus? Muted greens or soft blues tend to support sustained concentration better than bright, high-energy colours, which can actually become distracting during long work sessions.

    Final Thoughts

    Color psychology interior design principles genuinely help you build a home that supports how you want to feel, room by room, rather than just chasing whatever’s trending this season. Warm tones energise, cool tones calm, and neutrals give you the flexible foundation to tie it all together — the trick is matching the colour to the room’s actual purpose, not just the mood board.

    Before your next repaint, spend a week paying attention to how each room in your home actually makes you feel right now. That honest observation will guide your palette choices far better than any trend list, mine included.

  • Minimalist Interior Design Tips for Small Indian Homes

    Minimalist Interior Design Tips for Small Indian Homes

    Ever walked into a small flat that somehow feels calm and open, then gone home to your own equally small flat that feels like it’s closing in on you? The difference usually isn’t square footage — it’s approach. Minimalist interior design small homes solutions have become genuinely popular in Indian cities lately, and honestly, it’s about time. Most of us grew up in homes packed with furniture, showpieces, and “just in case” storage. Unlearning that takes effort. But done right, minimalism isn’t about having an empty, sterile flat — it’s about making a small space breathe. Let’s get into what actually works for real Indian homes in 2026, not the impossibly staged versions you see online.

    What Minimalist Design Actually Means for Indian Homes

    There’s a lot of confusion here, so let’s clear it up first.

    Quick answer: Minimalist interior design for small homes means keeping only furniture and decor that serves a genuine purpose, using a limited colour palette, and prioritising open floor space over clutter. It’s not about owning nothing — it’s about owning intentionally, especially important in Indian homes where multi-generational living often means more stuff, not less.

    A lot of people assume minimalism means white walls, bare rooms, and no personality — basically a Scandinavian catalogue photo. That’s not quite right, and frankly, it doesn’t translate well to Indian living anyway. We’ve got puja corners, guests who drop by unannounced, festival decorations that come out seasonally, and often extended family staying over. Pure Western minimalism doesn’t account for any of that.

    What actually works is a middle ground — fewer, better pieces, smart storage that hides the seasonal stuff, and enough breathing room that the flat doesn’t feel like an obstacle course. I’ve noticed the Indian homes that pull off minimalism well aren’t empty at all. They just don’t have three showpiece cabinets crammed into one living room, which, let’s be honest, a lot of us grew up with.

    Decluttering Before You Decorate

    This step gets skipped constantly, and it’s genuinely the most important one on this entire list.

    You can’t design a minimalist small home around clutter that’s already there. Buying new furniture or repainting walls without decluttering first is like putting a nice tablecloth over a messy table — it looks fine for about a day.

    A practical approach that actually works:

    • Go room by room, not the whole house at once — trying to declutter everything in a weekend usually leads to giving up halfway
    • Use the “one year” rule loosely — if you haven’t touched something in over a year and it’s not seasonal or sentimental, it’s probably safe to let go
    • Separate “genuinely sentimental” from “just old” — these get confused constantly, and it’s worth being honest with yourself here
    • Deal with paper clutter first — old bills, documents, random files pile up fastest and take up more visual space than people realise

    Picture a small business owner in Jaipur who runs her business from a spare room in her 2BHK flat. She spent one weekend just decluttering that single room before touching any decor — donated old furniture, digitised years of paperwork, sold off unused inventory shelving. The room felt nearly 30% bigger afterward, without a single new purchase. That’s the power of subtraction before addition.

    Choosing a Restrained Color Palette

    Colour does a lot of heavy lifting in small-space minimalism, more than most people expect.

    Quick answer: A restrained colour palette — typically 2-3 core tones plus one accent colour — makes small rooms feel larger and calmer, since visual continuity across walls, furniture, and decor reduces the sense of clutter even before you remove a single item.

    Stick to warm whites, soft greys, or muted earthy tones as your base. These reflect light well, which genuinely matters in smaller Indian flats that often don’t get generous natural light through every window.

    Save bold colour for one accent — a cushion set, a single wall, a piece of art — rather than spreading multiple bright shades across the room. This is honestly the single biggest mistake I see in small Indian homes trying to go minimalist: they get the furniture right, then undo it all with five different bright colours competing across cushions, curtains, and rugs.

    Wood tones (light oak, warm teak) pair beautifully with neutral walls and add warmth without adding visual noise, which pure white-on-white minimalism sometimes lacks.

    Multi-Functional Furniture for Small Spaces

    Indian homes need furniture that works harder than a single job, especially in genuinely compact flats.

    A sofa-cum-bed remains one of the smartest investments for small living rooms that occasionally need to double as a guest room. Storage ottomans do double duty as seating and a place to stash extra bedding or festival decor.

    A few specific pieces worth considering:

    1. Extendable dining tables that seat 4 daily but expand to 6-8 for family gatherings, common enough in most Indian households
    2. Wall-mounted folding study desks that disappear when not in use — genuinely useful in one-room setups or shared spaces
    3. Beds with built-in drawer storage underneath, eliminating the need for a separate wardrobe in tiny bedrooms
    4. Nesting side tables that stack together when not needed, then spread out for guests

    The trick with multi-functional furniture is not overdoing the “convertible” gimmick either. I’ve seen people buy furniture that transforms five different ways and ends up being mediocre at all five, rather than genuinely good at two. Pick pieces that do one or two jobs really well.

    Smart Storage Solutions That Hide the Everyday Clutter

    This is where minimalism and real Indian living actually meet in the middle — because we do accumulate things, festival season alone guarantees that.

    Vertical storage is your best friend in small homes. Floor space is precious, but wall space usually isn’t being used to its full potential. Tall, narrow shelving units take up minimal footprint while offering serious storage capacity.

    Some approaches that genuinely work:

    • Closed cabinet storage over open shelving for anything that isn’t decorative — open shelves look great in photos but get cluttered fast in daily use
    • Under-bed storage bins for seasonal items like blankets, festival decor, or extra bedding
    • Modular wardrobe systems that can be reconfigured as your storage needs change over time
    • A dedicated “landing zone” near the entrance for keys, mail, and daily items, so they don’t end up scattered across the living room

    Has this ever happened to you — bought a beautiful open shelf, styled it perfectly for a week, and then it slowly filled up with random stuff until it looked worse than before? That’s basically the universal experience with open storage in a lived-in home. Closed storage just survives real life better.

    Making the Most of Natural Light

    Light genuinely changes how spacious a small room feels, sometimes more than the furniture arrangement itself.

    Quick answer: Maximising natural light through sheer curtains, strategically placed mirrors, and unobstructed windows is one of the most effective, low-cost ways to make a small home feel open, since good lighting reduces the visual weight of furniture and walls alike.

    Sheer or light-coloured curtains let daylight filter through without blocking it entirely, unlike heavy drapes that darken a room even during the day. Save the heavier curtains for genuine privacy needs, like bedrooms facing a busy street.

    Mirrors placed opposite windows bounce natural light deeper into the room, and this trick genuinely works — it’s not just decorating folklore. A single well-placed mirror can make a narrow hallway or small living room feel noticeably more open.

    Avoid blocking windows with tall furniture, even if that spot seems like the only place a bookshelf fits. It’s almost always worth rearranging the room slightly to keep window access clear.

    Multi-Purpose Rooms Without Feeling Chaotic

    Small Indian homes often need one room to serve two or three functions, and minimalist design handles this better than a cluttered approach ever could.

    A living room that also serves as a home office needs clear visual separation, even without walls. A folding screen, a strategically placed bookshelf, or even just a different rug under the desk area signals “this is a different zone” without needing an actual partition.

    A few zone-separation ideas that work in compact flats:

    • Use a rug to define a seating area distinctly from a dining or work corner
    • Keep work-related items in closed storage when not in active use, so the “office” disappears when the workday ends
    • Choose furniture on castors or wheels for spaces that need to reconfigure between day and evening use
    • Vertical room dividers (slatted wood, cane screens) add separation without blocking light the way a solid partition would [link to related guide on budget wall decor ideas using local materials here]

    FAQs About Minimalist Interior Design for Small Homes

    Is minimalist interior design suitable for Indian homes with joint families? Yes, though it needs adapting — smart closed storage and multi-functional furniture matter even more when more people share the same small space daily.

    How do I start minimalist interior design small homes projects on a tight budget? Start with decluttering, which costs nothing, then focus spending on one or two multi-functional furniture pieces rather than a full room overhaul at once.

    Does minimalist design mean I can’t display religious or sentimental items? Not at all. A dedicated, well-organised puja corner or a single curated shelf for sentimental pieces fits minimalist principles just fine — it’s about intentional display, not elimination.

    What colours work best for minimalist small Indian homes? Warm whites, soft greys, and muted earthy tones as a base, with one accent colour used sparingly through cushions, art, or a single wall.

    How much storage space do I actually need in a minimalist small home? Enough closed storage to hide seasonal and non-decorative items completely — the goal is that everyday clutter has a home, not that you own fewer belongings than you need.

    Can rented flats be decorated in a minimalist style without permanent changes? Definitely — furniture choices, storage, colour through textiles, and lighting do most of the work, none of which requires drilling or repainting a rented space.

    Final Thoughts

    Minimalist interior design small homes approaches work particularly well in Indian flats, once you adapt the concept to actual Indian living rather than copying a Scandinavian catalogue directly. Declutter first, choose a restrained palette, invest in furniture that pulls double duty, and let closed storage handle the everyday chaos that real life inevitably brings.

    Start with just one room this month — your living room or bedroom, whichever feels most cluttered right now — and apply these principles there before tackling the whole flat. You’ll likely find that one calm, breathable room changes how the entire home feels, long before you’ve touched every corner.

  • Festive Home Decoration Ideas for Small Spaces

    Festive Home Decoration Ideas for Small Spaces

    Living in a compact 1BHK or a small rented flat and worried your home won’t feel festive enough this year? I hear this every single Diwali season, usually from someone comparing their 600 sq ft flat to their parents’ sprawling ancestral house. Here’s the thing, though — some of the best festival home decoration ideas I’ve seen actually came from small spaces, not big ones. Constraints force creativity. A cramped balcony with three diyas and a string of marigolds can feel warmer than a huge hall decorated half-heartedly. Let’s go through practical, budget-friendly ways to make a small home genuinely glow this festive season, without needing extra square footage you don’t have.

    Why Small Spaces Actually Have an Advantage

    This might sound like I’m just trying to make you feel better about a small flat, but hear me out.

    Quick answer: Small spaces require less decor to feel complete, which means every piece you choose has more visual impact. A single well-placed rangoli or a cluster of diyas can transform an entire small room, whereas the same items would get lost in a larger house.

    Big houses need volume — lots of lights, multiple decor zones, enough material to fill visual space without it looking sparse. That gets expensive fast, and honestly, sometimes it ends up looking cluttered rather than festive.

    A small space doesn’t have that problem. One well-lit corner near the entrance can carry the entire festive mood for your whole flat. I’ve noticed that guests actually comment more on a thoughtfully done small space than a haphazardly decorated large one — it just feels more intentional, more personal.

    There’s a practical side too. Less space means less decor to buy, less to store afterward, and less time spent putting it all up and taking it down. For someone juggling work and festival prep in the same week, that matters more than people admit.

    Entrance and Doorway Decor That Punches Above Its Size

    Your entrance does most of the visual work, so this is where to focus first if you’re short on space elsewhere.

    A simple rangoli at the doorstep remains the single highest-impact, lowest-cost festival decoration idea there is. Even a small 2×2 feet design using coloured rice or flower petals creates that instant “something special is happening here” feeling before anyone even steps inside.

    A few doorway ideas that work well in tight spaces:

    • Torans (door hangings) made from marigold, mango leaves, or fabric — costs as little as ₹50-150 and instantly signals festivity
    • LED string lights wrapped around the door frame, which use minimal space and look striking after dark
    • A pair of small brass or terracotta diyas flanking either side of the door, even on a narrow landing
    • Small potted marigolds or chrysanthemums placed directly outside, if you’ve got even a foot of space on either side

    Picture a small business owner in Jaipur who lives in a narrow first-floor flat with barely any entrance space to speak of. Every Diwali, she does a small rangoli right on the stairwell landing along with a single string of lights along the railing. It’s genuinely one of the most photographed spots by her building’s other residents — proof that scale really doesn’t matter as much as thoughtfulness does.

    Balcony and Window Decoration Ideas

    If you’ve got even a small balcony or a decent-sized window ledge, you’ve got more decorating real estate than you might think.

    Quick answer: Balconies and windows are ideal for festival home decoration ideas in small spaces because they’re visible from outside, catch natural light beautifully, and don’t compete for floor space with furniture or foot traffic inside the flat.

    String lights along a balcony railing transform even a tiny outdoor space after dark. Solar-powered fairy lights are a smart choice here too — no extra wiring hassle, and they charge through the day automatically.

    Hanging planters with marigold or seasonal flowers add colour without taking up any actual floor space. If your balcony railing allows it, hanging diyas or small lanterns along the edge create a lovely glow visible from the street below, which honestly feels nice for the whole neighbourhood, not just you.

    Window sills work similarly. A row of small diyas, a few candles in glass holders, or a small string of lights along the frame turns even a single window into a genuine festive focal point, visible both from inside and outside the flat.

    Living Room Decor Without Overcrowding

    The living room is usually where people feel the most pressure to “do a lot,” but in a small space, restraint genuinely works better.

    Pick one wall or one corner to be your festive focal point rather than spreading decor thin across the entire room. A single decorated console table near the entrance, or one accent wall with lights and a few hanging decorations, does more visual work than scattered bits everywhere.

    Some ideas that don’t eat up floor space:

    1. Wall-mounted diyas or LED lights strung vertically create height without needing any floor footprint at all
    2. A small tabletop rangoli or flower arrangement on your coffee table, refreshed daily with fresh petals if you want that extra touch
    3. Festive cushion covers on your existing sofa — genuinely one of the cheapest, most effective swaps, often under ₹200 per cover
    4. A single statement piece, like a brass or clay Ganesh idol on a decorated tray, placed somewhere central

    I’ll admit a personal bias here — I think people massively overdo fairy lights indoors sometimes, wrapping every surface until the room feels more like a store display than a home. One well-placed string, used thoughtfully, usually looks better than five scattered everywhere.

    Using Rangoli Designs Strategically in Tight Spaces

    Rangoli deserves its own section because it’s genuinely the best value-per-square-foot festival decoration you can do.

    Traditional large rangoli designs assume you’ve got a big open floor area, which small flats often don’t have. The fix is simple — scale down, and get strategic about placement instead.

    A few adaptations that work well in compact homes:

    • Mini rangoli stencils, widely available now, let you create clean, detailed patterns in a fraction of the space and time
    • Doorstep or threshold rangoli (just 1-2 feet wide) still delivers full visual impact since it’s the first thing anyone sees
    • Floating rangoli in a shallow bowl of water with flower petals and a diya works beautifully on a small side table if you don’t have floor space at all
    • Chalk or rangoli powder on a stair step, if you’ve got a stairwell, adds a lovely festive touch that most people never think to use

    Has this ever happened to you — spent hours on an elaborate rangoli only to have it get smudged by foot traffic within the day? In small, high-traffic flats, this happens fast. Placing your rangoli slightly to one side of the main walking path, rather than directly in the centre, solves this pretty easily.

    Budget-Friendly Lighting Ideas for Small Homes

    Lighting genuinely does the heaviest lifting in festival decor, and thankfully it’s also one of the more affordable categories if you shop smart.

    Quick answer: LED string lights, diyas, and lanterns remain the most budget-friendly festival home decoration ideas for small spaces, typically costing between ₹100-500 for enough lighting to transform an entire small flat’s festive mood after dark.

    A few cost-conscious tips:

    • Buy warm white LED strings over multicoloured ones — they look more elegant and work across multiple festivals, not just one specific occasion
    • Reuse diyas year after year rather than buying new terracotta ones each time, just repaint or clean them up
    • Battery-operated tea lights are safer than open flame diyas in tight spaces, especially if you’ve got curtains or paper decorations nearby
    • Group your lighting rather than spreading it thin — one well-lit corner beats faint lighting scattered across the whole flat

    For context, a decent set of warm white LED string lights (around 20 feet) typically runs ₹150-300, and that single string can genuinely transform a small living room or balcony on its own. [link to related guide on budget wall decor ideas using local materials here]

    Kitchen and Puja Corner Decoration

    Small flats often combine puja space with the kitchen or a corner of the living room, and that’s completely fine — it just needs a slightly different decorating approach.

    Keep the puja corner decor simple but intentional. A fresh marigold garland, a small diya set, and maybe a strand of lights framing the shelf or niche does the job without overwhelming a tight space.

    For the kitchen itself, small festive touches work better than elaborate ones:

    • A decorated thali or plate for sweets displayed on the counter adds colour without taking counter space away from actual cooking
    • Small rangoli-patterned coasters or a festive tablecloth on your dining table, if you have one, instantly shifts the mood
    • Fresh flowers in a small vase near the window brighten the space with almost zero effort or cost

    Making Small Spaces Feel Festive Without Overcrowding

    There’s a real risk in small homes of over-decorating simply because you’re trying to compensate for limited square footage. Resist that urge.

    Quick answer: The key to festival home decoration ideas in small spaces is choosing fewer, more meaningful pieces over volume — a cluttered small room looks chaotic, while a curated one feels genuinely festive and welcoming, regardless of size.

    Stick to a simple colour palette — maybe just warm gold, deep red, and marigold orange — rather than mixing every festive colour available. This alone makes small-space decor look far more put-together.

    Leave breathing room. A single beautifully lit corner with intention behind it beats five half-decorated corners competing for attention in a room that’s already tight on space to begin with.

    FAQs About Festival Home Decoration Ideas for Small Spaces

    What are the best budget festival home decoration ideas for a small flat? Rangoli at the entrance, warm white LED string lights, and festive cushion covers top the list — all genuinely affordable and require minimal space to make a strong visual impact.

    How can I decorate a small balcony for festivals? Solar fairy lights along the railing, hanging planters with seasonal flowers, and a few diyas or lanterns transform even a compact balcony without needing much space or budget.

    Is it worth doing rangoli in a small home with high foot traffic? Yes, but place it slightly off the main walking path, or go with a smaller doorstep design, so it doesn’t get smudged constantly through the day.

    What festival decoration ideas work in a shared or rented flat? Removable options like string lights, torans, cushion covers, and freestanding diyas work best since they don’t require drilling or permanent changes landlords often object to.

    How do I avoid making my small living room feel cluttered during festivals? Pick one focal point rather than decorating every surface, stick to a limited colour palette, and resist buying more decor items than the space genuinely needs.

    Can I combine festival decor with my regular home decor rather than replacing it? Absolutely, and it’s often the smarter approach for small spaces — layer festive touches like cushion covers, lights, and flowers over your existing setup instead of adding entirely new decor pieces.

    Final Thoughts

    Small spaces genuinely don’t need to compromise on festive spirit — if anything, the best festival home decoration ideas for tight flats prove that intention beats square footage every time. A well-placed rangoli, a string of warm lights, and a curated corner or two will make your home feel genuinely festive without draining your budget or your weekend.

    This year, before buying a pile of new decorations, walk through your flat and pick just two or three spots — your entrance, a window, maybe a small console table — and focus your effort there. You’ll likely find your small home feels warmer and more thoughtfully festive than a bigger space decorated in a rush ever could.

  • Budget Wall Decor Ideas Using Local Materials

    Budget Wall Decor Ideas Using Local Materials

    Staring at a bare wall, wanting it to look “done” but not wanting to spend a fortune on imported prints or branded decor pieces? I get it. Some of the best budget wall decor ideas I’ve come across weren’t from a fancy store at all — they came from a local kumhar’s stall, a hardware shop, or someone’s old dupatta collection. Living in Jaipur, I’ve noticed just how much genuinely beautiful raw material is sitting around us — terracotta, cane, block-printed fabric, even leftover marble offcuts — and most people walk right past it looking for something from an online catalogue instead. Let’s fix that. Here’s how to decorate real walls with real local materials, without draining your budget in 2026.

    Why Local Materials Beat Store-Bought Decor Anyway

    This isn’t just a money-saving argument, though it certainly helps there too.

    Quick answer: Local materials for budget wall decor cost significantly less than imported or branded pieces, often 60-80% cheaper, while adding authentic regional character that mass-produced decor simply can’t replicate. They also tend to age and weather more gracefully in Indian homes.

    Store-bought wall art, especially anything imported or “designer,” carries a markup that has nothing to do with actual craftsmanship. You’re often paying for packaging and brand name more than the object itself.

    Local materials flip that completely. A terracotta wall plate from a Molela artisan in Rajasthan might cost ₹300-800, and it’s handmade, one of a kind, and genuinely tied to a regional craft tradition. Compare that to a mass-produced ceramic wall piece from a big retail chain running ₹1,500-2,500 for something far less distinctive.

    There’s also a durability angle people don’t think about. Materials like terracotta, cane, and treated wood have survived centuries in Indian homes for a reason — they handle our climate better than a lot of imported decor pieces designed for entirely different weather conditions.

    Terracotta and Clay Wall Art

    If there’s one material I’d push hardest for budget wall decor, it’s terracotta.

    Rajasthan, especially areas around Molela village near Udaipur, has a long tradition of terracotta relief art — gods, animals, folk scenes, all worked into clay panels. These pieces run anywhere from ₹200 for small pieces to ₹2,000-3,000 for larger, more detailed panels, and they genuinely look like nothing you’d find in a regular home decor store.

    A few practical ways to use them:

    • Group 3-5 small terracotta wall plates in an asymmetric cluster instead of one large piece — costs less and looks more curated
    • Terracotta wind chimes or small wall-hung diyas add texture without covering the whole wall
    • Unglazed terracotta pairs beautifully with white or sand-coloured walls, letting the earthy tone actually stand out

    I’ll be honest, though — I’ve noticed some people over-cluster these and it starts feeling busy rather than curated. Less is usually more here. Three well-placed pieces beat twelve crammed together.

    Cane and Bamboo Wall Hangings

    Cane work has had a genuine resurgence lately, and for good reason — it’s affordable, lightweight, and works in almost any room style.

    Quick answer: Cane and bamboo wall decor typically costs between ₹150-600 for medium-sized pieces, making them one of the most affordable budget wall decor ideas available. Their natural, woven texture also adds warmth to plain walls without requiring any additional colour or paint.

    Cane circular mirrors, woven wall baskets, and bamboo lattice panels are all widely available in local markets — places like Bapu Bazaar in Jaipur or similar local craft markets in most Indian cities usually have several vendors selling these directly.

    A hanging arrangement of three or four cane baskets in graduating sizes, mounted flat against a wall, creates genuine visual interest for under ₹1,000 total. It photographs well too, if that matters to you for social media purposes.

    One small caution — cane doesn’t love extreme humidity long-term, so if you’re in a coastal city, keep these away from bathroom-adjacent walls or areas with poor ventilation. [link to related guide on best flooring for humid climate here — the same humidity logic applies to décor materials]

    Block-Printed and Textile Wall Hangings

    Fabric wall decor is probably the single cheapest option on this whole list, and Rajasthan happens to be one of the best places in the country to source it.

    Block-printed fabric panels, framed dupattas, or even simple tapestries made from leftover sari material can transform a wall for genuinely little money. Sanganeri and Bagru block print traditions, both local to the Jaipur region, produce fabric that looks rich and intentional even when the piece itself cost under ₹500.

    A few ideas that consistently work:

    1. Stretch a block-printed fabric panel over a simple wooden frame — instant “art piece” for a fraction of framed print costs
    2. Hang an old dupatta or stole with a simple wooden dowel and some jute string — no sewing required
    3. Layer two contrasting prints slightly overlapping for a more bohemian, collected-over-time look
    4. Use a single large indigo or madder-red block print as a bold statement piece behind a bed or sofa

    Picture a small business owner in Jaipur who runs a home-stay. She decorated three guest rooms almost entirely with local block-printed textile panels sourced directly from a Bagru printing unit, spending under ₹3,000 total across all three rooms. Guests comment on the decor constantly — more, actually, than they comment on some of the pricier furniture pieces in the same rooms.

    Repurposed and Upcycled Materials

    Some of the most interesting budget wall decor ideas cost almost nothing, because they use things you’d otherwise throw away.

    Old wooden window frames (jharokhas), especially from renovation sites or demolition yards, make stunning wall pieces. Mount one directly on a wall, maybe with a small mirror or plant behind the frame, and you’ve got a genuine conversation piece for the cost of cleaning and a bit of sanding.

    Other upcycling ideas worth trying:

    • Broken bangles or old jewellery pieces arranged in a shadow box frame
    • Marble or stone offcuts from a local stonemason, often given away free or sold very cheap, arranged as a geometric wall pattern
    • Old clay pots, cracked and unusable for actual planting, mounted flat against a wall as sculptural pieces
    • Reclaimed wood planks, sanded and lightly varnished, used as floating shelves that double as decor

    This category takes a bit more hunting and patience than just buying something ready-made. But the result usually looks far more personal, and honestly, that’s the whole point of budget decor done well — it shouldn’t look budget, it should look intentional.

    DIY Wall Art Using Local Techniques

    If you’re willing to put in a weekend of effort, DIY genuinely stretches your budget the furthest.

    Quick answer: DIY wall art using local techniques like block printing, mandala painting, or simple stencil work can cost under ₹500 in materials while producing genuinely unique pieces that mass-produced decor can’t match, especially when using traditional regional motifs.

    Learning basic block printing at home isn’t as intimidating as it sounds. Wooden printing blocks are available cheaply at craft markets, fabric paint runs ₹100-150 for a decent-sized bottle, and a plain cotton canvas costs next to nothing. A weekend afternoon can produce two or three framed pieces.

    Mandala or rangoli-inspired wall painting is another accessible option, especially if you’ve got a steady hand or don’t mind a slightly imperfect result — honestly, a bit of imperfection often makes hand-painted work look more authentic anyway, not less.

    Stencilling is the easiest entry point if you’re nervous about freehand work. Pre-cut jaali-pattern stencils (inspired by traditional Rajasthani window lattice work) are widely available online and locally, and a single stencil can be reused across multiple wall sections for a cohesive, patterned look.

    Budgeting Your Wall Decor Project

    Let’s talk actual numbers, because vague advice like “it’s affordable” doesn’t help much when you’re planning.

    For a single accent wall in a mid-sized bedroom or living room, here’s a realistic budget breakdown:

    • Terracotta cluster (5-6 pieces): ₹1,000-1,500
    • Cane hanging arrangement: ₹600-900
    • Block-printed textile panel with frame: ₹500-800
    • Small DIY stencil project: ₹300-500

    Mixing two or three of these categories on one wall — say, a terracotta cluster alongside a single framed textile piece — typically lands you a genuinely striking accent wall for under ₹2,500 total. Compare that to a single branded canvas print from a home decor chain, which can easily run ₹2,000-4,000 on its own.

    FAQs About Budget Wall Decor Ideas

    What are the cheapest budget wall decor ideas using local Indian materials? Terracotta wall plates, block-printed fabric panels, and cane hangings top the list, generally costing between ₹150-800 per piece and widely available in most Indian craft markets.

    Where can I buy affordable local wall decor materials? Local markets like Bapu Bazaar in Jaipur, or equivalent craft markets in most Indian cities, plus artisan villages directly producing terracotta, block print, and cane work at source prices.

    Is DIY wall decor actually cheaper than buying ready-made pieces? Usually yes, especially for fabric-based or stencil projects, since raw materials cost a fraction of a finished piece — though it does require your time and a bit of patience.

    Do local materials like terracotta and cane last as long as manufactured decor? Often longer, actually, since these materials have traditionally suited Indian climate conditions. Cane needs some humidity caution in coastal regions, but terracotta and treated wood hold up very well.

    How do I arrange budget wall decor so it doesn’t look cluttered? Stick to odd numbers (3 or 5 pieces), leave breathing room between items, and avoid mixing too many different materials on one small wall section.

    Can budget wall decor work in a rented apartment? Yes, most of these ideas — cane hangings, framed textiles, lightweight terracotta pieces — use simple hooks or adhesive strips rather than heavy drilling, making them landlord-friendly.

    Final Thoughts

    Budget wall decor ideas built around local materials genuinely outperform mass-produced decor, both in cost and in character. Terracotta, cane, block-printed textiles, and a bit of DIY effort can transform a bare wall for a fraction of what a branded store piece would cost, and you end up with something that actually feels tied to where you live.

    Start with one wall, mix two or three material types, and resist the urge to over-decorate right away. Visit a local craft market this weekend if you can — half the fun of this approach is discovering pieces you didn’t know you wanted until you saw them in person.

  • How Long Does Interior Paint Really Last?

    How Long Does Interior Paint Really Last?

    Standing in your living room, staring at a wall that’s looking a bit tired, and wondering if it’s finally time to repaint? Or maybe you just moved into a new place and want to know what you’re working with before you start planning changes. Either way, how long does paint last is one of those questions with a frustratingly “it depends” answer — but that doesn’t mean there’s nothing concrete to say. I’ve repainted enough rooms, and watched enough paint jobs age badly, to know there’s a real pattern to how long a coat actually holds up. Let’s get into the specifics, room by room, so you know what to actually expect.

    The Short Answer: Paint Lifespan at a Glance

    Before getting into details, here’s the quick version people usually want first.

    Quick answer: Interior paint typically lasts 5-10 years depending on the room, paint quality, and wall traffic. High-moisture areas like kitchens and bathrooms need repainting every 3-5 years, while low-traffic rooms like bedrooms can go 8-10 years or longer with quality paint.

    Of course, that’s a range, not a fixed number. A premium paint job in a spare bedroom that barely gets used could genuinely last 12-15 years. A budget paint job in a busy hallway with kids running through it? You might be looking at a touch-up within 2-3 years.

    The honest truth is paint doesn’t just “expire” on a calendar. It degrades gradually — fading, chalking, small cracks — and at some point you personally decide it’s crossed the line from “still fine” to “needs doing.”

    How Long Does Paint Last in Different Rooms?

    Not all rooms age the same way, and this is where a lot of generic paint guides fall short.

    Living rooms and bedrooms typically hold up the longest — 8-10 years with decent quality paint, since they see less humidity and moderate foot traffic. These rooms rarely need repainting purely for durability reasons; it’s usually more about wanting a style refresh.

    Kitchens face a tougher environment. Steam, grease, occasional splatters — all of it wears paint down faster. Expect 3-5 years before the walls start looking genuinely tired, especially near the stove and sink areas.

    Bathrooms are the toughest test of all. Constant humidity, occasional water splashing, and steam from hot showers all attack the paint film. Even good quality bathroom-rated paint often needs attention within 3-4 years, and cheaper paint can start peeling within 18 months in a badly ventilated bathroom.

    Hallways and staircases see heavy physical contact — bags brushing against walls, kids’ hands, furniture bumps. Scuffing and scratches show up here well before the colour itself actually fades, usually within 4-6 years.

    Children’s rooms are their own category, honestly. Between crayon marks, sticker residue, and general chaos, I’ve seen these need touch-ups within 2 years regardless of paint quality — that’s just parenting reality, not a paint problem.

    What Actually Determines How Long Paint Lasts?

    Paint quality gets blamed for everything, but it’s really just one factor among several.

    Quick answer: Paint longevity depends on paint quality, application technique, wall preparation, humidity levels, and how much foot traffic or physical contact the wall receives. Premium paints with proper primer and prep can outlast budget paint by several years, even in identical conditions.

    Here’s what genuinely moves the needle:

    • Paint quality itself — premium acrylic emulsions with higher pigment volume concentration simply hold colour and resist wear longer than budget options
    • Surface preparation — skipping primer or painting over a poorly cleaned, uneven wall is probably the single biggest reason paint jobs fail early
    • Number of coats — a proper two-coat job lasts noticeably longer than a rushed single coat, even with the same paint can
    • Humidity exposure — as covered above, this is why bathrooms and kitchens age faster than bedrooms
    • Sunlight exposure — walls that get direct sun through large windows fade faster, sometimes visibly within 2-3 years
    • Application method — I’ve noticed that roller-applied paint tends to have a slightly more even, durable finish than brush application on large wall surfaces, though brushes are obviously necessary for edges and corners

    A cheap paint job done well can occasionally outlast an expensive paint job done badly. Prep work really is that important.

    Signs Your Paint Is Actually Due for a Repaint

    People often wait too long simply because they’re not sure what to look for.

    Fading is the obvious one, especially on walls that catch direct sunlight for several hours a day. But there are subtler signs too, and honestly, these matter more.

    1. Chalking — if you run your hand along the wall and a fine powdery residue comes off on your fingers, that’s the paint binder breaking down
    2. Hairline cracks — small cracks, especially around doorframes or corners, usually mean the paint film has become brittle
    3. Peeling or bubbling — almost always a moisture problem underneath, not just a surface issue
    4. Visible patchiness — uneven sheen across the wall, particularly noticeable under bright light
    5. Persistent stains that won’t wash off — once paint stops being washable, it’s genuinely past its functional life, not just its aesthetic one

    Has this ever happened to you — you go to wipe a mark off the wall and instead of cleaning up, you end up rubbing the paint itself thin? That’s usually a sign the paint’s durability has already worn down, even if the colour still looks okay from a distance.

    Interior vs Exterior Paint: Why Lifespan Differs

    People sometimes assume all paint ages at similar rates, but interior and exterior paint face completely different conditions.

    Exterior paint deals with direct sun, rain, temperature swings, and pollution — genuinely harsh stuff. It’s formulated with UV-resistant additives and flexible binders to handle that, but even so, exterior paint typically needs repainting every 5-7 years in most Indian cities. [link to related guide on best exterior paint colors that increase home value here]

    Interior paint doesn’t face that level of environmental stress, which is exactly why it lasts longer on average. The trade-off is that interior paint isn’t built to handle UV or heavy moisture the way exterior formulations are — so using leftover exterior paint indoors, or vice versa, isn’t actually a great shortcut even though people occasionally try it to save money.

    Premium vs Budget Paint: Is the Price Difference Worth It?

    This is where I’ll share a genuine opinion, and some readers might disagree — that’s fine.

    I think premium paint is usually worth it for main living spaces, but budget paint is perfectly reasonable for storage rooms, utility areas, or spaces you’re likely to repaint again soon anyway.

    A rough cost comparison for context:

    • Budget emulsion paint: ₹150-250 per litre, coverage roughly 120-140 sq ft per litre
    • Mid-range emulsion: ₹300-450 per litre, generally better coverage and washability
    • Premium emulsion (washable, low-VOC formulations): ₹500-800+ per litre, often with 5-7 year warranties from the manufacturer

    Picture a small business owner in Jaipur repainting both his home and a small rented office space in the same month. He went premium for the home’s living areas, since he wanted it to last, but chose budget paint for the office storage room, since durability mattered less there. That’s honestly the right instinct — match the paint tier to how much the space actually needs to hold up.

    The maths works out in favour of premium paint if you’re not planning to repaint again within 5 years anyway. If you know you’ll want a style change sooner, save the money.

    How Paint Finish Affects Longevity

    Finish gets less attention than colour, but it genuinely changes how long a paint job holds up visually.

    Quick answer: Satin and semi-gloss finishes last longer and clean more easily than matte finishes, making them better choices for high-traffic areas, while matte finishes look more premium but show marks and wear more visibly over time.

    Matte finish is popular because it looks rich and hides minor wall imperfections well. The downside is it’s harder to clean — scrubbing a matte wall too hard can actually burnish the surface, leaving a shiny patch that looks worse than the stain you were trying to remove.

    Satin and eggshell finishes sit in a nice middle zone. Slight sheen, genuinely washable, and they hold up noticeably better in hallways, kids’ rooms, and kitchens.

    Semi-gloss and gloss finishes are the most durable and easiest to wipe clean, which is exactly why they’re the standard choice for doors, window frames, and bathroom walls, even though most people wouldn’t want that much shine across an entire living room.

    Simple Ways to Extend Your Paint’s Life

    A few habits genuinely stretch out how long a paint job stays looking good, and none of them cost much.

    • Use a soft, slightly damp cloth for cleaning rather than abrasive scrubbing, especially on matte walls
    • Keep bathroom exhaust fans running during and after showers to cut down on trapped moisture hitting the walls
    • Touch up small scuffs early rather than waiting — a small patch job now beats a full repaint later
    • Avoid hanging heavy items directly against freshly painted walls until the paint has fully cured, which can take up to 30 days for some emulsions
    • Consider curtains or UV-filtering film on windows that get harsh direct sunlight for several hours daily

    None of this is complicated, honestly. It’s mostly just paying attention before small problems turn into a full repaint job.

    FAQs About How Long Paint Lasts

    How long does paint last on interior walls in India specifically? Generally 5-10 years, though this varies a lot by room. Bedrooms and living rooms tend toward the higher end, while kitchens and bathrooms need attention sooner, often within 3-5 years.

    Does expensive paint really last longer than cheap paint? Usually yes, mainly because premium paints have better pigment concentration and washability. That said, proper surface prep matters just as much as the paint tier itself.

    How can I tell if my paint just needs cleaning versus a full repaint? If a gentle wipe with a damp cloth restores the look, cleaning is enough. If marks won’t budge, or the surface feels chalky or is visibly peeling, it’s time to repaint.

    Does paint age even if the wall is never touched? Yes, though slower. Sunlight exposure and general humidity still affect the paint film over time, even in low-traffic rooms that barely get touched.

    Is it bad to paint over old paint without removing it first? Not necessarily, as long as the existing paint is in decent condition and properly cleaned and lightly sanded. Peeling or chalky old paint should be scraped back before repainting, though.

    How long should I wait between coats when repainting? Most emulsion paints need 2-4 hours between coats, though full curing can take up to 30 days, so go easy on the walls during that early period.

    Final Thoughts

    So, how long does paint last? Realistically, somewhere between 3 and 10 years depending on the room, the paint quality, and how well the surface was prepped before that first coat went on. Kitchens and bathrooms will always need more frequent attention than a quiet spare bedroom, and that’s just the nature of moisture and use, not a sign you did anything wrong.

    If your walls are starting to show chalking, peeling, or that persistent dullness no cleaning fixes, that’s your answer right there — it’s time. Rather than waiting for the whole house to look tired at once, consider tackling high-moisture rooms first, since those age fastest and show the most obvious wear.

  • Best Exterior Paint Colors That Increase Home Value

    Best Exterior Paint Colors That Increase Home Value

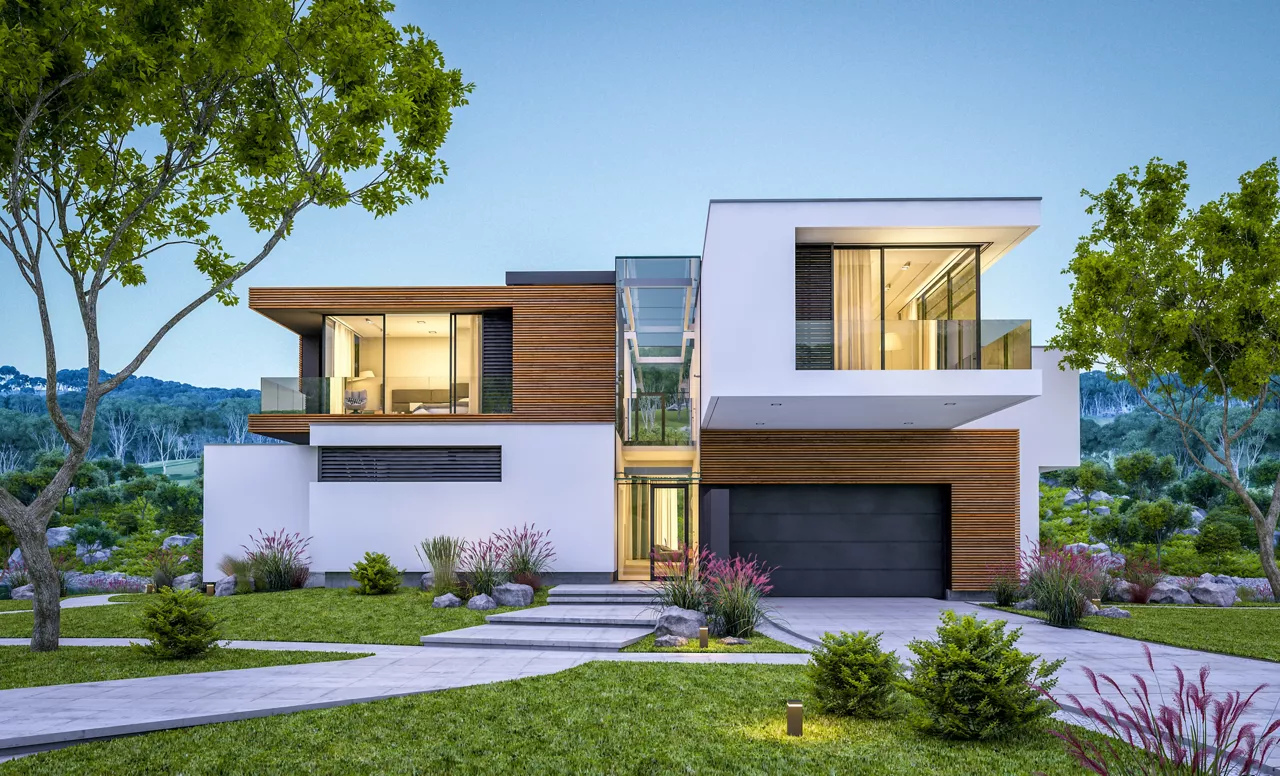
    Standing outside your house, paint chip in hand, wondering if that lovely teal you fell for online is going to help or hurt when it’s time to sell? You’re not alone. Choosing the best exterior paint colors is one of those decisions that feels purely aesthetic until you realise buyers form an opinion about a house within seconds of seeing it from the street. I’ve watched two identical houses in the same Jaipur colony get very different offers, and the paint job was genuinely part of the story. Colour affects perceived maintenance, perceived size, even perceived price bracket. Let’s get into what actually works, and what to avoid if resale value matters to you.

    Why Exterior Paint Color Actually Affects Resale Value

    This isn’t just decorating opinion — there’s real psychology and market behaviour behind it.

    Quick answer: The right exterior paint colors increase home value by improving curb appeal, signalling good maintenance, and appealing to the broadest range of buyers. Neutral, well-chosen shades can add measurable resale value, while bold or poorly maintained colors can actually turn buyers away before they even step inside.

    Buyers make snap judgments. Real estate agents will tell you the “drive-by” impression happens in under 10 seconds, and colour is the single biggest visual element in that window. A fresh, tasteful exterior signals the owner has taken care of the place — even if the buyer hasn’t seen the plumbing yet.

    There’s also a psychological safety factor. Neutral colours feel like a blank canvas buyers can imagine themselves living in. A house painted in an intensely personal colour choice — say, bright purple — makes buyers picture the cost and hassle of repainting before they’ve even walked through the gate.

    I’ve noticed something else too: colour affects how big a house looks. Lighter shades tend to make a structure appear larger and more open, while very dark colours can make a compact house feel boxed in, especially in tighter urban plots common in cities like Mumbai or Bengaluru.

    None of this means you have to paint everything beige. It just means the colour choice deserves more strategic thought than “what do I personally love.”

    Top Neutral Colors That Appeal to Most Buyers

    Neutrals remain the safest, most universally liked choice for a reason — they simply work across architectural styles and buyer preferences.

    • Warm white or off-white — classic, timeless, pairs well with almost any roof or door colour
    • Soft beige or sand tones — particularly popular in Rajasthan and other warmer states, since it hides dust and heat marks well
    • Light grey — increasingly popular in newer builds, feels modern without trying too hard
    • Greige (grey-beige blend) — a genuine crossover trend that’s held up surprisingly well over the last few years

    A soft beige or warm white exterior tends to photograph beautifully too, which matters more than people realise now that most buyers browse listings online first. Property photos with washed-out or overly dark exteriors just don’t get the same click-through.

    Bold Accent Colors That Still Work (When Used Right)

    Neutral doesn’t have to mean boring — and honestly, an all-white house can feel a bit flat if there’s zero contrast anywhere.

    Quick answer: Bold exterior colors can boost curb appeal without hurting resale value when used sparingly, typically on doors, shutters, or trim rather than the entire façade. Navy blue doors and deep green accents are consistently popular choices that add character without alienating buyers.

    The trick is restraint. A single navy blue front door on an otherwise neutral house reads as intentional and stylish. The same navy covering the entire exterior can feel heavy and overwhelming, particularly on smaller homes.

    Some accent combinations that consistently work well:

    1. Charcoal grey trim against a soft white base — sharp, modern, doesn’t date quickly
    2. Deep green door with beige or cream walls — feels grounded, slightly traditional, ages well
    3. Terracotta or rust accents paired with sand-toned walls — this actually leans into regional aesthetics common in parts of Rajasthan and Gujarat, so it doesn’t feel out of place

    Picture a small business owner in Jaipur who runs a home-based boutique. She repainted her house’s boundary wall in a warm terracotta with cream detailing on the main structure. It didn’t just look good — clients commented on it, and when she eventually listed a portion of the property for rent, it got noticed faster than the plain white house next door.

    Colors to Avoid If You Care About Resale Value

    Some colours are just risky bets, no matter how much you personally love them.

    Bright, saturated colours — think hot pink, neon yellow, electric blue — tend to narrow your buyer pool dramatically. What you find charming, a buyer might see as an expensive repainting project waiting to happen.

    Very dark colours across an entire façade (deep black, near-black navy) can look striking in photos but absorb serious heat in Indian summers, and buyers who understand that will factor it in. I’d personally avoid an all-black exterior in most Indian cities — it’s just not practical here, however sleek it looks on Pinterest.

    A few more to think twice about:

    • Overly trendy pastels that feel tied to a specific design moment rather than timeless
    • Mismatched, chaotic colour schemes with too many competing shades on one façade
    • Colours that clash badly with a red-tiled roof or existing stonework — this happens more often than you’d expect

    Has this ever happened to you — walking past a house and thinking “that colour choice really doesn’t do this place any favours”? That instinct is usually right, and buyers have the same reaction, just silently.

    How Climate Should Influence Your Color Choice

    This part gets skipped in a lot of generic paint guides, but in India it genuinely matters.

    Hot, dry regions like Rajasthan and Gujarat do better with lighter shades that reflect heat rather than absorb it. Sand, warm white, and soft beige aren’t just aesthetically fitting for the region — they keep interior temperatures a touch more manageable too.

    Humid coastal cities face a different issue entirely: mould and paint degradation. Darker, richer colours can actually hide staining and water marks better in places like Kochi or Mumbai, but you’ll want a paint formulated specifically for humidity resistance regardless of shade. [link to related guide on best flooring for humid climate here — same climate logic applies to exterior surfaces]

    If you’re in a dusty region, avoid very pale colours near ground level. Dust marks show up fast on light-coloured walls below waist height, and repainting that lower band more frequently gets expensive and tedious.

    Paint Finish Matters Almost as Much as Color

    People obsess over the colour swatch and completely forget the finish affects the final look just as much.

    Quick answer: For exteriors, a matte or low-sheen finish typically looks more upscale and hides surface imperfections better, while high-gloss finishes show dirt, dust, and application flaws more visibly — especially in dusty Indian climates.

    Matte finishes have become the preferred choice for modern homes because they give that clean, almost velvety look in photos and in person. The trade-off is they can be slightly harder to clean.

    Satin or eggshell finishes sit in a nice middle ground — a bit of sheen, easier maintenance, still looks reasonably premium. This tends to be my personal recommendation for most Indian homes, honestly, since dust is a constant battle here regardless of colour choice.

    High-gloss finishes work well for doors, gates, and window frames — small accent areas — but covering an entire façade in high gloss can look almost plasticky and cheap, which is the opposite of what you want if resale value is the goal.

    Regional and Cultural Color Preferences Across India

    Colour trends aren’t uniform across the country, and ignoring this can genuinely hurt your resale prospects in a specific local market.

    In South Indian cities like Chennai and Coimbatore, warm yellows and ochres remain popular and are seen as traditional, welcoming choices. In North Indian cities, whites, greys, and beiges dominate newer construction, especially in gated communities and builder-floor developments.

    A few regional patterns worth knowing:

    • Rajasthan and parts of Gujarat lean toward sand and terracotta tones, partly practical (heat), partly cultural
    • Kerala often favours a mix of white with wood-toned accents, playing off the region’s traditional architecture
    • Metro apartment complexes increasingly standardise on grey and white combinations, largely driven by builder branding rather than individual homeowner choice

    If you’re planning to sell within a specific micro-market, it genuinely helps to drive around the neighbourhood first and notice what’s already there. Standing out slightly is fine. Looking completely out of place rarely helps resale value.

    Testing Colors Before You Commit

    This step gets skipped constantly, and it’s honestly the one that saves the most regret later.

    Paint chips under showroom lighting look nothing like they will on your actual wall under real sun. A colour that looks like a soft beige indoors can turn distinctly yellow or pink once it’s baking in direct Rajasthan sunlight for six hours a day.

    A few practical steps that actually help:

    1. Buy small sample pots and paint patches directly on your exterior wall — at least 2×2 feet, in more than one spot
    2. Check the sample at different times of day — morning light and evening light change colours dramatically
    3. Step back and view it from the street, not just up close, since that’s the actual buyer’s perspective
    4. Live with the sample for at least 3-4 days before committing to the full job

    Skipping this step is how people end up repainting an entire house within a year because the colour “looked different in the can.” [link to related guide on choosing the right paint finish for Indian homes here]

    FAQs About Choosing Exterior Paint Colors

    What are the best exterior paint colors for reselling a home in India in 2026? Warm white, soft beige, and light grey remain the top performers for broad buyer appeal. They photograph well, suit most architectural styles, and don’t require a buyer to picture repainting immediately.

    Do dark exterior colors reduce home value? Not always, but an entirely dark façade can narrow your buyer pool and isn’t ideal for hot Indian climates. Using dark shades as accents rather than the dominant colour tends to work better.

    How much does exterior paint color really affect resale price? It’s hard to put an exact number on it, but real estate agents consistently note that curb appeal, paint included, influences how fast a home sells and the initial offers it attracts.

    Should I match my neighbours’ house colors? You don’t need to match exactly, but wildly clashing with the surrounding street can hurt buyer perception. A complementary, slightly distinct shade usually works best.

    What exterior paint finish lasts longest in Indian weather? Satin or eggshell finishes tend to balance durability and looks well across most Indian climates, though genuinely humid coastal regions need paints specifically rated for moisture and mould resistance.

    Is it worth repainting before selling a house? Usually yes, if the current exterior looks faded, patchy, or outdated. A fresh, neutral coat is one of the more affordable renovations that reliably improves first impressions.

    Final Thoughts

    Picking the best exterior paint colors for your home really comes down to balancing personal taste with what actually works for your climate, your region, and your resale timeline. Neutrals like warm white, beige, and light grey remain the safest bet if value matters most, while a well-placed bold accent — a navy door, a terracotta trim — adds personality without scaring off buyers.

    If you’re planning to sell in the next few years, don’t just pick a colour off Pinterest. Drive around your own neighbourhood, notice what’s already there, and test a real sample on your actual wall before committing. That one extra weekend of patience with paint samples can save you a much bigger repainting bill down the line.

  • How to Choose the Best Flooring for Humid Climate Zones

    How to Choose the Best Flooring for Humid Climate Zones

    If you live somewhere like Kochi, Mumbai, or Kolkata, you already know the drill — that sticky, heavy air that makes everything feel damp, including your floors. Choosing the best flooring for humid climate conditions isn’t just a design decision, it’s a practical one. Get it wrong and you’re looking at swollen skirting boards, musty smells, or tiles that feel perpetually cold and clammy. I’ve seen homeowners spend lakhs on gorgeous wooden flooring only to watch it cup and warp within two monsoons. Let’s avoid that. This guide walks through what actually works in high-humidity conditions, and what to steer clear of, based on real installations, not just showroom talk.

    Why Humidity Wrecks Certain Flooring Types

    Moisture doesn’t just sit on the surface — it gets absorbed, and that’s the real problem.

    Quick answer: High humidity causes porous flooring materials to absorb moisture from the air, leading to swelling, warping, mould growth, and eventually structural damage. Non-porous materials like vitrified tiles or vinyl resist this because they don’t let water in at all.

    Wood is the classic victim here. Solid timber is essentially organic material, and organic material absorbs water vapour from the surrounding air — even without a single spill. In coastal cities where relative humidity regularly sits above 70%, wood keeps expanding and contracting with the seasons. Over a few years, that stress shows up as cupping, gaps between planks, or a slightly springy, unstable feel underfoot.

    Carpets are arguably worse. They trap moisture in the fibres and padding underneath, creating the perfect environment for mould and dust mites. If you’ve ever pulled up an old carpet in a ground-floor flat near the coast and caught that musty smell, you know exactly what I mean.

    Even some adhesives and underlayment materials react badly to sustained dampness, which is why professional installation matters more in humid regions than people realise. A flooring contractor in Chennai once told me he adds an extra moisture barrier layer as standard practice now — not because clients ask for it, but because he’s tired of callbacks.

    Vitrified Tiles: Still the Safest Bet

    For sheer reliability in humid conditions, it’s hard to beat vitrified tiles.

    They’re fired at high temperatures until they become non-porous, which means water simply can’t get in. No absorption, no warping, no mould growing underneath. In cities like Kochi or Vizag where the air feels thick most of the year, this matters enormously.

    A few practical notes:

    • Go for matte or anti-skid finish in bathrooms and balconies — glazed tiles get genuinely dangerous when wet
    • Double charge or full-body vitrified tiles resist scratching better over time than cheaper soluble salt variants
    • Grout lines are the weak point — use epoxy grout instead of standard cement-based grout, since it resists mould far better

    [link to related guide comparing vitrified tiles vs wooden flooring here]

    Vinyl and SPC Flooring: The Underrated Option

    Not everyone wants tiles everywhere, and that’s fair. Vinyl and SPC (Stone Plastic Composite) flooring have quietly become popular alternatives for humid regions, and honestly, I think they’re underrated.

    Quick answer: SPC and luxury vinyl flooring are 100% waterproof, dimensionally stable, and mimic wood or stone convincingly, making them one of the best flooring options for humid climates where real wood isn’t practical.

    SPC flooring is made from a limestone-based composite core, which means it simply doesn’t absorb water the way wood does. It clicks together, floats over the existing subfloor, and can even go in bathrooms — something you’d never attempt with solid wood.

    Cost-wise, expect somewhere between ₹120-300 per square foot for decent quality SPC, which sits comfortably between budget laminate and mid-range engineered wood. Not the cheapest, but the durability trade-off is worth it in coastal or monsoon-heavy regions.

    One thing I’ll admit — the “feel” isn’t quite identical to real wood. It’s close, close enough that most guests won’t notice, but if you’ve lived with actual timber floors before, you’ll clock the difference underfoot within a week.

    What About Engineered Wood?

    People often ask if engineered wood is a safe middle ground, and the answer is: sometimes, with conditions attached.

    Engineered wood has a plywood or HDF core topped with a thin layer of real wood veneer. The cross-layered construction makes it far more dimensionally stable than solid timber, so it handles humidity swings better.

    That said, it’s not waterproof. It’s humidity-resistant, not humidity-proof — a distinction a lot of vendors conveniently blur when they’re trying to close a sale.

    If you’re set on the wood look in a humid city, here’s what actually helps:

    1. Choose engineered wood with a thicker top veneer layer (2mm or above ideally) so it can handle a couple of re-sandings over its life
    2. Keep indoor humidity between 40-60% using a dehumidifier, especially during peak monsoon months
    3. Avoid installing it in bathrooms, kitchens, or balconies — no exceptions here
    4. Ask your installer about acclimatisation — the wood needs to sit in the room for a few days before installation to adjust to local moisture levels

    Picture a family in Kochi who insisted on engineered oak flooring for their living room in 2026. Three years in, it’s held up fine — but only because they run a dehumidifier religiously during the monsoon and never let standing water sit near the balcony door. That’s the commitment level we’re talking about.

    Natural Stone Flooring in Humid Regions

    Stone gets overlooked in this conversation, which is a bit of a shame because certain types genuinely excel in humid climates.

    Granite, for instance, is dense, non-porous once properly sealed, and handles moisture without much fuss. It’s a favourite in South Indian homes for exactly this reason — walk into any older Kerala house and there’s a decent chance the flooring is granite or a similar stone.

    Marble is trickier. It’s more porous than granite and can stain or develop a dull, hazy look if moisture sits on it repeatedly. If you love the marble aesthetic but live somewhere humid, ask about sealing frequency upfront — it’s not a one-time job, it needs reapplication every year or two.

    Kota stone, a local favourite in Rajasthan and increasingly used elsewhere, is naturally water-resistant and stays cool underfoot, which is a nice bonus in humid heat too.

    Carpets and Rugs: Proceed With Caution

    I won’t tell you to never use carpet in a humid home — that feels a bit extreme — but you do need to be smart about it.

    Full wall-to-wall carpeting in a consistently humid region is asking for trouble. Trapped moisture, mould, dust mite buildup — none of it’s pleasant, and allergies tend to flare up faster in these conditions.

    If you want the soft, warm feel carpet gives a room, area rugs on top of tile or vinyl work much better. You get the comfort without the moisture trap, and you can pull the rug out to air-dry or clean it whenever needed.

    Has your carpet ever developed that faint musty smell after a particularly wet monsoon? That’s usually moisture trapped in the underlay, and once it sets in, it’s genuinely hard to fully get rid of.

    Bathroom and Balcony Flooring: The High-Risk Zones

    These spaces deserve their own mention because they face the worst of it — direct water exposure on top of ambient humidity.

    Quick answer: For bathrooms and balconies in humid climates, anti-skid vitrified tiles or textured natural stone are the most reliable choices, since they combine full waterproofing with slip resistance in constantly wet conditions.

    A few specifics worth knowing:

    • Anti-skid ceramic or vitrified tiles remain the standard recommendation for Indian bathrooms, and for good reason
    • Avoid polished marble in these zones entirely — it becomes dangerously slippery when wet
    • For balconies exposed to direct rain, check the tile’s water absorption rating; anything below 0.5% is considered ideal for outdoor use
    • Proper slope and drainage matter as much as the material itself — even the best flooring will trap water and degrade faster without it

    Ventilation and Subfloor Prep Matter More Than People Think

    Here’s something that gets glossed over constantly — the flooring material is only half the equation.

    A poorly ventilated room with bad subfloor moisture barriers will cause problems regardless of what you put on top. I’ve noticed contractors sometimes skip proper moisture barrier installation to save a bit of cost, and it always comes back to bite the homeowner within a couple of years.

    Basic things that actually help: exhaust fans in bathrooms, cross-ventilation in bedrooms where possible, and a proper damp-proof course during construction if you’re building from scratch. None of this is glamorous advice, but it matters just as much as picking the right tile brand. [link to related guide on home ventilation tips for humid regions here]

    FAQs About Flooring for Humid Climates

    What is the best flooring for humid climate homes near the coast? Vitrified tiles or SPC/vinyl flooring, hands down. Both are non-porous and won’t absorb moisture, which is the main problem coastal humidity creates for other materials.

    Is wooden flooring a bad idea in humid areas? Not necessarily bad, but risky without precautions. Engineered wood with good humidity control (like a dehumidifier and proper acclimatisation) can work, but solid wood struggles the most.

    Does vinyl flooring smell or develop mould in humidity? Good quality SPC or vinyl flooring is fully waterproof and won’t trap moisture underneath, so mould growth is rare, as long as the subfloor itself was properly prepped before installation.

    Can I use marble flooring in a humid climate? Yes, but it needs regular sealing since marble is more porous than granite. Skip it for bathrooms or balconies where it gets slippery when wet.

    How often should I dehumidify a room with wooden flooring? During peak monsoon months, running a dehumidifier daily to keep humidity between 40-60% is a reasonable habit, tapering off once the weather dries out.

    Is carpet ever okay in humid regions? Small area rugs are fine and easy to manage. Full wall-to-wall carpeting is genuinely risky for mould and allergens in consistently humid homes.

    Final Thoughts

    Choosing the best flooring for humid climate conditions really comes down to one question — how much moisture management are you willing to sign up for? Vitrified tiles and SPC flooring ask almost nothing of you and handle humidity without complaint. Wood, especially solid wood, asks for real commitment: dehumidifiers, careful maintenance, and accepting some risk.

    My honest take, having seen both sides play out in real homes? Unless you’re deeply attached to the wood look, non-porous options save you a lot of future headache in humid regions. If you do go with wood, budget for a dehumidifier from day one, not as an afterthought once the planks start cupping. Walk through a few installed homes in your own city before deciding — nothing beats seeing how a floor has actually aged through a couple of monsoons.

  • Vitrified Tiles vs Wooden Flooring: Which Is Better?

    Vitrified Tiles vs Wooden Flooring: Which Is Better?

    So you’re renovating, or maybe building from scratch, and you’ve hit that one decision that seems to trip up almost everyone — vitrified tiles vs wooden flooring. I get asked about this constantly, usually by someone standing in a tile showroom in Jaipur or Pune looking mildly overwhelmed. And honestly? There’s no single right answer. It depends on your budget, your climate, how much upkeep you’re willing to do, and even which room we’re talking about. Let’s break it down properly, room by room and rupee by rupee, so you can actually make a decision instead of just Googling for another hour.

    What Are Vitrified Tiles, Exactly?

    Vitrified tiles are basically clay mixed with silica and quartz, fired at extremely high temperatures until the material becomes glass-like and non-porous. That’s where the name comes from — “vitrified” means turned into glass.

    Vitrified tiles are popular in Indian homes because they’re tough, water-resistant, and don’t need the kind of babying that natural materials do. You’ll find them in almost every new apartment complex across Jaipur, Ahmedabad, and Bengaluru these days.

    There are a few types worth knowing about:

    • Double charge vitrified tiles — the pattern goes two layers deep, so scratches don’t reveal a different colour underneath
    • Full body vitrified tiles — the design runs through the entire thickness of the tile, making them the most durable option
    • Soluble salt tiles — cheaper, decent for walls, but not something I’d recommend for heavy-traffic flooring
    • Glazed vitrified tiles (GVT) — glossy finish, great for that showroom look, though they can get slippery when wet

    Quick answer: Vitrified tiles are ceramic tiles fired at high heat until they become non-porous and glass-like. They resist water, stains, and scratches far better than regular ceramic tiles, which is why they’ve become the default flooring choice in most Indian homes built after 2015 or so.

    What Counts as Wooden Flooring Today?

    Here’s something people often get wrong — “wooden flooring” doesn’t just mean solid teak planks anymore. There are actually three broad categories, and the price gap between them is huge.

    Solid wood flooring is the real deal — actual timber, usually teak, oak, or sal. Gorgeous, but expensive and fussy about humidity.

    Engineered wood flooring is a thin layer of real wood bonded over plywood layers. More stable in India’s varying humidity, and noticeably cheaper than solid wood.

    Laminate flooring isn’t wood at all, technically. It’s a high-resolution wood-print layer over a fibreboard core. Looks convincing from a few feet away, costs a fraction of the real thing.

    I’ve noticed a lot of homeowners assume “wooden flooring” automatically means solid wood, then get sticker shock when they price it out. Ask specifically which category a vendor is quoting you — it changes everything.

    Vitrified Tiles vs Wooden Flooring: Cost Comparison

    Let’s talk numbers, because this is usually where the decision actually gets made.

    Vitrified tiles typically run ₹40 to ₹150 per square foot for the material, plus another ₹15-25 for installation. Premium large-format or imported vitrified tiles can climb past ₹250 per square foot, but for most homes, mid-range tiles do the job fine.

    Wooden flooring is a different story altogether:

    1. Laminate flooring: roughly ₹80-150 per sq ft
    2. Engineered wood: roughly ₹150-400 per sq ft
    3. Solid wood (teak, sal): ₹400-800+ per sq ft, sometimes touching ₹1,200 for premium grades

    So for a standard 1,000 sq ft flat, you’re looking at maybe ₹65,000-1,00,000 for a decent vitrified tile job, versus ₹4-8 lakh for genuine solid wood across the whole house. That’s not a small difference — it’s the kind of gap that changes the entire budget conversation.

    Picture a small business owner in Jaipur fitting out a new 2BHK. Tiles for the whole flat, plus labour, came to under a lakh. He’d originally wanted wooden flooring in the bedrooms too, but after pricing it out, he went with vitrified tiles everywhere except one accent room. That’s a pretty common compromise, honestly.

    Durability: Which One Actually Lasts Longer?

    Quick answer: Vitrified tiles generally outlast wooden flooring in Indian conditions — they resist moisture, termites, and daily wear without much maintenance, easily lasting 15-20 years or more. Wood, especially solid wood, can last just as long but only with consistent care and the right humidity control.

    This is where a lot of the debate over vitrified tiles vs wooden flooring really lives. Tiles don’t warp. They don’t get eaten by termites. Spill a glass of water on them and nothing happens — you just wipe it up.

    Wood is more temperamental. Indian summers and monsoons put real stress on timber. It expands, contracts, sometimes cups or cracks if the humidity swings are severe. Engineered wood handles this better than solid wood, but it’s still not bulletproof.

    That said — and this is my honest opinion — well-maintained solid wood flooring ages beautifully in a way tiles never will. Tiles look the same on day one and day 3,000. Wood develops character, a patina, little marks that tell a story. Some people love that. Others find it annoying. There’s no wrong answer here, just a preference.

    Maintenance: Day-to-Day Living With Each

    Nobody talks about maintenance enough before buying, and then they’re surprised later. Let’s fix that.

    Vitrified tiles need almost nothing — a mop, some mild detergent, done. No sealing, no polishing, no special products. You could genuinely forget about maintenance for years and the floor would still look decent.

    Wooden flooring asks for more attention:

    • Avoid wet mopping; use a barely damp cloth instead
    • Keep humidity between roughly 40-60% if possible
    • Re-polish or re-coat every few years depending on foot traffic
    • Use felt pads under furniture legs (scratches are a real headache otherwise)
    • Watch out for direct sunlight fading the finish over time in south-facing rooms

    Has your wooden furniture ever developed water rings from a sweaty glass left overnight? Now imagine that risk across your entire living room floor. That’s the trade-off with wood — it rewards care and punishes neglect.

    Comfort, Warmth, and the “Feel Factor”

    This one’s underrated, but it matters more than people expect once they’re actually living with the floor.

    Wood feels warm underfoot, even in winter, and has a slight give to it that’s easier on joints — something people with older parents at home tend to notice quickly. Tiles, on the other hand, stay cold most of the year and feel hard, which is lovely in Rajasthan’s brutal summers but less fun in December mornings.

    Sound is another factor nobody mentions. Wooden floors dampen footstep noise; tiled floors can feel a bit echoey, especially in larger, sparsely furnished rooms. If you’ve got young kids running around, you’ll notice this fast.

    Aesthetics and Resale Value

    Both can look stunning, so this really comes down to the vibe you’re after and, frankly, what buyers in your area expect.

    Quick answer: In most Indian metros, vitrified tiles are the safer bet for resale value since buyers expect them and see wooden flooring as a bonus, not a necessity. Wood tends to add more perceived luxury in premium villa or bungalow segments specifically.

    I’ve walked through enough properties to notice a pattern — in mid-range apartments, buyers barely register the tile brand as long as it looks clean and modern. In high-end independent houses, though, a wooden staircase or engineered wood in the living room genuinely shifts how “premium” the place feels to a buyer walking in.

    Large-format vitrified tiles (like 800x1600mm) have gotten popular recently because they mimic marble or wood grain convincingly while keeping the practical benefits. Worth checking out if you want the wood look without wood’s headaches. [link to related guide on choosing tile sizes for small rooms here]

    Which Rooms Suit Which Flooring?

    You don’t have to pick just one for the whole house — most people don’t, in fact.

    • Kitchen and bathrooms: Vitrified tiles, no contest. Water resistance wins here every time.
    • Living room: Either works; wood adds warmth, tiles add easy upkeep.
    • Bedrooms: Many homeowners prefer wood or laminate here for the underfoot comfort.
    • Balconies and utility areas: Tiles, always — outdoor exposure destroys wood fast.
    • Home office or study: Wood tends to feel calmer and quieter for focused work.

    A mixed approach is honestly what most interior designers recommend anyway. [link to related guide on flooring ideas by room here]

    Environmental Impact: A Quick Word

    Solid wood, if sourced from certified sustainable plantations, is renewable — but a lot of cheap timber in India isn’t sourced responsibly, so ask questions before buying. Vitrified tiles use significant energy in manufacturing but last for decades without replacement, which offsets some of that footprint over time. Neither is perfectly clean; it’s more about which trade-off bothers you less.

    FAQs: What People Actually Ask About This

    Is vitrified tile flooring cheaper than wooden flooring in India? Yes, almost always. Even premium vitrified tiles rarely cross what mid-range engineered wood costs, and solid wood is in a completely different price bracket altogether.

    Does wooden flooring increase home value in India? Sometimes, particularly in premium segments or independent houses. In standard apartments, buyers rarely pay extra for it — vitrified tiles are simply the expected norm.

    Which is better for humid or coastal cities like Mumbai or Kochi? Vitrified tiles handle humidity far better. Wood, especially solid wood, is more prone to warping and moisture damage in consistently humid climates.

    Can I install wooden flooring over existing vitrified tiles? Yes, engineered wood or laminate can often go directly over tiles if the surface is level, which actually saves on demolition costs.

    How long do vitrified tiles typically last? With basic care, 15-20 years easily, sometimes longer. They don’t degrade the way wood can if there’s water exposure.

    Is vitrified tile flooring slippery? Glazed vitrified tiles can be slippery when wet, so for bathrooms or balconies, it’s worth asking for matte or anti-skid variants specifically.

    Final Thoughts

    There’s no universal winner in the vitrified tiles vs wooden flooring debate — it genuinely depends on your budget, your climate, and how much maintenance you’re willing to sign up for. If you want low upkeep and water resistance, tiles win easily. If warmth, comfort, and that timeless look matter more to you, wood earns its higher price tag.

    My honest suggestion? Don’t force one material across the entire house. Use tiles where practicality matters most — kitchens, bathrooms, balconies — and reserve wood or engineered wood for bedrooms or the living room if your budget allows it. Walk into a couple of showrooms, ask for actual samples, and live with them under your home’s lighting for a day or two before deciding. That fifteen-minute showroom visit tells you a lot less than seeing the sample on your own floor at 7pm with the lights on.

  • Best Roofing Materials for Indian Homes: Cost vs Durability

    Best Roofing Materials for Indian Homes: Cost vs Durability

    Contractors love quoting the cheapest roofing option first, and it’s easy to see why — a lower number closes deals faster. But has anyone ever shown you what that “budget” roof actually costs over 15 years, once repairs and reapplications get factored in?

    Picking the best roofing materials for an Indian home isn’t really about upfront price at all — it’s about cost per year of actual service life, something contractors rarely walk buyers through unprompted. I’ve been through this decision myself for an independent house extension, and the research genuinely changed which option I went with, mostly because the cheapest choice on paper wasn’t cheapest once I did the math properly.

    This guide compares what’s actually available in the Indian market in 2026, breaking down real cost-versus-durability tradeoffs rather than just listing options without context.

    Why Upfront Roofing Cost Is the Wrong Number to Compare

    Direct answer: Comparing roofing materials purely on upfront installation cost is misleading, since materials with lower initial prices often need more frequent maintenance or complete replacement sooner — the more useful comparison is cost divided by expected lifespan, which sometimes flips the “cheaper” option into the more expensive one long-term.

    This sounds obvious once stated plainly, but it’s genuinely easy to overlook when you’re staring at quotes side by side and one number is simply lower. A roofing material costing ₹150 per sq ft that lasts 25 years works out cheaper annually than one costing ₹90 per sq ft that needs replacement or major repair every 8 years.

    I’ve noticed the buyers who regret their roofing choice most are almost always the ones who compared quotes purely on the headline number, without asking the contractor directly about expected lifespan and maintenance frequency for each option.

    1. RCC (Reinforced Cement Concrete) Flat Roof: The Default for Most Indian Homes

    Direct answer: RCC remains the most common roofing choice for Indian apartments and independent houses due to its structural strength and long lifespan (40-60+ years for the structure itself), though it requires separate waterproofing that needs reapplication every 5-8 years to stay effective.

    RCC isn’t really a “roofing material” in the same sense as tiles or metal sheets — it’s the structural slab itself, with a waterproofing layer applied on top to actually keep water out. This distinction matters, because RCC’s own durability is excellent, but the waterproofing layer is the actual weak point that fails periodically.

    • Structural cost: typically included in overall construction cost, roughly ₹400-600 per sq ft for the slab itself
    • Waterproofing (separate cost): ₹15-40 per sq ft depending on method, reapplied every 5-8 years
    • Best suited for: standard apartment construction, terrace usage (gardens, drying clothes, gatherings)

    Picture a family in Jaipur who built their independent house with a standard RCC roof, assuming “concrete lasts forever” without accounting for waterproofing maintenance separately. Five years in, they were surprised by water seepage that a simple, budgeted waterproofing reapplication would’ve prevented entirely.

    2. Clay Tile Roofing: Traditional, Genuinely Good for Heat

    Clay tiles (Mangalore tiles being the most common Indian variety) offer something RCC struggles with — genuinely better heat insulation, keeping interiors noticeably cooler through Indian summers without additional cooling costs.

    • Cost: ₹80-150 per sq ft including installation, depending on tile quality and region
    • Lifespan: 30-50 years for quality tiles, though individual tiles crack and need periodic replacement
    • Maintenance: occasional tile replacement (₹20-40 per damaged tile) and periodic moss/algae cleaning in humid regions

    I’ll admit a mild bias here — I genuinely prefer the look and thermal comfort of clay tile roofs, even though they’re less common in urban apartment construction now. The tradeoff is they need a sloped structure, which doesn’t suit every architectural style or the flat-terrace usage many Indian families expect from their roof space.

    3. Metal Roofing Sheets (GI/Galvalume): Fast, Affordable, Noisier

    Direct answer: Metal roofing sheets (galvanized iron or Galvalume) offer the fastest installation and lowest upfront cost among durable options, making them popular for sheds, extensions, and budget construction, though they transmit heat and rain noise more than RCC or tile alternatives without additional insulation.

    Metal sheets work well for specific use cases — warehouse-style spaces, budget extensions, temporary or semi-permanent structures — where speed and cost matter more than thermal comfort or acoustic performance.

    1. Cost: ₹60-120 per sq ft depending on gauge thickness and coating quality
    2. Lifespan: 20-30 years for quality Galvalume, less for basic GI sheets in coastal or high-humidity areas
    3. Best suited for: budget construction, sheds, covered parking, extensions where living comfort isn’t the primary concern

    Without added insulation underneath, metal roofs genuinely get uncomfortably hot in direct summer sun and loud during heavy monsoon rain — something many first-time buyers of metal-roofed sheds discover the hard way during their first proper monsoon.

    4. Concrete Roof Tiles: A Middle Ground Between RCC and Clay

    Concrete tiles offer a reasonable middle option — more affordable than premium clay tiles, better heat performance than bare metal sheets, and reasonably durable without needing the specialized craftsmanship traditional clay tile installation sometimes requires.

    • Cost: ₹70-130 per sq ft including installation
    • Lifespan: 25-40 years depending on quality and coating
    • Maintenance: lower than clay (fewer individual tile breakages) but still needs periodic inspection for cracking

    [link to related guide on signs your roof needs repair before monsoon here] for what to watch for regardless of which roofing material you choose.

    5. Modern Waterproofing Membranes for RCC Terraces

    Since RCC is genuinely the most common choice, the waterproofing membrane applied on top deserves its own comparison, since this is where most of the actual cost-versus-durability decision happens for RCC roofs specifically.

    • APP membrane (torch-applied): ₹25-40 per sq ft, lasts 8-12 years, good for heavy-use terraces
    • Liquid waterproofing (polyurethane/acrylic based): ₹15-30 per sq ft, lasts 5-8 years, easier reapplication
    • Cementitious waterproofing: ₹10-20 per sq ft, lasts 4-6 years, most budget-friendly but shortest lifespan

    Has anyone in your building ever compared notes on which waterproofing method they used and how it’s held up? I did this recently with a few neighbours, and honestly, the APP membrane users reported noticeably fewer repeat issues over a decade compared to the cheaper cementitious option, even accounting for the higher upfront cost.

    Cost-Per-Year Comparison: The Number That Actually Matters

    Here’s where the real comparison happens — dividing total cost by expected lifespan to get a genuine annual cost figure:

    MaterialApprox Cost (per sq ft)LifespanCost Per Year (approx)
    RCC + APP membrane₹425-640 (structure + waterproofing)10-12 years (membrane cycle)₹35-53/year
    Clay tiles₹80-15030-50 years₹2-5/year
    Metal sheets (Galvalume)₹60-12020-30 years₹2-4/year
    Concrete tiles₹70-13025-40 years₹2-4/year
    RCC + cementitious waterproofing₹410-6204-6 years (membrane cycle)₹68-155/year

    This table specifically isolates the roofing/waterproofing cost, not the full structural cost of the building itself, which is why RCC numbers include repeated waterproofing cycles over time.

    Which Roofing Material Actually Suits Your Situation

    Direct answer: RCC with quality waterproofing suits most Indian apartment living and independent houses wanting usable terrace space, clay or concrete tiles suit those prioritizing heat performance and long-term low maintenance, and metal sheets suit budget extensions or non-living spaces where cost and speed matter more than comfort.

    There’s genuinely no single “best” answer here — it depends on what you’re building and what matters most to you specifically.

    • Want a usable terrace for drying clothes, gardening, or gatherings: RCC remains the practical default
    • Building an independent house and prioritizing natural cooling: clay or concrete tiles are worth the extra planning
    • Need a quick, budget covering for a shed, parking area, or non-living extension: metal sheets make sense

    FAQ: Common Questions About Best Roofing Materials

    What’s the most durable roofing material for Indian homes? Clay tiles and quality metal (Galvalume) sheets both offer excellent longevity, 25-50 years depending on quality. RCC’s structural slab lasts even longer, but its waterproofing layer needs periodic reapplication regardless.

    Is RCC roofing actually the cheapest option long-term? Not necessarily — while RCC is the default and structurally necessary for most apartment construction, the repeated waterproofing cost over decades can exceed the lifetime cost of clay or concrete tile alternatives when calculated per year of service.

    Do metal roofing sheets work well in Indian summer heat? Not without additional insulation underneath. Bare metal sheets transmit heat significantly, making spaces beneath them noticeably hotter than RCC or tile alternatives during peak summer months.

    How often does RCC terrace waterproofing actually need reapplication? Depending on the method used, anywhere from 4-6 years (cementitious, most budget-friendly) to 8-12 years (APP membrane, more durable but pricier upfront).

    Are clay tiles suitable for apartment buildings, or just independent houses? Clay tiles work best with sloped roof structures, which is why they’re more common in independent houses. Most Indian apartment buildings use flat RCC roofs, making tile options less practical without significant structural redesign.

    Which roofing material needs the least ongoing maintenance? Metal sheets and clay tiles both need relatively low ongoing maintenance beyond occasional damaged-piece replacement, compared to RCC roofs, which need periodic waterproofing reapplication regardless of the concrete’s own structural durability.

    Final Thoughts

    Choosing among the best roofing materials for your specific situation comes down to running the actual cost-per-year math, not just comparing upfront quotes side by side. RCC with proper waterproofing suits most standard Indian construction, while tile and metal options serve more specific priorities around heat performance or budget speed.

    Before finalizing your next roofing decision, ask your contractor directly for expected lifespan alongside the price quote, then do the simple division yourself. That one extra question, more than any brand loyalty or contractor recommendation, is what actually protects your long-term roofing budget.