Blog

  • Roof Repair Signs You Shouldn’t Ignore Before Monsoon

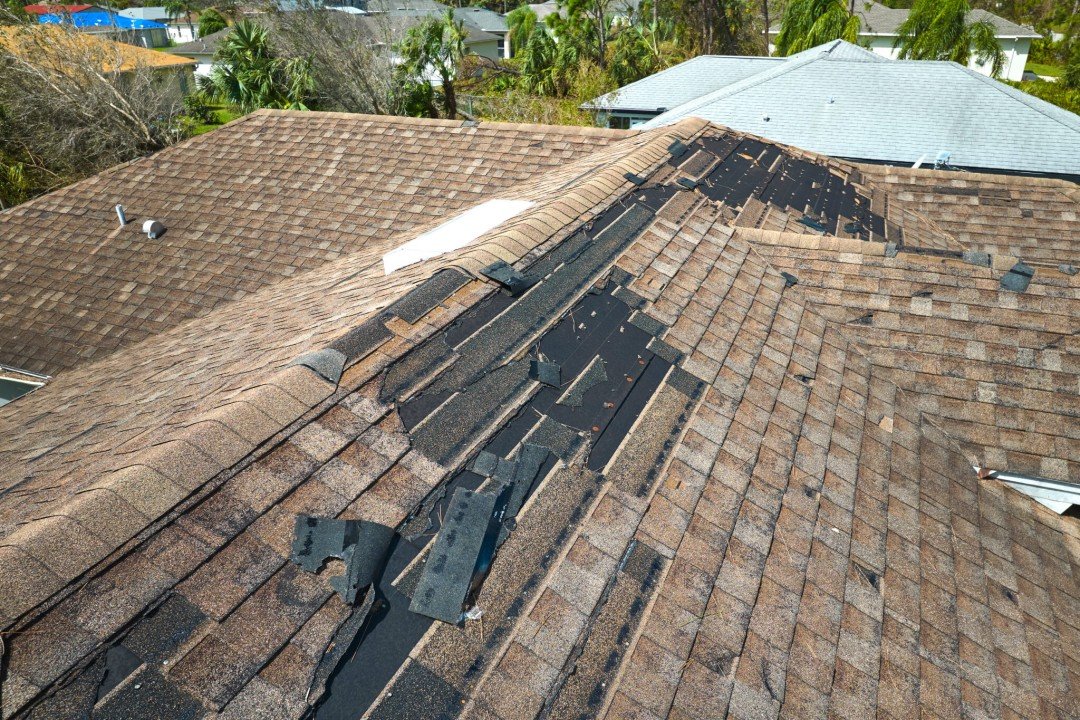
    Roof Repair Signs You Shouldn’t Ignore Before Monsoon

    That faint water stain on the ceiling corner you noticed last October and figured “it’s probably nothing” — has it grown even slightly since then? That’s usually the first clue most people miss.

    Catching roof repair signs early, weeks or even months before monsoon actually arrives, is the difference between a manageable ₹10,000 fix and a full ceiling collapse repair running into lakhs. I own a top-floor flat, so roof issues aren’t theoretical for me — I’ve dealt with two separate waterproofing failures over the years, and both times, looking back honestly, there were warning signs I noticed and just filed away as “check later.”

    This guide walks through what actually indicates roof trouble in 2026, specifically for Indian flat roofs and terrace conditions, not generic sloped-roof advice that doesn’t apply here.

    Why Indian Flat Roofs Fail Differently Than Sloped Roofs

    Direct answer: Flat roofs common in Indian apartments and independent houses are more prone to water pooling than sloped roofs, since there’s no natural runoff — meaning waterproofing degradation, cracks, and drainage blockages show up as standing water problems rather than the shingle damage typical of sloped-roof homes.

    Most roof maintenance content online is written for markets with sloped, shingled roofs, which just isn’t the reality for most Indian homes. Flat terraces need proper slope built into the waterproofing layer itself to drain correctly, and this slope degrades or gets damaged over years of foot traffic, temperature cycling, and general wear.

    I’ve noticed the roof problems that escalate fastest are almost always ones where water pools in one specific spot repeatedly rather than draining properly — that’s usually the first sign something structural, not just cosmetic, needs attention.

    1. Ceiling Water Stains: The Most Obvious Sign, Often Caught Too Late

    Direct answer: Brown or yellowish ceiling stains indicate water has already penetrated through the roof’s waterproofing layer and reached the concrete slab beneath — by the time a stain is visible, the underlying damage has typically been developing for weeks or months already.

    This is the sign everyone recognizes, but by the time it’s visible, you’re already past the “catch it early” window. The stain itself represents accumulated moisture, not the start of the problem.

    Has this ever happened to you — a stain that seemed to fade after a dry spell, only to reappear worse after the next rain? That pattern specifically indicates an active, ongoing leak rather than old residual moisture, and needs proper waterproofing attention, not just a paint touch-up over the stain.

    2. Standing Water on the Terrace After Rain

    Walk up to your terrace a few hours after rain stops. If water is still pooling in specific spots rather than having drained away, that’s a genuine early warning sign, well before any ceiling damage shows up below.

    • Check corners and low points specifically, where drainage slope issues concentrate water
    • Note how long pooling takes to clear — anything beyond 2-3 hours after rain stops suggests a drainage or slope problem worth addressing
    • Look for any cracks or bubbling in the waterproofing membrane near pooling areas specifically

    Picture a small business owner in Jaipur running a rooftop café, who noticed water pooling near one corner for two monsoons running before finally addressing it. By year three, that same corner had developed a genuine leak into the floor below, costing significantly more to fix than the original drainage correction would have.

    3. Visible Cracks in the Waterproofing Membrane or Terrace Surface

    Direct answer: Hairline cracks in a terrace’s waterproofing coating or the concrete surface itself widen over successive heat and moisture cycles, eventually becoming entry points for water — catching these while still small (under 2-3mm) allows for a simple patch repair rather than full membrane replacement.

    Terrace surfaces expand and contract with temperature swings throughout the year, and this constant movement eventually cracks even well-applied waterproofing if it’s past its useful life. Small cracks are genuinely easy and cheap to patch. Left alone through a full monsoon season, they widen considerably.

    Walk your terrace on a dry day specifically to check for cracks — they’re often easier to spot when the surface is fully dry rather than after rain when everything looks uniformly wet.

    4. Musty Smell or Visible Mould on Top-Floor Ceilings

    A persistent musty smell in a top-floor room, even without an obvious visible stain, often indicates moisture accumulating within the roof structure before it’s visible as a surface stain. Mould spots, even small ones, confirm sustained dampness that needs addressing.

    • Check corners and areas near AC outdoor unit mounting points specifically, since these penetrations are common leak entry spots
    • A musty smell that intensifies during or right after rain, then fades in dry weather, points toward an active seasonal leak
    • Don’t just clean visible mould without addressing the underlying moisture source — it returns quickly if the actual leak isn’t fixed

    5. Peeling Paint or Bubbling on Top-Floor Ceilings

    Paint bubbling or peeling on a ceiling, distinct from normal wear, usually indicates moisture trapped beneath the paint layer, pushing against it from water that’s penetrated through the roof above.

    This sign often gets misdiagnosed as “just old paint needing a repaint,” when actually addressing the underlying roof issue first is essential — repainting over an active moisture problem just delays the visible symptom while the actual damage continues underneath.

    6. Damaged or Blocked Terrace Drainage Outlets

    Direct answer: Terrace drainage outlets clogged with debris, leaves, or accumulated silt prevent proper water runoff, directly causing the standing water and pressure buildup that leads to waterproofing failure — checking and clearing these before monsoon season is one of the simplest, cheapest preventive roof repair steps available.

    This connects directly to the pooling issue mentioned earlier. A drainage outlet that looks clear on the surface can still be partially blocked a few inches down, where silt accumulates gradually and isn’t visible without actually checking.

    1. Physically check each drainage outlet by hand, not just a visual glance
    2. Clear any debris, leaves, or silt buildup completely
    3. Test by pouring a bucket of water near the outlet and confirming it drains within a reasonable time

    7. Age of Last Waterproofing Application

    Direct answer: Terrace waterproofing typically lasts 5-8 years depending on the method used and exposure conditions — if you don’t know or can’t recall when your roof was last waterproofed, and it’s been longer than this range, proactive reapplication makes more sense than waiting for visible failure signs.

    Not every roof issue announces itself with a dramatic sign. Sometimes the honest answer is simply “it’s been long enough that a check makes sense regardless of visible symptoms.” Waterproofing degrades gradually, and the failure point isn’t always obvious until it’s already causing damage.

    [link to related guide on monsoon home maintenance tips here] covers the broader pre-monsoon checklist beyond just roof-specific concerns.

    Roof Repair Signs: Quick Reference Checklist

    SignUrgencyWhat It Usually Means
    Ceiling water stainsHighActive leak, waterproofing already breached
    Standing water after rainMedium-highDrainage slope or blockage issue
    Visible cracks in membraneMediumEarly-stage, cheap to fix if caught now
    Musty smell/mouldMedium-highSustained moisture, possibly not yet visible as stain
    Peeling/bubbling ceiling paintHighTrapped moisture actively damaging ceiling
    Blocked drainage outletsMediumPreventable cause of pooling and pressure buildup
    Waterproofing over 5-8 years oldLow-medium (proactive)Statistically due for reapplication regardless of symptoms

    Cost of Roof Repair: Early vs Delayed

    Here’s roughly how the cost difference plays out based on typical Indian repair pricing in 2026:

    Issue StageApprox Cost
    Crack patching (caught early)₹2,000-5,000
    Drainage clearingFree-₹500 (DIY or basic labour)
    Full terrace waterproofing reapplication₹15-40 per sq ft
    Ceiling repair after active leak (plaster, paint)₹8,000-25,000
    Structural repair after prolonged water damage₹50,000+

    FAQ: Common Questions About Roof Repair Signs Before Monsoon

    How early before monsoon should I check for roof repair signs? Ideally 6-8 weeks before your region’s monsoon typically starts, giving enough time for any waterproofing work to properly cure before heavy rain arrives.

    Is standing water on my terrace always a serious problem? Not always seriously urgent immediately, but water that takes more than 2-3 hours to drain after rain indicates a slope or blockage issue worth addressing before it worsens through repeated monsoon exposure.

    Can I do minor roof crack repairs myself, or does this always need a professional? Small hairline cracks can often be patched with a basic waterproofing sealant yourself for genuinely minor cases. Anything beyond small surface cracks, or any sign of structural concern, needs a professional assessment.

    How do I know if my ceiling stain is from an old leak or an active one? An active leak typically shows fresh, expanding edges or reappears worse after each rain. A stain from an old, already-fixed leak usually stays the same size and doesn’t darken further over time.

    Does terrace waterproofing need to be redone every single year? No, quality waterproofing typically lasts 5-8 years. What’s needed annually is an inspection to catch early cracks or drainage issues, not necessarily a full reapplication each year.

    What’s the biggest mistake people make with roof repair timing? Waiting for a visible ceiling stain before addressing anything. By that point, the underlying issue has usually been developing for a while, and the repair costs considerably more than catching the earlier warning signs would have.

    Final Thoughts

    Most serious monsoon water damage traces back to roof repair signs that were visible weeks or months earlier — a crack, some pooling water, a musty smell nobody investigated properly. None of these look urgent in isolation, which is exactly why they get put off until they’re not avoidable anymore.

    Head up to your terrace this weekend and run through the checklist above, even if nothing seems obviously wrong right now. Catching one small crack or a blocked drain today is a fraction of the cost and stress of dealing with a ceiling collapse mid-monsoon.


  • Property Resale Value Factors: Location Beats Everything Else

    Property Resale Value Factors: Location Beats Everything Else

    Two identical flats, same builder, same floor plan, same year of construction — one sells for 40% more than the other five years later. The only real difference? Location. Has this ever struck you as unfair, or just how the market genuinely works?

    Among all the property resale value factors people obsess over — interiors, floor number, vastu, brand of fittings — location consistently outweighs the rest combined. I’ve watched this play out with my own extended family’s properties over the years, and honestly, it’s a bit frustrating to see people spend lakhs on premium interiors in a location that was never going to hold value well to begin with.

    This guide breaks down exactly which location-related factors actually move resale prices in Indian cities, and which commonly cited ones matter far less than people assume, going into 2026’s market conditions.

    Why Location Dominates Every Other Resale Value Factor

    Direct answer: Location affects property resale value more than any other single factor because it’s the one variable that can’t be changed after purchase — interiors, fittings, and even floor plans can be renovated, but proximity to infrastructure, transit, and employment hubs is fixed permanently once a property is built.

    This is the core reason experienced real estate investors obsess over location above almost everything else. A poorly finished flat in an excellent location can be renovated into something desirable. A beautifully finished flat in a declining or poorly connected area has a ceiling on its resale potential that no amount of interior work fixes.

    I’ve noticed first-time buyers often get this backwards, prioritizing a flat’s current finish quality over its location’s long-term trajectory, which tends to work against them when it’s time to sell.

    1. Proximity to Metro and Public Transit

    Direct answer: Properties within 1-1.5 km of an operational metro station typically command a resale premium of 15-25% over comparable properties farther from transit, based on patterns observed across major Indian cities where metro expansion has occurred in recent years.

    This effect has become one of the most consistent patterns in Indian real estate over the past decade. Metro connectivity genuinely changes daily commute feasibility, and buyers pay for that convenience predictably, city after city.

    Picture a flat in Noida that sat relatively flat in value for years, then saw a noticeable price jump once a nearby metro extension opened. This kind of pattern has repeated across Delhi-NCR, Bengaluru, and other cities with active metro expansion — worth researching planned (not just current) transit lines when evaluating a property’s future resale potential.

    2. Distance From Employment Hubs

    Proximity to major IT parks, business districts, or commercial hubs affects resale value substantially, particularly in cities where daily commute times genuinely shape quality of life decisions.

    • Properties within a 20-30 minute commute of major employment centers hold value better through market slowdowns
    • Areas anticipating new employment hub development (announced IT parks, corporate campuses) often see gradual appreciation even before construction completes
    • Areas losing employment relevance (a major employer relocating or downsizing) can see resale values stagnate or decline over time

    3. School and Healthcare Access

    Families with children specifically weigh school proximity heavily, and this shows up in resale patterns for family-oriented properties. Similarly, healthcare access matters more to certain buyer segments — particularly retirees or joint families with elderly members.

    • Properties within walking or short-drive distance of well-regarded schools often see faster resale turnaround, not necessarily always higher price, but genuinely faster buyer interest
    • Proximity to a multi-specialty hospital adds resale appeal for a meaningful segment of buyers, particularly in Tier-2 cities where healthcare access varies more significantly by area

    4. Neighbourhood Trajectory: Rising vs Declining Areas

    Direct answer: A property’s resale value depends heavily on whether its neighbourhood is on an upward or declining trajectory — areas seeing new infrastructure investment, retail development, and population growth tend to appreciate faster than established areas that have already peaked or areas showing signs of infrastructure neglect.

    This is genuinely harder to assess than the other factors, since it requires looking beyond current conditions toward direction of change. An area that looks unremarkable today but has announced infrastructure projects, new commercial development, or population inflow can outperform an already-premium area that’s plateaued.

    I’d honestly disagree with buyers who focus purely on “which area is most premium right now” without considering trajectory. Some of the best resale value gains I’ve seen among family and friends came from buying in areas that were genuinely unglamorous at purchase time but had clear signs of upward development already underway.

    5. Road Connectivity and Traffic Patterns

    Daily traffic reality affects resale value more than people initially account for. A property that looks well-located on a map can face genuinely poor practical connectivity due to traffic bottlenecks, one-way road systems, or seasonal flooding on access roads.

    1. Check actual commute times during peak hours, not just map distance
    2. Ask existing residents about traffic patterns specific to the exact road, not just the general area
    3. Consider monsoon-season accessibility specifically for areas with any flooding history [link to related guide on monsoon home maintenance tips here]

    6. Proximity to Nuisances That Quietly Hurt Resale Value

    Some location factors work against resale value, and buyers often overlook these during an excited property search. Properties near these features consistently see resale challenges regardless of how good the flat itself is:

    • Directly facing a busy highway or major traffic junction, due to noise and pollution concerns
    • Proximity to industrial zones, even if zoning currently allows residential use nearby
    • Adjacent to under-construction projects with unclear completion timelines, which can affect both livability during construction and buyer perception afterward
    • Low-lying areas with a documented history of monsoon flooding

    7. City-Specific Location Trends Worth Knowing in 2026

    Location value patterns aren’t uniform across India — what drives premium pricing in Bengaluru differs from patterns in Mumbai or smaller Tier-2 cities.

    • Bengaluru: proximity to IT corridors (Whitefield, Electronic City, Outer Ring Road) continues to dominate resale premiums
    • Mumbai: connectivity via suburban rail and upcoming metro lines remains the strongest single predictor of resale value
    • Delhi-NCR: metro proximity and distance from pollution-heavy industrial zones both weigh heavily
    • Tier-2 cities (Jaipur, Indore, Lucknow): emerging IT parks and planned infrastructure projects are starting to show the same patterns metro cities saw a decade ago

    [link to related guide on first time home buyer mistakes to avoid here] if you’re weighing location against other purchase factors for the first time.

    Location Factors Ranked by Resale Impact

    Based on patterns observed across Indian cities, here’s roughly how these factors rank in terms of resale value impact:

    FactorResale ImpactWhy It Matters
    Metro/transit proximityVery highDirect commute convenience, consistent buyer demand
    Employment hub distanceHighAffects daily quality of life for working buyers
    Neighbourhood trajectoryHighDetermines future appreciation, not just current value
    School/healthcare accessModerate-highStrong for specific buyer segments (families, retirees)
    Road connectivity/trafficModerateAffects practical livability beyond map distance
    Nuisance proximityModerate (negative)Can suppress otherwise strong location value

    FAQ: Common Questions About Property Resale Value Factors

    Does floor number matter as much as location for resale value? Floor number matters, but far less than location. A well-located property on a less popular floor almost always outperforms a poorly located property on a premium floor over the long term.

    How much of a resale premium does metro proximity actually add? Based on patterns across major Indian cities, properties within 1-1.5 km of an operational metro typically see a 15-25% resale premium over comparable properties farther away, though this varies by specific city and metro line usage.

    Is it worth buying in an “up and coming” area versus an already-established premium location? It depends on your investment horizon and risk tolerance. Established premium areas offer more predictable but slower appreciation, while genuinely up-and-coming areas carry more risk but potentially higher long-term gains if the anticipated development actually materializes.

    Do school-zone properties always resell faster? Generally yes, for family-oriented buyer segments specifically, though this factor matters less for investors or buyers without school-age children, so its impact varies by target buyer.

    How can I research a neighbourhood’s future infrastructure plans before buying? Check your city’s development authority website for announced metro extensions, road projects, or zoning changes. Local real estate forums and recent news coverage of infrastructure announcements also help build a fuller picture.

    Does proximity to a highway always hurt resale value? Direct-facing highway properties typically see lower resale demand due to noise and pollution, but properties with good highway access without direct exposure (a short drive away rather than facing it) can actually benefit from improved connectivity without the downsides.

    Final Thoughts

    Among all the property resale value factors worth considering, location remains the one variable you genuinely cannot change after purchase, which is exactly why it deserves more weight than interior finishes or floor number when making a buying decision. Metro proximity, employment hub distance, and neighbourhood trajectory consistently outweigh everything else in the resale equation.

    Before your next property decision, spend real time researching the location’s future trajectory, not just its current state — check planned infrastructure, talk to residents, and look at how similar nearby areas have performed over the past 5-10 years. That research effort, more than any single feature of the flat itself, is what protects your resale value down the line.

  • First Time Home Buyer Mistakes That Genuinely Cost You

    First Time Home Buyer Mistakes That Genuinely Cost You

    Signing on a flat that “felt right” during a single Sunday visit, only to discover six months later that the society’s maintenance charges are double what you budgeted for — this happens more often than people admit.

    First time home buyer mistakes in India tend to follow a pattern, and having watched two close friends go through the buying process (one smoothly, one with several expensive surprises), I’ve noticed the mistakes are rarely about the property itself. They’re about paperwork nobody double-checked, budgets that only accounted for the sale price, and decisions rushed under pressure from a broker or a “limited time” deal.

    This guide covers the mistakes that actually cost people money and stress in 2026, not generic advice you’d find in any real estate brochure.

    Why First-Time Buyers Make Predictable Mistakes

    Direct answer: First-time home buyers typically make avoidable mistakes because the process involves unfamiliar legal, financial, and negotiation elements all at once, and most buyers go through it only once or twice in their lives — meaning there’s little accumulated experience to draw on compared to a seasoned investor or broker on the other side of the deal.

    Brokers and sellers do this professionally, often dozens of times a year. A first-time buyer is, by definition, doing this for the first time, which creates a real information gap that isn’t the buyer’s fault, just a structural reality of the process.

    I’ve noticed the buyers who do best are the ones who slow down deliberately and ask more questions than feels natural, even at the risk of seeming overly cautious to an eager broker.

    1. Not Verifying Property Documents Thoroughly

    Direct answer: Skipping proper legal verification of title deeds, encumbrance certificates, and approved building plans is one of the costliest first time home buyer mistakes, since undiscovered legal disputes or unauthorized construction can make a property unsellable or legally risky years after purchase.

    This is the mistake with the biggest potential downside on this entire list. A property with unclear title history or unauthorized construction might look completely fine on a site visit, but the problems surface later — sometimes years later, when you try to sell or when a dispute emerges.

    Documents worth verifying properly, ideally through a lawyer rather than relying solely on the broker’s word:

    • Title deed and chain of ownership going back at least 12-15 years
    • Encumbrance certificate confirming no pending loans or legal claims
    • Approved building plan matching the actual constructed property
    • Occupancy certificate (OC) for ready-to-move properties specifically

    2. Underestimating the Total Cost Beyond the Sale Price

    Picture a couple in Bengaluru who budgeted exactly ₹65 lakh for their flat, matching the seller’s quoted price precisely, then discovered stamp duty, registration, GST (on under-construction properties), brokerage, and interior work added nearly ₹8 lakh more than they’d planned for. That’s not a rare story — it’s closer to the norm.

    • Stamp duty and registration: typically 5-7% of property value depending on the state
    • GST: applicable on under-construction properties, generally around 1-5% depending on category
    • Brokerage: usually 1-2% of the sale price if using an agent
    • Interior and fitting costs: often ₹3-8 lakh depending on how much the property needs

    Has anyone ever walked you through the full cost breakdown before you started house-hunting? Most first-time buyers genuinely haven’t seen this until they’re deep into the process, which is exactly when budget shocks hurt the most.

    3. Skipping a Proper Home Loan Comparison

    Direct answer: Many first-time buyers accept the home loan offered by their bank or the builder’s in-house lender without comparing rates across multiple institutions, potentially costing lakhs extra in interest over a 20-year loan tenure due to even a 0.25-0.5% difference in interest rate.

    This mistake compounds significantly over time, which is exactly why it’s easy to underestimate upfront. A seemingly small rate difference, multiplied across two decades of EMIs, adds up to a genuinely large sum.

    A few things worth comparing across lenders before committing:

    1. Interest rate (fixed vs floating, and the actual applicable rate for your credit profile)
    2. Processing fees and any hidden charges
    3. Prepayment penalty terms, if you plan to pay off early eventually
    4. Loan tenure flexibility and EMI restructuring options

    This isn’t financial advice specific to your situation — loan terms depend heavily on your income, credit score, and the property itself, so it’s worth discussing your specific numbers with a bank representative or a qualified financial advisor before finalizing anything.

    4. Not Accounting for RERA Registration Status

    RERA (Real Estate Regulatory Authority) registration exists specifically to protect buyers, and skipping this check is a genuinely avoidable mistake. For under-construction properties especially, RERA registration means the builder has committed to specific timelines and disclosure requirements.

    Check the RERA registration number on your state’s RERA website directly, rather than just trusting a number printed in a brochure. This takes a few minutes and confirms the project is legitimately registered, with actual project details matching what’s been disclosed.

    5. Rushing the Decision Under Sales Pressure

    Every property visit seems to come with some version of “there’s another buyer interested” or “this offer is only valid till the weekend.” Sometimes true, often exaggerated to push a faster decision.

    I’ve noticed the buyers who end up happiest with their purchase are almost always the ones who visited the property multiple times, at different times of day, and took at least a week before signing anything. The ones who regret rushed purchases usually cite this exact pressure as the reason they skipped proper diligence.

    • Visit at different times of day to check noise levels, sunlight, and traffic patterns
    • Talk to existing residents in the building or society, not just the broker or seller
    • Take at least a few days after the final decision before signing, even if it feels slower than the seller would like

    6. Ignoring the Society’s Financial Health and Maintenance Charges

    This gets overlooked constantly, and it’s a genuinely costly oversight. A well-built flat in a financially troubled housing society can mean unexpected special assessments, poor upkeep of common areas, or maintenance charges that climb faster than expected.

    • Ask for the last 2-3 years of society maintenance charge history, not just the current rate
    • Check if the society has any pending legal disputes or major unresolved maintenance issues
    • Understand what the maintenance charge actually covers — some societies bundle far more (security, amenities, sinking fund) than others

    7. Not Getting a Proper Home Inspection Before Finalizing

    For resale properties especially, skipping a proper inspection of plumbing, electrical wiring, and structural condition is a mistake that often surfaces as expensive repairs within the first year of moving in.

    [link to related guide on common plumbing mistakes that cause water damage here] covers what to specifically check plumbing-wise during a resale property visit.

    A basic professional inspection (₹3,000-8,000 depending on property size) is genuinely worth the cost, especially for older resale properties where wear and tear isn’t always visible during a casual walkthrough.

    First Time Home Buyer Mistakes: Quick Checklist

    AreaWhat to VerifyWhy It Matters
    Legal documentsTitle deed, encumbrance certificate, approved planAvoids future ownership or legal disputes
    Total costStamp duty, GST, brokerage, interiorsPrevents budget shock beyond sale price
    Home loanCompare rates across 3+ lendersSaves potentially lakhs over loan tenure
    RERA statusVerify registration on official state websiteConfirms builder accountability and disclosures
    Society healthMaintenance history, pending disputesAvoids unexpected charges or poor upkeep
    Property conditionProfessional inspection for resale flatsCatches hidden plumbing/electrical issues early

    FAQ: Common Questions About First Time Home Buyer Mistakes

    What’s the single most expensive first-time home buyer mistake? Skipping proper legal document verification, by a significant margin. Title or construction-approval issues can affect the property’s resale value or legal standing for years after purchase.

    How much should I budget beyond the property’s sale price? As a rough guide, budget an additional 10-15% of the sale price for stamp duty, registration, GST (if applicable), brokerage, and basic interior work, though this varies by state and property type.

    Is it necessary to hire a lawyer for property document verification, or can I do it myself? For most first-time buyers, a lawyer’s review (typically ₹5,000-15,000) is worth the cost, given how significant undetected legal issues can become. It’s not something most buyers have the expertise to fully verify alone.

    How do I check if a property is RERA registered? Visit your state’s official RERA website and search using the registration number provided by the builder or broker. Confirm the project details match what’s been disclosed to you directly.

    Should I always negotiate the price, even on a “final price” listing? Most sale prices do have some room for negotiation, particularly for resale properties, though the room varies by market conditions and how motivated the seller is. It’s generally worth a polite attempt regardless.

    What questions should I ask existing residents when researching a society? Ask about maintenance charge trends over the past few years, any recurring building issues (water supply, lift maintenance, security), and general responsiveness of the society management to complaints.

    Final Thoughts

    Most first time home buyer mistakes aren’t about picking the wrong property — they’re about skipping the unglamorous verification steps that don’t show up in a broker’s pitch or a nicely staged site visit. Legal document checks, a realistic total budget, and a proper loan comparison across lenders cover the mistakes that cost people the most.

    Before your next property visit, pull together a simple document checklist based on this guide and bring it along, even if it feels like overkill to the broker showing you around. A little friction now is genuinely cheaper than an expensive surprise a year into ownership — and remember, for anything involving significant sums or legal specifics, a qualified lawyer or financial advisor familiar with your exact situation is worth the consultation fee.

  • Air Purifying Indoor Plants for Indian Homes: An Honest Guide

    Air Purifying Indoor Plants for Indian Homes: An Honest Guide

    Delhi’s air quality index crosses “hazardous” territory most winters, and somewhere along the way, everyone started buying money plants and snake plants like they’d single-handedly fix the problem. Has this ever happened to you — buying a plant specifically because someone said it “purifies air,” without really knowing how much truth is behind that?

    I want to be upfront here: air purifying indoor plants genuinely do filter some pollutants, but the effect in a real, ventilated Indian home is nowhere near what a lot of viral posts suggest. That NASA study everyone cites was done in sealed lab chambers, not actual living rooms with doors opening and closing all day.

    That said, these plants aren’t useless either. This guide covers what they actually do, which ones are worth having in an Indian home in 2026, and where the marketing genuinely oversells the science.

    What “Air Purifying” Actually Means for Indoor Plants

    Direct answer: Air purifying indoor plants absorb certain airborne pollutants (like formaldehyde and benzene) through their leaves in controlled lab conditions, but in a real, naturally ventilated home, the effect on overall air quality is modest — genuinely helpful as one small factor, not a substitute for proper ventilation or an air purifier.

    I’ve noticed a lot of confusion stems from that one widely cited NASA Clean Air Study from decades ago, which tested plants in small, completely sealed chambers. Real homes aren’t sealed chambers — air moves, doors open, and the pollutant concentration a single plant can meaningfully affect is a fraction of what a whole room actually contains.

    None of this means skip the plants. It means set expectations properly — think of them as a small, genuine contribution alongside proper ventilation and, if pollution levels are high in your city, an actual air purifier. Not a replacement for either.

    1. Snake Plant (Sansevieria): The Most Overrated Yet Genuinely Useful Pick

    Snake plant gets recommended constantly, sometimes for reasons that don’t fully hold up (the “releases oxygen at night” claim gets exaggerated a lot online). What’s actually true: it’s remarkably hardy, tolerates low light and irregular watering, and does process some air pollutants reasonably well according to available research.

    • Thrives in both bright and low-light conditions, making it flexible for most Indian apartment layouts
    • Needs watering only every 2-3 weeks, genuinely low-maintenance
    • Cost: ₹150-400 depending on pot size and variety

    I keep three of these around my apartment, mostly because they survive my inconsistent watering schedule, not because I’m banking on measurable air quality improvement from them alone.

    2. Areca Palm: Good for Humidity, Decent Air Benefit Too

    Direct answer: Areca palm is particularly effective at adding natural humidity to a room through transpiration, which helps in Indian homes running AC constantly through summer, while also processing some airborne toxins as a secondary benefit.

    This is genuinely one of the better all-around picks if you want a plant that does more than just sit there looking green. It needs slightly more attention than snake plant — regular watering, bright indirect light — but the humidity benefit alone makes it worth the extra care in an AC-heavy household.

    Picture a small business owner in Jaipur running an office with the AC on for 8-10 hours daily — an areca palm near the entrance genuinely helped with the dry, stale air feeling that constant AC use tends to create, based on what she told me when I asked about her setup.

    3. Money Plant (Pothos): Popular for Good Reason, Even If Overhyped Slightly

    Money plant might be the single most common houseplant in Indian homes, and the reasons are mostly practical rather than about air purification specifically — it’s nearly impossible to kill, grows in water or soil, and tolerates almost any light condition.

    The air-purifying claims for pothos are genuine but modest, similar to most plants on this list. What it’s actually great at is filling space quickly and cheaply, and honestly, that visual greenery effect on mood and a room’s feel shouldn’t be underestimated even separate from air quality claims.

    • Cost: ₹50-150, among the cheapest options available
    • Can be trained to climb or trail, useful for small apartments wanting vertical greenery
    • Propagates easily from cuttings, so one plant can become several over time

    4. Peace Lily: Beautiful, But Needs More Attention Than People Expect

    Direct answer: Peace lily ranks among the higher air-purifying performers in lab studies, but it needs more consistent watering and indirect light than snake plant or pothos, making it a better fit for households willing to give slightly more regular care.

    I’ll be honest, I’ve killed two peace lilies through simple neglect before switching entirely to hardier options. If you’re the type who forgets watering schedules regularly, this might not be your best first pick despite how often it appears on “best air purifying plants” lists.

    For households that do keep a consistent watering routine, though, peace lily rewards the effort with genuinely attractive white blooms and a plant that visibly droops when it needs water, making neglect harder to accidentally sustain for too long.

    5. Aloe Vera: Practical Beyond Just Air Quality

    Aloe vera earns its spot here less for dramatic air-purifying claims and more because it’s genuinely useful to have around — the gel works for minor burns and skin irritation, and the plant itself tolerates neglect about as well as succulents generally do.

    1. Needs bright light, ideally a few hours of direct sun
    2. Watering only when soil is completely dry, roughly every 2-3 weeks
    3. Cost: ₹100-250, widely available at most nurseries

    [link to related guide on natural home cleaning tips for pets and kids here] if you’re building out a broader natural, low-chemical approach to your home.

    Plants to Be Cautious About If You Have Pets

    Not every commonly recommended plant is safe around curious cats and dogs, and this matters enough to flag clearly. Some popular “air purifying” plants are actually toxic to pets if chewed or ingested.

    • Peace lily and money plant/pothos are both mildly to moderately toxic to cats and dogs if ingested
    • Aloe vera, despite its skin benefits for humans, is also toxic to pets in significant quantities
    • Snake plant is mildly toxic as well, though generally causes only mild stomach upset rather than serious harm

    If you have pets that chew on plants, consider placing these on high shelves or hanging planters out of reach, or research pet-safe alternatives like areca palm and spider plant, which are generally considered non-toxic.

    Realistic Expectations: Plants Alone Won’t Fix Indoor Air Quality

    Direct answer: For genuinely poor air quality — high pollution days, homes near busy roads, or households with allergy concerns — an air purifier with a proper HEPA filter makes a measurably larger difference than any number of indoor plants, which work best as a complementary addition rather than a primary solution.

    I don’t want to overstate what plants can do, especially for readers dealing with genuinely serious air quality concerns, like those in Delhi-NCR during peak pollution season. A dozen snake plants in your living room won’t meaningfully offset a hazardous AQI day the way a proper air purifier will.

    Think of indoor plants as one part of a broader approach — proper ventilation when air quality outside is decent, an air purifier for genuinely bad days, and plants as a smaller, genuine but modest contribution alongside both.

    Best Air Purifying Indoor Plants: Quick Comparison

    PlantMaintenance LevelPet SafetyApprox Cost
    Snake plantVery lowMildly toxic₹150-400
    Areca palmModerateNon-toxic₹500-1,500
    Money plant/pothosVery lowMildly toxic₹50-150
    Peace lilyModerate-highToxic₹200-500
    Aloe veraLowToxic₹100-250
    Spider plantLowNon-toxic₹100-300

    FAQ: Common Questions About Air Purifying Indoor Plants

    Do air purifying plants actually make a measurable difference in Indian homes? A modest one, yes, but nowhere near what the popular NASA study claims suggest when applied to a real, ventilated home rather than a sealed lab chamber. They’re a genuine but small contribution, not a replacement for ventilation or an air purifier.

    How many plants would I need for a noticeable air quality effect? Realistically, far more than most apartments could comfortably hold — some estimates suggest dozens of plants per room for lab-study-level effects, which isn’t practical for most homes.

    Which air purifying plant is safest if I have cats or dogs? Areca palm and spider plant are generally considered non-toxic and safe options if pets tend to nibble on greenery around the house.

    Do these plants help specifically with Delhi’s or other Indian cities’ pollution levels? Not meaningfully on their own during genuinely poor air quality days. A proper HEPA air purifier makes a measurably bigger difference for actual pollution concerns; plants work better as a complementary, everyday addition.

    Which air purifying plant is easiest to keep alive for a complete beginner? Snake plant and money plant, without much competition. Both tolerate irregular watering, various light conditions, and general neglect better than almost anything else on this list.

    Can these plants help with indoor odours as well as air pollutants? To some degree, yes, particularly plants with dense foliage in enclosed spaces like bathrooms. The effect is similarly modest compared to proper ventilation or odour-specific solutions, though.

    Final Thoughts

    Air purifying indoor plants are worth having, but worth having with realistic expectations rather than the inflated claims a lot of social media content pushes. Snake plant, money plant, and areca palm cover most Indian households well — easy to maintain, genuinely pleasant to have around, and a small but real contribution to indoor air.

    For actual air quality concerns, especially in cities with serious pollution problems, pair a few of these plants with proper ventilation habits and, if needed, a real air purifier. Start with two or three low-maintenance options from this list, and let the greenery be a nice bonus rather than the whole solution.

  • Balcony Garden Ideas for People Who Forget to Water Plants

    Balcony Garden Ideas for People Who Forget to Water Plants

    Let’s be honest about something first — most “easy gardening” content assumes you’ll actually remember to water on schedule, check soil moisture daily, and generally treat plants like a serious hobby. That’s not most of us.

    The best balcony garden ideas for small Indian apartments work around real life, not an idealized version of it. I’ve killed enough money plants and basil to have genuine opinions on what survives forgetfulness and what doesn’t. My current balcony, six plants strong, has survived two vacations and one genuinely neglectful monsoon month where I barely stepped outside.

    This guide covers what actually thrives with minimal effort in 2026, specifically for small balconies and Indian growing conditions — heat, humidity, limited space, the works.

    Why Most Balcony Garden Advice Doesn’t Account for Real Neglect

    Direct answer: Generic gardening advice often assumes daily attention and ideal conditions, but a genuinely low-maintenance balcony garden needs plants selected specifically for drought tolerance, minimal pruning needs, and resilience to inconsistent watering — the reality for most working professionals.

    A lot of gardening content is written by people who genuinely enjoy daily plant care as a hobby. Nothing wrong with that, but it doesn’t help someone who wants greenery without a second job’s worth of attention.

    I’ve noticed the plants that survive on my balcony aren’t the “beginner-friendly” ones every list recommends — they’re specifically the ones that tolerate being forgotten for a week and still look fine when I remember.

    1. Succulents and Cacti: The Genuinely Neglect-Proof Option

    Direct answer: Succulents and cacti store water in their leaves and stems, meaning they need watering only once every 10-14 days rather than daily — making them one of the most reliable balcony garden ideas for anyone who travels often or forgets watering schedules.

    These are the plants I recommend first to anyone who’s given up on keeping anything alive. Jade plant, aloe vera, and various small cacti all handle Indian heat well and genuinely punish overwatering more than underwatering, which works in your favour if forgetting is the pattern.

    • Jade plant (₹80-200): tolerates full sun, needs watering only when soil is completely dry
    • Aloe vera (₹100-250): doubles as a useful plant for minor burns, genuinely low-fuss
    • Snake plant (₹150-400): technically not a succulent but similarly forgiving, tolerates low light too

    2. Self-Watering Pots for the Plants That Actually Need Regular Moisture

    If you want anything beyond succulents — herbs, flowering plants, small vegetables — self-watering pots solve the consistency problem without needing you to remember daily.

    These pots (₹300-1,200 depending on size) have a reservoir at the base that wicks water up as needed, keeping soil moisture steady for 5-7 days between refills instead of requiring daily attention.

    Picture someone in Mumbai wanting fresh mint and coriander for cooking but traveling for work most weeks — self-watering pots keep both alive through a typical work trip without any arrangement needed with a neighbour.

    3. Vertical Planters to Maximize a Small Balcony

    Small balconies waste vertical space constantly, and wall-mounted or tiered planters (₹500-2,000 for a basic setup) fix this without eating into your actual floor or seating area.

    • Wall-mounted pocket planters work well for herbs and small succulents
    • Tiered plant stands let you fit 6-8 pots in the footprint of 2-3 floor pots
    • Hanging planters from a ceiling hook (if your balcony structure allows it) add greenery without any floor space at all

    I switched to a tiered stand about a year ago and genuinely fit almost double the plants in the same corner. Small change, disproportionate visual impact.

    4. Herbs That Actually Survive Indian Balcony Conditions

    Not every herb thrives here, and honestly, some popular Western gardening recommendations just don’t hold up against Indian summer heat. Here’s what’s worked consistently for me and people I know with similar setups:

    1. Curry leaves (kadi patta): thrives in full sun, genuinely low-maintenance once established, and a staple in most Indian kitchens anyway
    2. Mint (pudina): spreads aggressively, tolerates some neglect, needs a slightly bigger pot to avoid overcrowding
    3. Tulsi: culturally significant in a lot of Indian households and genuinely one of the hardiest herbs for balcony conditions
    4. Coriander: less forgiving than the others, needs more consistent watering, but worth it for how often it’s used in cooking

    Basil, despite being everyone’s go-to “easy herb” recommendation online, has genuinely struggled on my balcony every single summer. I’ve noticed it just doesn’t love the intense heat the way curry leaves or tulsi do — worth knowing before you build a whole herb garden around it.

    5. Drip Irrigation Timers for Genuine Hands-Off Watering

    Direct answer: A basic drip irrigation timer system (₹1,500-3,000) automates watering on a set schedule, making it possible to maintain a balcony garden through extended absences without asking a neighbour or relying on self-watering pots alone.

    For anyone with more than 5-6 plants, or plants that need more consistent watering than succulents, this is genuinely worth the investment. Small tubes run to each pot, connected to a timer that releases water on schedule.

    [link to related guide on budget smart home upgrades here] covers a few smart versions of this with app-based scheduling, if you want to check and adjust remotely while traveling.

    6. Choosing the Right Pots for Indian Heat and Monsoon

    Pot material matters more than people realize, particularly for a balcony exposed to direct sun most of the day. Terracotta pots breathe well and prevent waterlogging, but dry out faster in intense heat. Plastic pots retain moisture longer but can overheat roots in direct sun if not shaded at all.

    • Terracotta: better for succulents and plants that prefer drier soil
    • Glazed ceramic: a middle ground, retains moisture better than plain terracotta while still allowing some breathability
    • Plastic with drainage holes: cheapest option, fine for shaded balconies but riskier for full-sun spots

    Whatever you choose, drainage holes are non-negotiable. Waterlogged roots during monsoon season kill more balcony plants than heat or neglect combined, in my experience.

    7. Low-Maintenance Flowering Plants for Colour Without the Fuss

    If you want some colour beyond greenery, a few flowering plants handle Indian balcony conditions without demanding constant deadheading or fussy care.

    • Bougainvillea: thrives in full sun, tolerates neglect well once established, though it does need occasional pruning to control size
    • Marigold: genuinely easy, blooms reliably, and doubles nicely for festival decoration if you’re already doing [link to related guide on Diwali deep cleaning checklist here]
    • Hibiscus: needs slightly more consistent watering than the others on this list, but the payoff in bloom frequency is worth it for most people

    Sample Low-Maintenance Balcony Setup Under ₹5,000

    Here’s roughly how I’d build a genuinely low-effort balcony garden from scratch:

    ItemApprox Cost
    3 succulents (jade, aloe, snake plant)₹450
    Tiered plant stand₹1,200
    2 self-watering pots for herbs₹1,000
    Curry leaf and tulsi plants₹300
    Terracotta and ceramic pots (mixed)₹1,500
    Basic drainage trays₹400
    Total~₹4,850

    FAQ: Common Questions About Balcony Garden Ideas

    What’s the easiest plant to start with for a completely beginner balcony gardener? Snake plant or jade plant, without question. Both tolerate irregular watering, low attention, and a range of light conditions, making them nearly impossible to accidentally kill.

    How much sunlight does a low-maintenance balcony garden actually need? Most low-maintenance options (succulents, curry leaves, bougainvillea) prefer at least 4-6 hours of direct sunlight. For shadier balconies, snake plant and mint tolerate lower light better than most alternatives.

    Can I grow vegetables on a small balcony, or is it just herbs and flowers? Small vegetables like cherry tomatoes, chillies, and leafy greens do work on balconies with decent sun exposure, though they need more consistent watering than the truly low-maintenance options on this list.

    How do I keep my balcony garden alive during a week-long vacation? Self-watering pots handle most plants for 5-7 days without issue. For longer trips, a basic drip irrigation timer or asking a neighbour to water every few days covers the gap.

    Do balcony gardens need special monsoon care in India? Yes — ensure proper drainage in every pot before monsoon hits, since waterlogged roots are a bigger risk during heavy rain than the rain itself. Move sensitive plants under cover if your balcony gets direct rain exposure.

    What’s the biggest mistake people make when starting a balcony garden? Overwatering, by a wide margin. Most people assume more water always helps, but for succulents and several low-maintenance plants on this list, overwatering kills far more often than underwatering does.

    Final Thoughts

    A genuinely low-maintenance balcony garden isn’t about picking whatever looks nice at the nursery — it’s about matching plant choice to how much actual attention you’re realistically going to give it. Succulents, curry leaves, and tulsi cover the “I forget things” crowd well, while self-watering pots and drip timers handle the rest.

    Start with two or three plants from this list rather than filling the whole balcony at once. See what survives your actual routine over a month, then build out from there — that’s genuinely how my own balcony garden went from a single sad money plant to what it is now.

  • DIY Plumbing Repair vs Calling a Plumber: What Actually Makes Sense

    DIY Plumbing Repair vs Calling a Plumber: What Actually Makes Sense

    Standing in front of a dripping tap with a YouTube tutorial open on your phone, wondering if this is a “10-minute fix” situation or a “you’re about to make this so much worse” situation — most homeowners have been exactly there.

    The truth about DIY plumbing repair is that it genuinely saves money on some jobs and genuinely costs more on others, and the line between the two isn’t always obvious until you’re already halfway into the repair with parts scattered across the bathroom floor. I’ve done both — saved a fair bit on a few tap replacements, and once turned a ₹200 problem into a ₹3,000 one by attempting something I really shouldn’t have.

    This guide breaks down the real cost comparison, job by job, so you know which plumbing tasks are worth attempting yourself in 2026 and which ones genuinely need a professional.

    Why the DIY vs Professional Decision Isn’t Just About Cost

    Direct answer: Choosing between DIY plumbing repair and calling a professional depends on three factors beyond just labour cost — the risk of making the problem worse, whether the job involves hidden or concealed plumbing, and how much your own time and frustration are actually worth.

    Most people frame this purely as “plumber charges ₹500, so doing it myself saves ₹500.” That math only works if the DIY attempt actually succeeds cleanly. Factor in a failed attempt, and suddenly you’re paying for the original professional visit anyway, plus whatever damage the attempt caused, plus your own wasted time and irritation.

    I’ve noticed the jobs that go wrong most often for DIY attempters aren’t the hard ones — they’re the ones that look deceptively simple but have a hidden complication, like a pipe joint that seems accessible but sits at an awkward angle behind a wall panel.

    Jobs Worth Doing Yourself: Low Risk, Real Savings

    Direct answer: DIY plumbing repair makes financial sense for simple, visible, low-risk jobs — replacing a tap washer, unclogging a surface drain, or fixing a running toilet flush — where the parts cost ₹50-300 and the total savings versus a plumber visit typically run ₹300-600.

    These are jobs where even a partial failure doesn’t cause real damage, just wasted time, and the parts involved are cheap enough that a mistake doesn’t hurt much.

    • Replacing a tap washer: ₹30-80 for the part, saves roughly ₹300-500 in labour versus calling someone out for what’s genuinely a 10-minute fix
    • Fixing a running toilet flush valve: ₹150-400 for a replacement flush valve kit, saves ₹300-600 in a typical service call
    • Unclogging a surface drain: A plunger or basic drain snake (₹100-300) handles most simple clogs without any professional visit needed at all
    • Replacing a showerhead or basin tap: Straightforward if the existing connection isn’t corroded; parts run ₹500-2,500 depending on quality

    Jobs That Look DIY-Friendly But Usually Aren’t

    This is where I’d genuinely push back against a lot of generic DIY advice floating around online. Some tasks look simple in a five-minute video but involve enough real-world variables that attempting them without experience often backfires.

    Picture a small business owner in Jaipur trying to fix a leaking pipe joint under a commercial kitchen sink over a weekend, based on a tutorial video, to avoid closing for a plumber visit. The patch held for about four days, then failed at 2 AM, flooding the kitchen floor and damaging stored inventory — a repair that would’ve cost ₹500 with a professional turned into several thousand rupees in cleanup and lost stock.

    Jobs in this risky-but-tempting category:

    • Sealing pipe joints that have already failed once (usually indicates a deeper issue than a simple reseal fixes)
    • Any repair involving cutting into an existing pipe
    • Water heater or geyser-related plumbing, given the electrical proximity

    Jobs That Should Always Go to a Professional

    Direct answer: Certain plumbing jobs should never be attempted as DIY plumbing repair regardless of confidence level — concealed pipe repairs, main line issues, sewage line problems, and anything involving gas geysers — because the risk of property damage, health hazards, or safety issues far outweighs any labour cost saved.

    These aren’t judgment calls. They’re jobs where the potential downside is serious enough that the labour cost saving genuinely isn’t worth the risk.

    1. Concealed or wall-embedded pipe repairs — accessing these properly often needs breaking into walls or tiles, and doing this incorrectly causes structural and cosmetic damage beyond the original plumbing issue
    2. Main water line problems — affects the whole house’s water supply, and a failed DIY attempt can leave you without water for days while waiting for professional help anyway
    3. Sewage or drainage line blockages beyond a simple surface clog — these often need proper equipment (drain rodding machines, cameras for inspection) that DIY tools simply can’t handle
    4. Gas geyser plumbing connections — combines water and gas safety risks, genuinely not a DIY zone under any circumstances

    Real Cost Comparison Table: DIY vs Professional

    Here’s how the numbers actually break down for common household plumbing issues in India, based on 2026 rates:

    JobDIY CostProfessional CostWorth DIY?
    Tap washer replacement₹30-80₹300-500Yes
    Running toilet flush fix₹150-400₹400-700Yes
    Surface drain unclog₹100-300₹300-600Yes
    Showerhead/tap replacement₹500-2,500₹300-500 (labour only)Usually yes
    Pipe joint reseal (first attempt)₹100-300₹300-600Depends on location
    Concealed pipe repairNot recommended₹1,500-5,000+No
    Sewage line blockageNot recommended₹1,000-3,000No
    Water heater plumbingNot recommended₹500-1,500No

    How to Tell If a Job Has Gotten Beyond Your Skill Level Mid-Repair

    Has this ever happened to you — you start a repair confidently, and twenty minutes in, realize you’re genuinely not sure what you’re looking at anymore? That’s exactly the moment to stop, not push through.

    A few honest signals it’s time to call someone:

    • You’ve had to loosen or remove more parts than the tutorial video showed
    • Water pressure or flow seems different after your attempt, even if there’s no visible leak yet
    • You’re using tools or force that feels excessive for what should be a simple fix
    • The problem you’re now looking at wasn’t the original problem you started with

    Stopping at this point and calling a plumber, even mid-repair, almost always costs less than continuing and potentially making things worse.

    Building a Basic DIY Plumbing Toolkit

    For the low-risk jobs worth attempting yourself, a basic toolkit costs surprisingly little and pays for itself within one or two repairs:

    • Adjustable wrench and pipe wrench: ₹300-600 combined
    • Teflon tape (plumber’s tape): ₹30-60 per roll
    • Basic plunger: ₹150-300
    • Drain snake/auger, manual: ₹300-600
    • Assorted washers and O-rings kit: ₹100-200

    Total investment lands around ₹1,000-1,800, which typically pays for itself after just two or three small DIY jobs that would otherwise need a service call.

    [link to related guide on common plumbing mistakes that cause water damage here] for what tends to go wrong when DIY attempts overreach.

    FAQ: Common Questions About DIY Plumbing Repair

    Is DIY plumbing repair actually cheaper in the long run? For simple jobs, yes, consistently. For anything involving concealed pipes or main lines, DIY attempts that fail often end up costing significantly more than calling a professional from the start.

    What tools do I need to start basic DIY plumbing repairs at home? An adjustable wrench, Teflon tape, a plunger, and a basic drain snake cover most of the low-risk jobs worth attempting yourself, for a total investment under ₹2,000.

    How do I know if a leak is a simple DIY fix or needs a professional? If the leak is visible, accessible without breaking into a wall, and involves a standard fitting (tap, showerhead, toilet valve), it’s usually DIY-friendly. Anything requiring you to access hidden pipework needs a professional.

    Can attempting a DIY plumbing repair void my home insurance in case of later damage? This depends on your specific policy, but some insurers do scrutinize claims more closely if a failed DIY attempt contributed to the damage. Worth checking your policy terms if you’re planning anything beyond basic fixes.

    Is it worth learning basic plumbing skills, or should I always just call a plumber? Learning the basics (washer replacement, simple unclogging, tap installation) genuinely saves money over time and isn’t difficult to pick up. Beyond that skill level, the risk-to-savings ratio shifts firmly toward calling a professional.

    How much does an average plumber visit cost in India for a simple job? Most simple plumbing visits run ₹300-600 for labour alone in most Indian cities, though this varies based on your city and whether it’s an emergency or scheduled visit.

    Final Thoughts

    The real answer to DIY versus professional plumbing isn’t one-size-fits-all — it genuinely depends on the specific job, not a blanket rule either way. Simple, visible, low-stakes repairs are worth attempting yourself and genuinely save money. Anything involving concealed pipework, main lines, or gas connections should go to a professional every time, no exceptions.

    Next time you’re facing a plumbing issue, run it against the table above before reaching for your toolkit or your phone. Getting that call right, more than any specific repair skill, is what actually keeps your plumbing costs down over the years.

  • Plumbing Mistakes to Avoid Before They Turn Into Real Damage

    Plumbing Mistakes to Avoid Before They Turn Into Real Damage

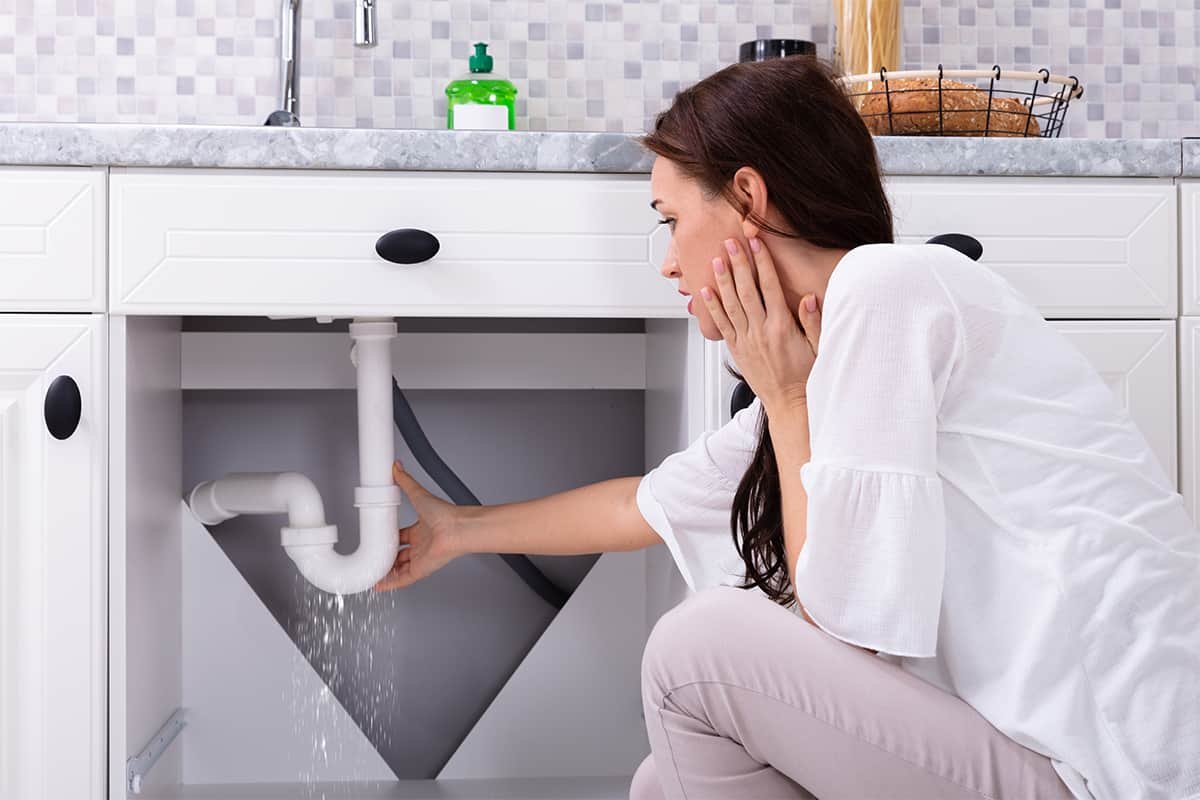
    That faint dripping sound under the kitchen sink you’ve been meaning to check for three weeks now? Yeah, that’s exactly how most water damage stories start.

    Most plumbing mistakes to avoid aren’t dramatic pipe bursts — they’re small, ignorable things that quietly compound over weeks or months until suddenly there’s a damp patch on the ceiling below, or worse. I’ve dealt with two proper water damage situations in my own homes over the years, and both times, looking back, there were warning signs I’d noticed and just… didn’t act on.

    This isn’t a generic “call a plumber” article. It’s the specific habits and oversights that cause the most damage in Indian homes, and what to actually do differently in 2026, before your next small leak becomes a big repair bill.

    Why Small Plumbing Issues Escalate So Fast in Indian Homes

    Direct answer: Indian apartment plumbing often runs through shared walls and concealed piping, meaning a small leak doesn’t just damage the room it’s in — it seeps into neighbouring units or the floor below, turning a minor fix into a shared, expensive dispute between residents.

    This is genuinely different from independent houses in a lot of Western contexts, where a leak mostly stays contained to your own space. In Indian apartment buildings, concealed plumbing running through shared walls means water travels sideways and downward in ways you don’t see until the damage shows up somewhere else entirely.

    I’ve noticed building societies deal with this exact scenario constantly — a leak in one flat’s bathroom shows up as a ceiling stain in the flat below, and then it becomes a whole conversation about whose responsibility the repair actually is.

    1. Ignoring Slow Drips Because “It’s Just a Little Water”

    Direct answer: A slow drip that seems negligible can waste over 3,000 litres of water a month and, more importantly, create constant moisture exposure that weakens pipe joints, seals, and surrounding materials over time — one of the most common plumbing mistakes to avoid is dismissing small leaks as harmless.

    The math on this genuinely surprises people. A drip every few seconds adds up to real water loss over a month, and that’s before considering what constant moisture does to whatever it’s dripping onto — cabinet wood, flooring, wall plaster.

    Has this ever happened to you — a drip you’ve been ignoring for weeks turns out to have swelled the cabinet base underneath by the time you finally look properly? It’s more common than people admit, mostly because nobody wants to deal with it until it’s unavoidable.

    2. Using the Wrong Sealant or Skipping It Entirely on Joint Connections

    Pipe joints need proper Teflon tape or thread sealant, and this is exactly where a lot of DIY plumbing attempts go wrong. Skipping it, or using an old, dried-out roll, means the joint looks connected but isn’t properly sealed against pressure.

    • Always use fresh Teflon tape, wrapped in the correct direction matching the thread
    • Don’t over-tighten fittings assuming it compensates for a poor seal — this often cracks the fitting instead
    • Check joint connections a day after any repair, not just immediately after, since some leaks only show up under sustained water pressure

    3. Pouring Grease and Oil Down Kitchen Drains

    This one’s almost universal across Indian kitchens, and it causes slow, creeping blockages that eventually show up as backed-up sinks or, worse, pipe damage from the buildup pressure.

    Grease seems liquid when hot, but solidifies as it cools inside the pipe, gradually narrowing the passage over weeks and months. Combined with food particles, this becomes a genuinely stubborn clog that often needs professional clearing rather than a simple plunger fix.

    Picture a small business owner in Jaipur running a home kitchen tiffin service, pouring cooking oil down the sink daily without thinking twice — within a few months, the drain was backing up regularly, and the eventual professional clearing cost far more than simply collecting the oil separately would have.

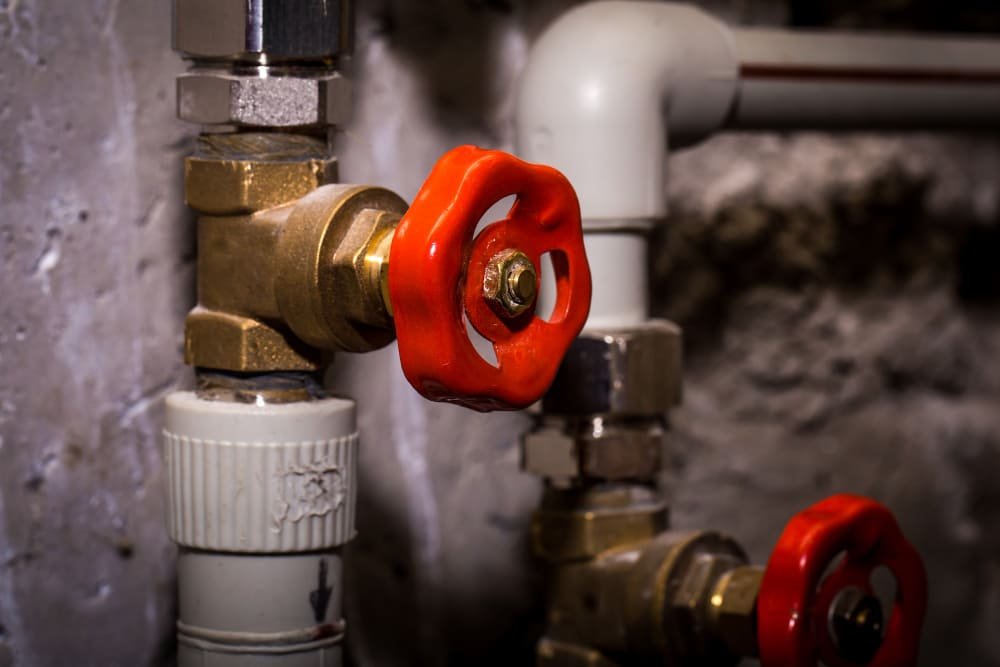
    4. Not Knowing Where Your Main Water Shut-Off Valve Is

    Direct answer: Every household should know the exact location of their main water shut-off valve, since the ability to stop water flow immediately during a burst pipe or major leak is often the difference between minor water damage and a genuinely destructive flood inside the home.

    This sounds basic, but I’d bet most people reading this don’t actually know where theirs is. I didn’t, for years, until a burst flexible hose under my washing machine turned my utility area into a small lake within minutes, and I spent a panicked ten minutes hunting for the shut-off while water kept spreading.

    Find yours now, not during an emergency. Label it clearly if needed, and make sure every adult in the household knows how to turn it off.

    5. Overlooking Flexible Hose Connections on Appliances

    Washing machines, dishwashers, and RO purifiers typically connect via flexible rubber or braided hoses, and these degrade over years without any obvious visible warning until they suddenly fail.

    • Check flexible hoses for any bulging, cracking, or discolouration every 6 months
    • Replace hoses proactively every 3-5 years regardless of visible condition, since internal deterioration doesn’t always show externally
    • Braided stainless steel hoses (₹300-800) last longer and burst less often than basic rubber ones

    6. Ignoring Bathroom Waterproofing Until There’s Visible Seepage

    By the time seepage becomes visible on a ceiling or wall, the actual water damage underneath has usually been developing for months already. Waiting for visible signs before addressing bathroom waterproofing is one of the costliest plumbing mistakes to avoid, precisely because the damage compounds silently.

    [link to related guide on low budget bathroom renovation here] covers ways to address this without a full renovation budget, including targeted regrouting and sealant fixes that catch problems before they become structural.

    7. DIY Plumbing Attempts Beyond Your Actual Skill Level

    There’s a real difference between reasonable DIY fixes — tightening a loose connection, replacing a washer, unclogging a simple drain — and attempts that genuinely need professional expertise. Getting this wrong often makes the original problem worse.

    1. Fixing a running toilet flush valve: reasonable DIY, low risk
    2. Replacing a tap washer: reasonable DIY for most people
    3. Rerouting pipe lines or fixing wall-concealed leaks: needs a professional
    4. Water heater/geyser plumbing: needs a professional, given the electrical proximity risk

    I’ve made this mistake myself, attempting to fix a wall-concealed leak with a patch kit meant for surface pipes. Made it worse, and ended up paying for both the original leak repair and the wall damage my attempt caused.

    Cost Comparison: Prevention vs Water Damage Repair

    Here’s roughly what the difference looks like in real numbers, based on typical Indian repair costs in 2026:

    IssuePrevention CostRepair Cost If Ignored
    Slow tap drip₹100-300 (new washer)₹2,000-5,000 (cabinet/flooring damage)
    Degraded flexible hose₹300-800 (replacement)₹15,000-40,000 (flood damage cleanup)
    Minor bathroom seepage₹5,000-10,000 (targeted waterproofing)₹40,000+ (ceiling, plaster, repainting)
    Grease-blocked drainFree (proper disposal habit)₹1,500-4,000 (professional drain clearing)

    FAQ: Common Questions About Plumbing Mistakes to Avoid

    How often should I check for hidden plumbing leaks in my home? A proper walkthrough every 2-3 months, checking under sinks, around the water heater, and near washing machine connections, catches most issues before they escalate significantly.

    Is it normal for a small amount of water to collect under the kitchen sink? No, this usually indicates a leak somewhere in the connection or drain pipe and shouldn’t be dismissed as normal condensation unless you’ve confirmed that’s actually what it is.

    Can I use regular tape instead of Teflon tape for pipe joints? No, regular tape doesn’t create a proper seal against water pressure and will fail relatively quickly. Teflon tape (plumber’s tape) is inexpensive and specifically designed for this purpose.

    How do I know if my flexible appliance hoses need replacing? Check for any bulging, cracking, or discolouration, and replace proactively every 3-5 years regardless of visible condition, since internal wear isn’t always externally obvious.

    What should I do immediately if I discover a burst pipe? Shut off the main water valve first, before anything else, then address the burst pipe itself. Trying to fix or assess the damage before stopping the water flow just makes the flooding worse.

    Is it worth getting a professional plumbing inspection even if nothing seems wrong currently? For homes over 10-15 years old, yes, an occasional inspection (₹500-1,000) can catch aging pipes or joint wear before any visible symptoms appear, potentially saving a much larger repair bill later.

    Final Thoughts

    Most serious water damage in Indian homes traces back to one of these plumbing mistakes left unaddressed for too long — a small drip, an aging hose, seepage nobody investigated properly. None of these are dramatic on their own, which is exactly why they get ignored until they’re not ignorable anymore.

    Do a proper plumbing walkthrough of your home this weekend — check under every sink, behind the washing machine, and around the water heater. If you find even one small issue from this list, fix it now rather than adding it to a list of things to deal with “eventually.”

  • Natural Home Cleaning Tips for Homes With Pets and Kids

    Natural Home Cleaning Tips for Homes With Pets and Kids

    Watching your toddler lick the floor tile (yes, they do that) or your dog flop down for a nap right after you’ve mopped with a strong chemical cleaner — that’s the exact moment most parents start googling safer alternatives.

    Good natural home cleaning tips matter more once there’s a crawling baby or a curious pet in the house, and honestly, that’s when most people start paying attention to what’s actually in their cleaning products. I switched most of my own cleaning routine over after my dog developed a mild paw irritation that our vet traced back to a floor cleaner residue — not dramatic, but enough of a wake-up call.

    This guide covers what genuinely works for natural cleaning in Indian homes in 2026, without pretending vinegar and baking soda solve absolutely everything (they don’t, and I’ll be upfront about where they fall short).

    Why Standard Cleaning Products Are a Bigger Concern With Pets and Kids Around

    Direct answer: Pets and young children spend far more time at floor level, in direct contact with surfaces, and put things in their mouths more often than adults — making chemical residue from standard cleaners a real exposure risk that natural home cleaning tips specifically address.

    A toddler crawling across a floor mopped with a strong phenol-based cleaner picks up residue on their hands within minutes, and hands go straight to mouths at that age, no way around it. Dogs and cats, similarly, walk across floors barefoot (so to speak) and then groom themselves, ingesting whatever’s on their paws.

    I’ve noticed a lot of cleaning product labels genuinely don’t disclose full ingredient lists, which makes it hard to judge real risk. When in doubt, going with tested natural alternatives at least removes that uncertainty for the areas that matter most.

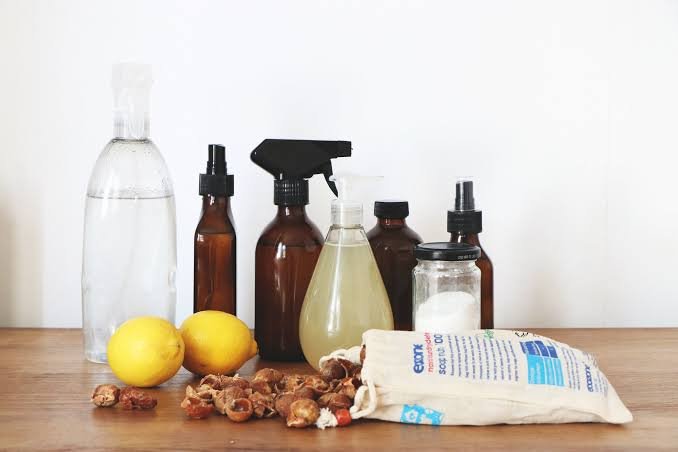
    1. Vinegar and Water: The Reliable All-Purpose Base

    Direct answer: A diluted white vinegar solution (roughly 1 part vinegar to 3 parts water) works effectively as a natural cleaner for glass, countertops, and general surfaces, cutting grease and mild grime without leaving the chemical residue found in many commercial cleaners.

    This is genuinely the workhorse of natural cleaning, and for good reason — it’s cheap, widely available, and does a solid job on everyday grime. Add a few drops of lemon essential oil if the vinegar smell bothers you; it fades within minutes anyway once the surface dries.

    Where it doesn’t work well: heavily greased kitchen surfaces or serious grout stains. Don’t expect it to replace a proper degreaser for those jobs — I learned this after stubbornly trying to vinegar my way through a stovetop backsplash that really needed something stronger.

    2. Baking Soda for Scrubbing Without Scratching

    Baking soda handles the abrasive cleaning jobs that vinegar can’t — bathroom tiles, sink stains, stovetop grime — without scratching surfaces the way some commercial scouring powders can.

    • Mix into a paste with a little water for scrubbing sinks and bathroom tiles
    • Sprinkle dry on carpets before vacuuming to lift odours, particularly useful in homes with pets
    • Use on stainless steel utensils and cookware for stubborn burnt-on residue

    Picture a household with a young puppy still getting house-trained — baking soda sprinkled on the affected carpet area, left for 20-30 minutes, then vacuumed, handles lingering odour far better than a heavily perfumed commercial spray that just masks the smell temporarily.

    3. Lemon for Cutting Grease and Natural Freshness

    Lemon’s natural acidity works similarly to vinegar for cutting grease, but with a genuinely pleasant smell that doesn’t need masking with additional fragrance. Halved lemons rubbed directly on cutting boards handle mild stains and odours well.

    For kitchen surfaces where kids or pets might make contact soon after cleaning, lemon-based solutions feel like a safer bet than anything with an artificial fragrance list you can’t fully parse.

    A quick combination worth trying: equal parts lemon juice and water in a spray bottle for daily kitchen counter wipe-downs. It won’t handle heavy grease, but for routine daily cleaning it does the job.

    4. Castile Soap for Floors Where Pets and Kids Spend the Most Time

    Castile soap, made from plant oils, is one of the gentler options for regular floor cleaning in rooms where pets nap or kids play on the ground. Diluted properly (check the bottle, usually a few tablespoons per bucket of water), it cleans without the harsh residue some floor cleaners leave behind.

    • Look for unscented versions if your pet or child is sensitive to fragrance
    • Rinse floors with plain water after castile soap cleaning for genuinely spotless results, since it can leave a slight film if used too concentrated
    • Works on most flooring types, though check compatibility with natural stone or specific wood finishes first

    5. Steam Cleaning: Chemical-Free for Deeper Cleans

    Direct answer: Steam cleaners use high-temperature water vapor to sanitize surfaces without any chemical residue, making them one of the most effective natural cleaning methods for homes with pets and kids — particularly for upholstery, tile grout, and pet bedding.

    A basic handheld steam cleaner (₹2,500-6,000 in India) handles jobs that natural liquid solutions genuinely struggle with — grout lines, pet bedding, upholstery that’s absorbed odours over time. The heat kills most bacteria and dust mites without needing any chemical additive at all.

    I was skeptical about the price initially, but honestly, it’s paid for itself just in how much less often I’m buying specialized cleaning sprays now.

    6. Essential Oils: Useful, But With Real Caveats for Pets

    Essential oils get recommended constantly in natural cleaning content, but this is exactly the area where caution matters most if you’ve got pets, especially cats. Some essential oils — tea tree, eucalyptus, and certain citrus oils in concentrated form — are genuinely toxic to cats even in small amounts.

    • Lavender and lemon, heavily diluted, are generally considered safer around dogs, but check with your vet before regular use around cats specifically
    • Never apply essential oils directly to pet bedding or areas where a cat regularly grooms itself
    • If you’re unsure, skip essential oils in cleaning solutions entirely and stick to the unscented base ingredients above

    This is the one area of natural cleaning where “natural” doesn’t automatically mean “safe” — worth remembering before adding oils to every DIY spray recipe you find online.

    What Natural Cleaning Genuinely Can’t Replace

    I don’t want to oversell this approach. Certain situations still need proper disinfectants, particularly if there’s been actual illness in the house or a pet-related mess involving bodily fluids.

    • Disinfecting after a stomach bug or contagious illness in the household
    • Deep sanitizing pet waste accidents, where proper enzymatic cleaners actually break down the mess better than vinegar alone
    • Mould removal, which usually needs a targeted treatment beyond general natural cleaning solutions

    [link to related guide on low budget bathroom renovation here] if mould has become a recurring structural issue rather than a surface cleaning one.

    Natural Home Cleaning Tips: Quick Reference Table

    IngredientBest ForAvoid Using On
    Vinegar solutionGlass, counters, general surfacesNatural stone, heavily greased areas
    Baking sodaScrubbing, odour absorptionDelicate polished surfaces
    LemonCutting boards, light greaseUnsealed wood
    Castile soapFloors, general surfacesAreas needing residue-free rinse skipped
    Steam cleanerUpholstery, grout, pet beddingUnsealed wood floors
    Essential oilsFragrance (with caution)Anywhere cats regularly groom

    FAQ: Common Questions About Natural Home Cleaning Tips

    Are natural cleaning products actually as effective as commercial ones? For everyday grime, yes, largely. For heavy grease, serious stains, or disinfection needs, natural options often fall short and a proper commercial product does the job faster.

    Is vinegar safe to use around dogs and cats? Generally yes, once diluted and dried, since the smell fades quickly and it’s not toxic in the amounts used for cleaning. Some pets dislike the smell while it’s still wet, so keep them out of the room briefly during application.

    Can I make my own natural cleaning spray at home? Yes, a vinegar-water base with a few drops of pet-safe essential oil (or none at all) covers most general surface cleaning needs, and costs a fraction of store-bought natural cleaning brands.

    What natural cleaning method works best for pet odours specifically? Baking soda for carpets and upholstery, combined with a steam clean if you have access to one. For serious pet accidents, an enzymatic cleaner (not strictly “natural” but still non-toxic) tends to work better than either.

    Are essential oils safe to diffuse or use around cats? Not always — several common essential oils are genuinely toxic to cats even through skin contact or inhalation. Check with your vet before using any essential oil regularly in a home with cats.

    How often should I deep clean using natural methods versus regular cleaning? Daily wipe-downs with a mild vinegar or castile soap solution work fine for routine cleaning. Reserve steam cleaning or more intensive natural deep-cleans for a weekly or bi-weekly schedule, depending on how much pet and kid activity your home sees.

    Final Thoughts

    Switching to natural cleaning methods genuinely makes sense once there’s a curious toddler or a pet spending most of their day at floor level. Vinegar, baking soda, lemon, and castile soap cover the vast majority of everyday cleaning needs without the chemical residue worry.

    Just remember the honest limits — natural doesn’t mean risk-free with essential oils around cats, and some messes genuinely need something stronger than a DIY spray. Start by swapping your everyday floor and counter cleaner first; that’s the highest-contact surface in the house and the easiest place to see the difference right away.

  • Diwali Deep Cleaning Checklist for a Home That’s Actually Ready

    Diwali Deep Cleaning Checklist for a Home That’s Actually Ready

    Every year it’s the same story — Diwali is three weeks away, and suddenly there’s a mental list of “things to clean before family visits” that feels impossibly long. Sound familiar?

    A proper Diwali deep cleaning checklist isn’t about scrubbing every surface in one exhausting weekend. It’s about spreading the work smartly across the weeks leading up to the festival, so you’re not collapsed on the sofa on Diwali morning wondering why you thought this was manageable. I’ve done the last-minute panic-clean version more times than I’d like to admit, and the planned-out version genuinely works better.

    This guide breaks the whole process into a realistic timeline, room by room, for 2026’s festival season — with the specific things people always forget until a guest points them out.

    Why Diwali Cleaning Needs a Timeline, Not a Single Weekend

    Direct answer: A proper Diwali deep cleaning checklist works best spread across 3-4 weeks before the festival, tackling one or two zones per weekend, rather than attempting a full-house deep clean in a single exhausting session that leaves half the tasks rushed or skipped entirely.

    I’ve noticed the “clean everything in one weekend” approach almost always backfires. You start strong on Saturday morning, exhaust yourself by the kitchen, and the bedrooms end up getting a half-hearted wipe-down at best.

    Breaking it into weekly zones — say, kitchen and storage one week, living areas the next, bedrooms and bathrooms after that — keeps the whole process from feeling like a punishment. It also means if something comes up (a work deadline, a sick kid, whatever), you haven’t lost the whole plan.

    Week 1: Kitchen and Storage Deep Clean

    Start here, since the kitchen tends to accumulate the most neglected grime — behind appliances, inside cabinets, the exhaust chimney filter nobody’s touched since last Diwali.

    • Clean the exhaust chimney filter with hot water and dish soap, or a degreaser if it’s been over a year
    • Wipe down the insides of all kitchen cabinets, checking for expired spices or unused containers to toss
    • Descale the electric kettle and check the RO purifier filter — both get ignored constantly
    • Deep clean behind the refrigerator and stove, where dust and grease genuinely accumulate unnoticed

    Picture a household in Lucknow where the mother-in-law visits every Diwali and, without fail, opens the spice cabinet within the first hour. That specific cabinet check has become something of a running joke in a lot of Indian households, honestly — worth remembering when planning your own timeline.

    Week 2: Living Room and Common Areas

    Direct answer: Living room deep cleaning for Diwali should prioritize curtains, upholstery, and light fixtures — areas that collect dust invisibly through the year but become immediately noticeable once diyas and decorative lighting go up around them.

    This is the space guests actually spend the most time in, so it deserves proportionate attention. Curtains especially — most people wash them once a year if that, and dust buildup there is more visible than you’d expect once festival lighting highlights it.

    Tasks worth prioritizing here:

    1. Wash or dry-clean curtains, especially any near windows facing dusty roads
    2. Vacuum and spot-clean sofa upholstery, flipping cushions to check for spills or stains underneath
    3. Dust ceiling fans and light fixtures thoroughly — this gets skipped constantly and shows badly under bright Diwali lighting
    4. Clean glass showcases, photo frames, and any display cabinets properly, not just a quick wipe

    Week 3: Bedrooms, Wardrobes, and Bathrooms

    By this point you’re past the halfway mark, which honestly helps with motivation. Bedrooms don’t need the same intensity as kitchen and living areas, but wardrobes genuinely benefit from a proper sort-through before festival shopping adds more clothes to the pile.

    • Sort through wardrobes, setting aside clothes for donation before new festival outfits arrive
    • Clean mattress surfaces with a vacuum attachment and flip if your mattress allows it
    • Deep clean bathroom tiles and grout — regrouting isn’t necessary here, just a proper scrub with the right cleaner [link to related guide on low budget bathroom renovation here] if the tiles genuinely need more than cleaning
    • Wash bedsheets, pillow covers, and any decorative cushions that don’t get regular washing

    Week 4: Final Touches and Decoration Prep

    The last stretch before Diwali itself is less about deep cleaning and more about polish — the details that make a genuinely clean house look festival-ready rather than just “recently cleaned.”

    • Polish brass and silver items (diyas, pooja thali, decorative pieces) that only come out for festivals
    • Clean windows and glass doors thoroughly, inside and out if accessible
    • Wipe down entrance area and doormat, since this is literally the first thing guests see
    • Set up rangoli space and check diya/lighting supplies well before the actual day, not the morning of

    Has this ever happened to you — realizing on Diwali morning that half your diyas from last year are missing or broken? Doing this check in week 4 avoids that particular scramble.

    Common Mistakes People Make During Diwali Deep Cleaning

    Direct answer: The most common Diwali deep cleaning mistakes are starting too late (leaving everything to the final week), skipping ventilation while using strong cleaning chemicals, and neglecting less-visible spots like exhaust fans and ceiling corners that guests notice more than expected.

    Starting late is the big one, obviously, but there are smaller mistakes that add up too. Using strong bleach-based cleaners in a closed bathroom without ventilation is genuinely risky, not just uncomfortable — always keep a window or exhaust fan running during heavy chemical cleaning.

    People also tend to focus entirely on visible surfaces while skipping ceiling corners, behind large furniture, and exhaust points — exactly the spots that show up glaringly once decorative lighting goes up everywhere.

    Cleaning Supplies Worth Stocking Up On Before Diwali

    Buying supplies piecemeal as you go through each room wastes time and often means a mid-cleaning run to the store. Stock up properly before Week 1 starts:

    • Multi-surface cleaner and a dedicated glass cleaner
    • Microfiber cloths — buy more than you think you need, at least 8-10
    • A good degreaser for kitchen surfaces and the exhaust chimney
    • Brass/silver polish for pooja items and decorative pieces
    • Extra vacuum bags or a fresh filter if your vacuum needs one

    Diwali Deep Cleaning Checklist: Full Timeline

    WeekFocus AreaKey Tasks
    Week 1Kitchen & storageChimney filter, cabinets, appliances, RO filter
    Week 2Living roomCurtains, upholstery, fans, showcases
    Week 3Bedrooms & bathroomsWardrobes, mattress, tile/grout scrub
    Week 4Final polishBrass/silver, windows, entrance, decoration setup

    [link to related guide on monsoon home maintenance tips here] if your festival prep overlaps with late monsoon repairs in your region.

    FAQ: Common Questions About Diwali Deep Cleaning Checklist

    How many weeks before Diwali should deep cleaning actually start? Three to four weeks works well for most homes, giving you roughly one zone per weekend without the exhausting single-weekend rush most people end up regretting.

    Should I hire professional cleaners for Diwali deep cleaning? For specific tasks like deep sofa cleaning, curtain washing, or exhaust chimney servicing, professional help (₹500-2,000 depending on the task) genuinely saves time. For general dusting and organizing, doing it yourself over the weeks works fine.

    What’s the most commonly forgotten spot during Diwali cleaning? The kitchen exhaust chimney filter and ceiling fan blades, without question. Both collect visible grime and dust but sit just outside normal eye-level attention most of the year.

    Is it necessary to clean the whole house, or just the areas guests will see? Ideally the whole house, since guests do wander into kitchens and sometimes bedrooms during festival visits. That said, if time’s genuinely limited, prioritize the living room, kitchen, and entrance area first.

    How do I clean brass and silver pooja items without damaging them? Use a dedicated brass or silver polish rather than generic household cleaners, and always test on a small hidden spot first if the item has any engraving or delicate finish.

    What should I do if I run out of time before Diwali? Prioritize visible, guest-facing areas — living room, entrance, and kitchen — over bedrooms and storage. A partially deep-cleaned home that looks presentable beats an evenly rushed job everywhere.

    Final Thoughts

    A genuinely Diwali-ready home doesn’t come from one heroic weekend of cleaning — it comes from spreading the work across a few weeks, zone by zone, the way this checklist lays out. Kitchen first, living areas next, bedrooms and bathrooms after that, with the final week reserved for polish and decoration.

    Start this weekend with just the kitchen exhaust filter and cabinets — that one task alone tends to make the biggest visible difference for the least effort. The rest of the checklist will feel a lot less daunting once that first zone is off your plate.

  • Home Security Tips Vacation Season Demands (Not Just Common Sense)

    Home Security Tips Vacation Season Demands (Not Just Common Sense)

    Booked the flights, packed the bags, told your neighbour you’ll be gone a week — and then spent the entire vacation half-wondering if you locked the back door properly. Has this ever happened to you?

    Good home security tips for vacation season go well beyond the usual “ask a neighbour to watch the place” advice everyone already knows. I travel a fair bit for work and family visits, and over the years I’ve picked up habits that actually matter, mostly by getting a few things wrong the hard way first.

    This isn’t about installing a fortress-level security system before every trip. It’s about the specific, practical steps that make a real difference — the kind that separates a house that looks empty from one that looks lived-in, even when nobody’s home. Let’s get into what actually works in 2026.

    Why “Looks Occupied” Matters More Than Any Single Gadget

    Direct answer: Burglars overwhelmingly target homes that show clear signs of being empty — accumulated mail, dark windows every single night, no movement — rather than homes with visible security systems, which is why maintaining an “occupied” appearance matters more than any single device.

    I’ve noticed people spend a lot on cameras and alarms but skip the basics that actually deter opportunistic break-ins in the first place. A house that looks lived-in — lights cycling, occasional sounds, no pile-up of newspapers — discourages most casual attempts before anyone even gets close enough to test a lock.

    This doesn’t mean skip the cameras. It means the appearance of occupancy is the first layer, and everything else builds on top of it.

    1. Stop Mail and Delivery Pile-Ups Before You Leave

    A stuffed mailbox or a stack of undelivered parcels at the doorstep is one of the clearest signals a house is empty. Anyone casing a neighbourhood notices this within seconds, and it doesn’t take a professional to spot it.

    • Ask a trusted neighbour to collect mail and any deliveries daily, not just “whenever”
    • Pause any subscription deliveries (milk, newspapers) rather than assuming someone will handle it
    • Hold Amazon or Flipkart deliveries until you’re back, or reroute to a relative’s address instead

    Picture a family in Jaipur who went on a 10-day trip and forgot to pause their milk delivery — five days in, a neighbour noticed the accumulated packets outside the door and, thankfully, flagged it to building security before anything happened. Small oversight, real risk.

    2. Smart Plugs and Timers to Simulate Presence

    Direct answer: Smart plugs connected to lights, set on randomized schedules rather than a fixed on/off time, create a convincing impression of occupancy — a far more effective and affordable home security tip for vacation trips than leaving a single light on constantly.

    Leaving one light on 24/7 is actually a giveaway once you think about it — nobody keeps a light on nonstop for a week straight in real life. Smart plugs (₹800-2,500 each) with randomized scheduling do a much better job of mimicking actual usage patterns.

    Set 2-3 plugs across different rooms — living room, bedroom, maybe a balcony light — on staggered schedules so it looks like normal movement through the house in the evening. [link to related guide on budget smart home upgrades here] covers specific smart plug options that work well for this.

    3. Don’t Broadcast Your Travel Dates Publicly

    This one seems obvious written down, but people do it constantly without thinking. Posting vacation photos in real time, or a public “heading to Goa for a week!” status, tells anyone watching exactly when your house is empty.

    I’ll be honest, I used to do this myself until a friend pointed out how specific my location tags were getting. Now I just post after I’m back, and honestly, the photos age fine — nobody’s checking timestamps that closely anyway.

    A few related habits worth adjusting:

    • Keep travel posts private or share them only after returning
    • Ask family members not to publicly tag your home address in posts while you’re away
    • Skip the “house-sitting request” posts in public community groups — those get seen by more people than you’d expect

    4. Secure Windows and Balcony Access Points Properly

    Main doors get most of the attention, but windows and balconies are often the weaker link, especially ground-floor or accessible upper-floor units. A window that’s “mostly closed but not latched” is functionally an open invitation.

    Check every window lock before leaving, not just the ones you remember using recently. Balcony grilles should be properly locked, not just closed — I’ve seen people assume a closed grille door is secure when the latch was actually broken for months.

    For ground-floor flats specifically, consider a simple window alarm sensor (₹500-1,200 per unit) that triggers a loud alert if a window opens while you’re away. Cheap insurance, genuinely.

    5. Inform the Right People, Not Everyone

    Direct answer: Tell your building’s security guard, RWA office, and one or two trusted neighbours about your travel dates directly and privately — this creates a support network who can actually respond to anything unusual, without broadcasting your absence to a wider, less trustworthy audience.

    There’s a real balance here. Too little communication means nobody’s watching out for your place at all. Too much, especially in public or semi-public spaces, increases the number of people who know your house is empty.

    Give your building watchman or society office your travel dates and a contact number, ask a specific neighbour (not a building WhatsApp group announcement) to keep an eye out, and share your itinerary with one family member who can act quickly if something comes up.

    6. Consider a Basic Camera Setup, Even Just for Peace of Mind

    You don’t need an elaborate CCTV network to add real value here. A single WiFi camera (₹1,500-4,000) pointed at your main entrance, connected to an app that sends motion alerts, covers most of what matters for a typical apartment.

    1. Position the camera to cover the door and any obvious entry points, not just a wide room view
    2. Check the app notification settings before leaving — false alerts from moving curtains or pets get annoying fast otherwise
    3. Make sure the camera’s own power backup or battery life covers your entire trip length

    I was skeptical about camera footage actually being useful until a neighbour’s camera caught a delivery mix-up that could’ve turned into a bigger dispute. Sometimes it’s not even about security, just having a record.

    7. Double-Check Locks, Gas, and Electrical Before Locking Up

    The most basic step, and somehow still the most commonly rushed one. Do a proper final walkthrough, not a quick glance on your way out the door with luggage in hand.

    • Main door lock, deadbolt if you have one, and any secondary locks
    • Gas cylinder valve switched off completely, not just the stove knob
    • Non-essential electrical appliances unplugged — geyser, iron, any device that doesn’t need to stay on
    • Water main valve, if your building allows individual control, switched off to prevent leak damage while nobody’s home to notice

    [link to related guide on monsoon home maintenance tips here] if you’re traveling during rainy season specifically — a few extra checks matter then.

    Home Security Tips Vacation Checklist: Quick Reference

    TaskTiming
    Pause deliveries and subscriptions2-3 days before leaving
    Set smart plug schedulesDay before departure
    Inform watchman/RWA and trusted neighbour2-3 days before
    Check window and balcony locksFinal walkthrough
    Set camera and app alertsDay before departure
    Gas, electrical, and water main checkFinal walkthrough, before locking up

    FAQ: Common Questions About Home Security Tips for Vacation

    Is it safe to tell my building’s security guard I’m going on vacation? Generally yes, since guards need this information to properly monitor your unit and flag anything unusual. Just avoid sharing exact dates in a public building group where it reaches a much wider audience.

    Should I leave all the lights on while I’m away? No, this actually looks more suspicious than helpful, since nobody keeps every light on for days straight. Randomized smart plug schedules on a couple of lights work far better than a constant “all lights on” approach.

    Do I really need a camera, or is it overkill for a short trip? For trips under 3-4 days, a camera is nice-to-have rather than essential if you’ve got the other basics covered. For longer trips, it adds real value, mainly for peace of mind and a record if anything does happen.

    What should I do about my car if it’s parked outside during my trip? Park it in a well-lit, visible spot if possible, and consider a simple steering lock as a visible deterrent. If your society has covered or monitored parking, that’s obviously the safer option over street parking.

    How do I stop packages from piling up if I don’t have a trusted neighbour nearby? Most courier services let you reschedule delivery to a later date directly through their app or website. Alternatively, reroute deliveries to a relative’s address for the duration of your trip.

    Is it worth getting home insurance specifically before a long vacation? If you don’t already have home insurance, it’s worth having regardless of travel plans, but definitely check your policy covers burglary and water damage before an extended trip away, particularly if you’re leaving during monsoon season.

    Final Thoughts

    Securing your home before a vacation isn’t about paranoia, it’s about a handful of specific, low-effort habits that genuinely reduce risk. Pausing deliveries, setting up randomized lighting, informing the right people quietly, and doing a proper final walkthrough covers almost everything that actually matters.

    Before your next trip, run through the checklist above the night before you leave, not while you’re already halfway to the airport with a taxi waiting. A calm ten-minute check beats a panicked call to your neighbour from the departure lounge, every single time.